
Azure IoT Central is Microsoft’s SaaS (software-as-a-service) offering that allows you to quickly provision an IoT solution. This service reduces the burden and cost of developing, managing and maintaining enterprise-level IoT solutions, allowing you to focus more on your IoT data and how it can transform your business. I will be going through the steps to create an Azure IoT Central application and how easy it is to create and maintain an IoT solution.
You can use IoT Central to create a custom, cloud-based IoT solution without having to worry about the details of the underlying infrastructure. Customization of your solution can all be done from the browser in the application UI, and includes capabilities to:
- Define the layout of properties and settings on a device template
- Configure custom dashboards
- Configure custom analytics to explore device data
Prerequisites
The only prerequisites needed are a Microsoft account (personal, work or school) as the creation process will ask you to login to your account, and an Azure subscription.
Getting Started
First you need to navigate to the Azure IoT Central Build site. You will notice a left-hand navigation menu which consists of several sections:
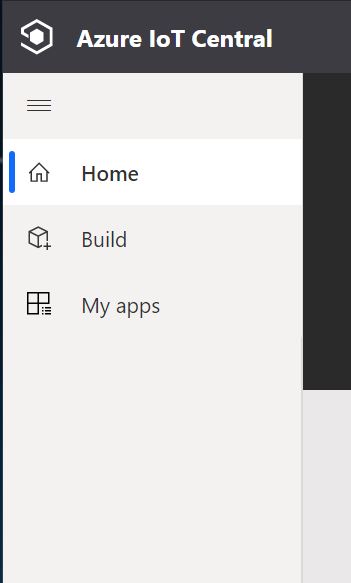
Figure 1: Azure IoT Central Menu
Clicking on the Build menu selection will take you to a page that displays a number of options to build your IoT application. You can start with a number of pre-generated templates that are geared towards specific industries or start with a blank application template.
Once you select either an industry-specific or custom template, a page displays that allows you to specify information about your application.

Figure 2: Creating an IoT Central Solution
The Application Name is pre-populated for you, as well as the URL. Please note that the application name and URL must be globally unique. The Application Template dropdown is only visible on custom applications, as you’re already selecting a specific template if you choose one of the industry-specific templates.
You also need to choose the pricing plan – you can try the solution for free for 7 days or select one of the other pricing tiers. These other tiers are based on how often you want to send messages from your devices. The Billing Info allows you to select the Directory (Azure Active Directory) and Azure Subscription you wish to have this solution hosted from. Location is also required as the system will provision the IoT Central solution resources in the closest region.
Web Application
Once the system provisions your IoT Central application you are taken to the Dashboard page, which displays some starting links such as adding devices, quick start demos, tutorials and documentation.
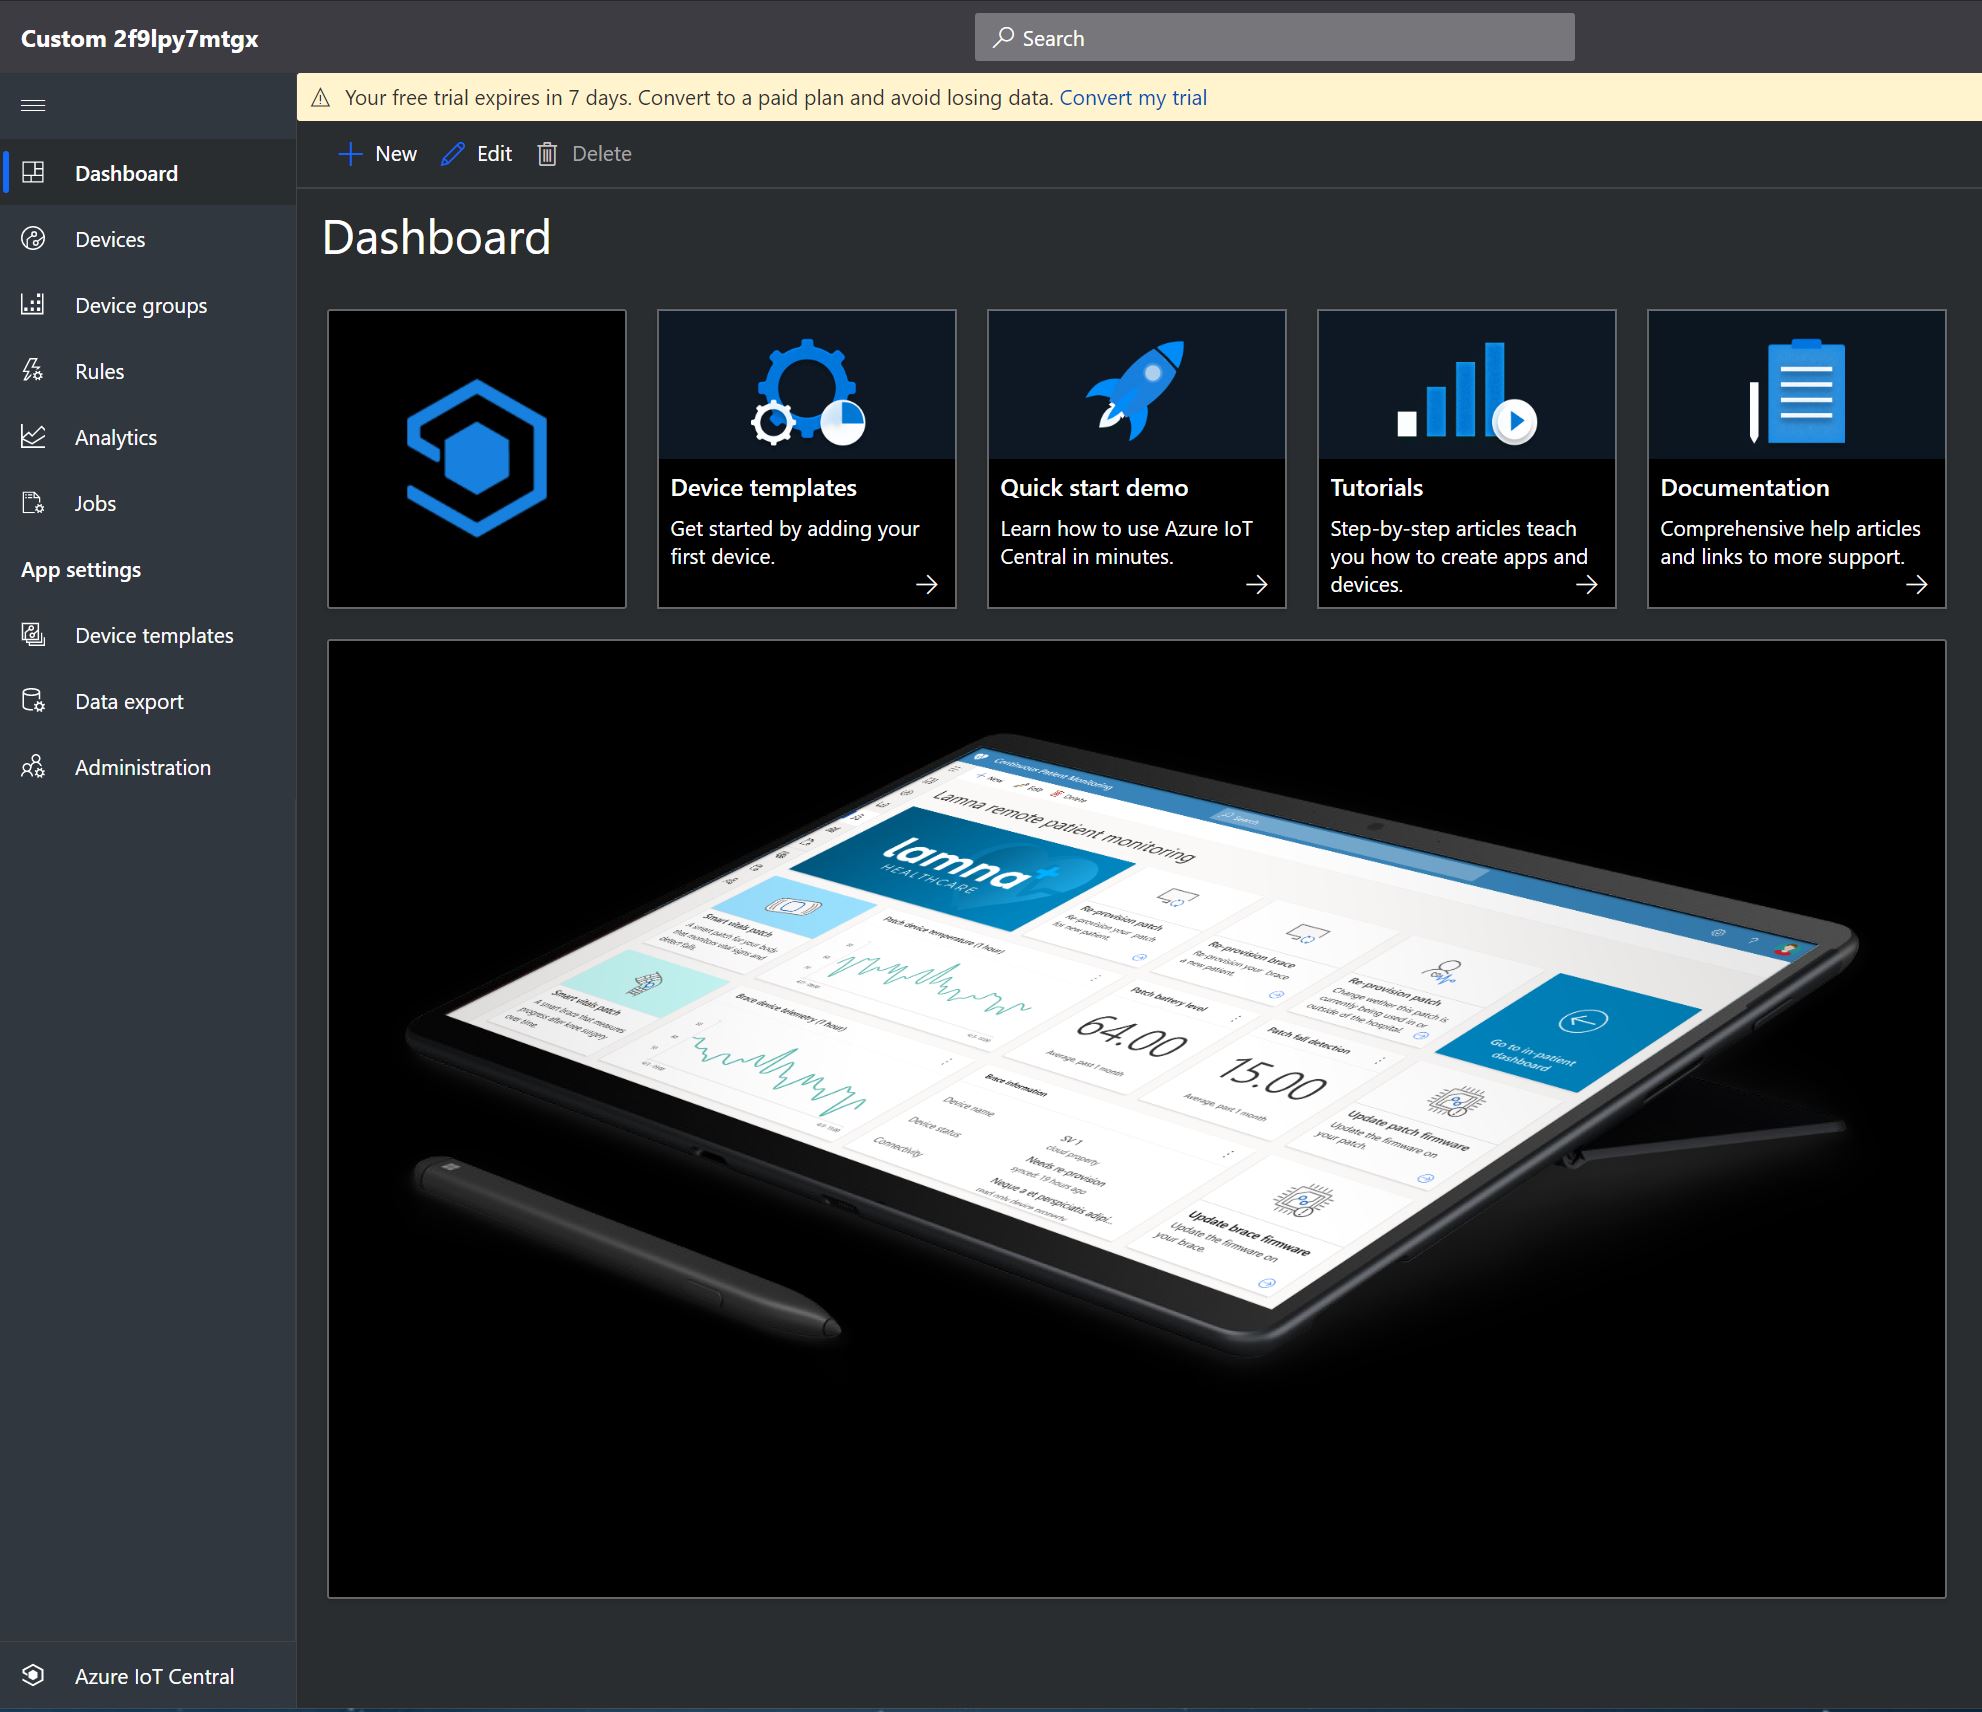
Figure 3: Dashboard page
Devices
Adding devices is easy in IoT Central – just click on the Devices tab and you are taken to a page that displays all the devices currently in the application. Adding a device is done by clicking on the +New button. A dialog window is displayed allowing you to configure the details about the new device being added:
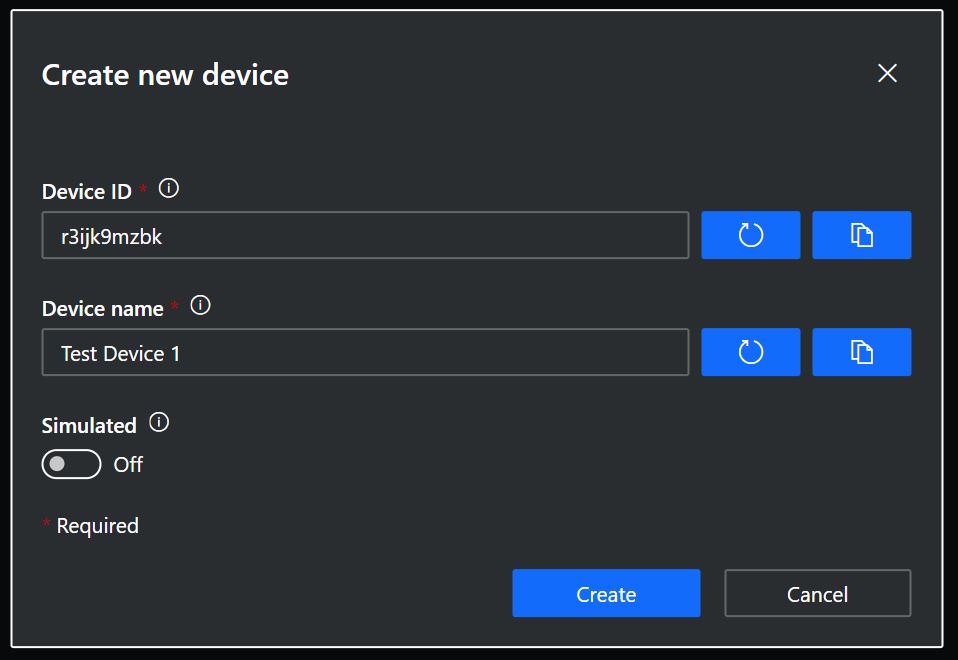
Figure 4: Adding a new device
Device ID is a unique identifier that is used by the device to connect, while Device Name is a friendly name for the device. You can also toggle the Simulated option which specifies whether your device is simulated or real.
Device Templates
You can also create one or more device templates, which can then be used to create new devices that have the template characteristics. Click on the +New button on the Device Templates tab (under App Settings) and you can select the template type:
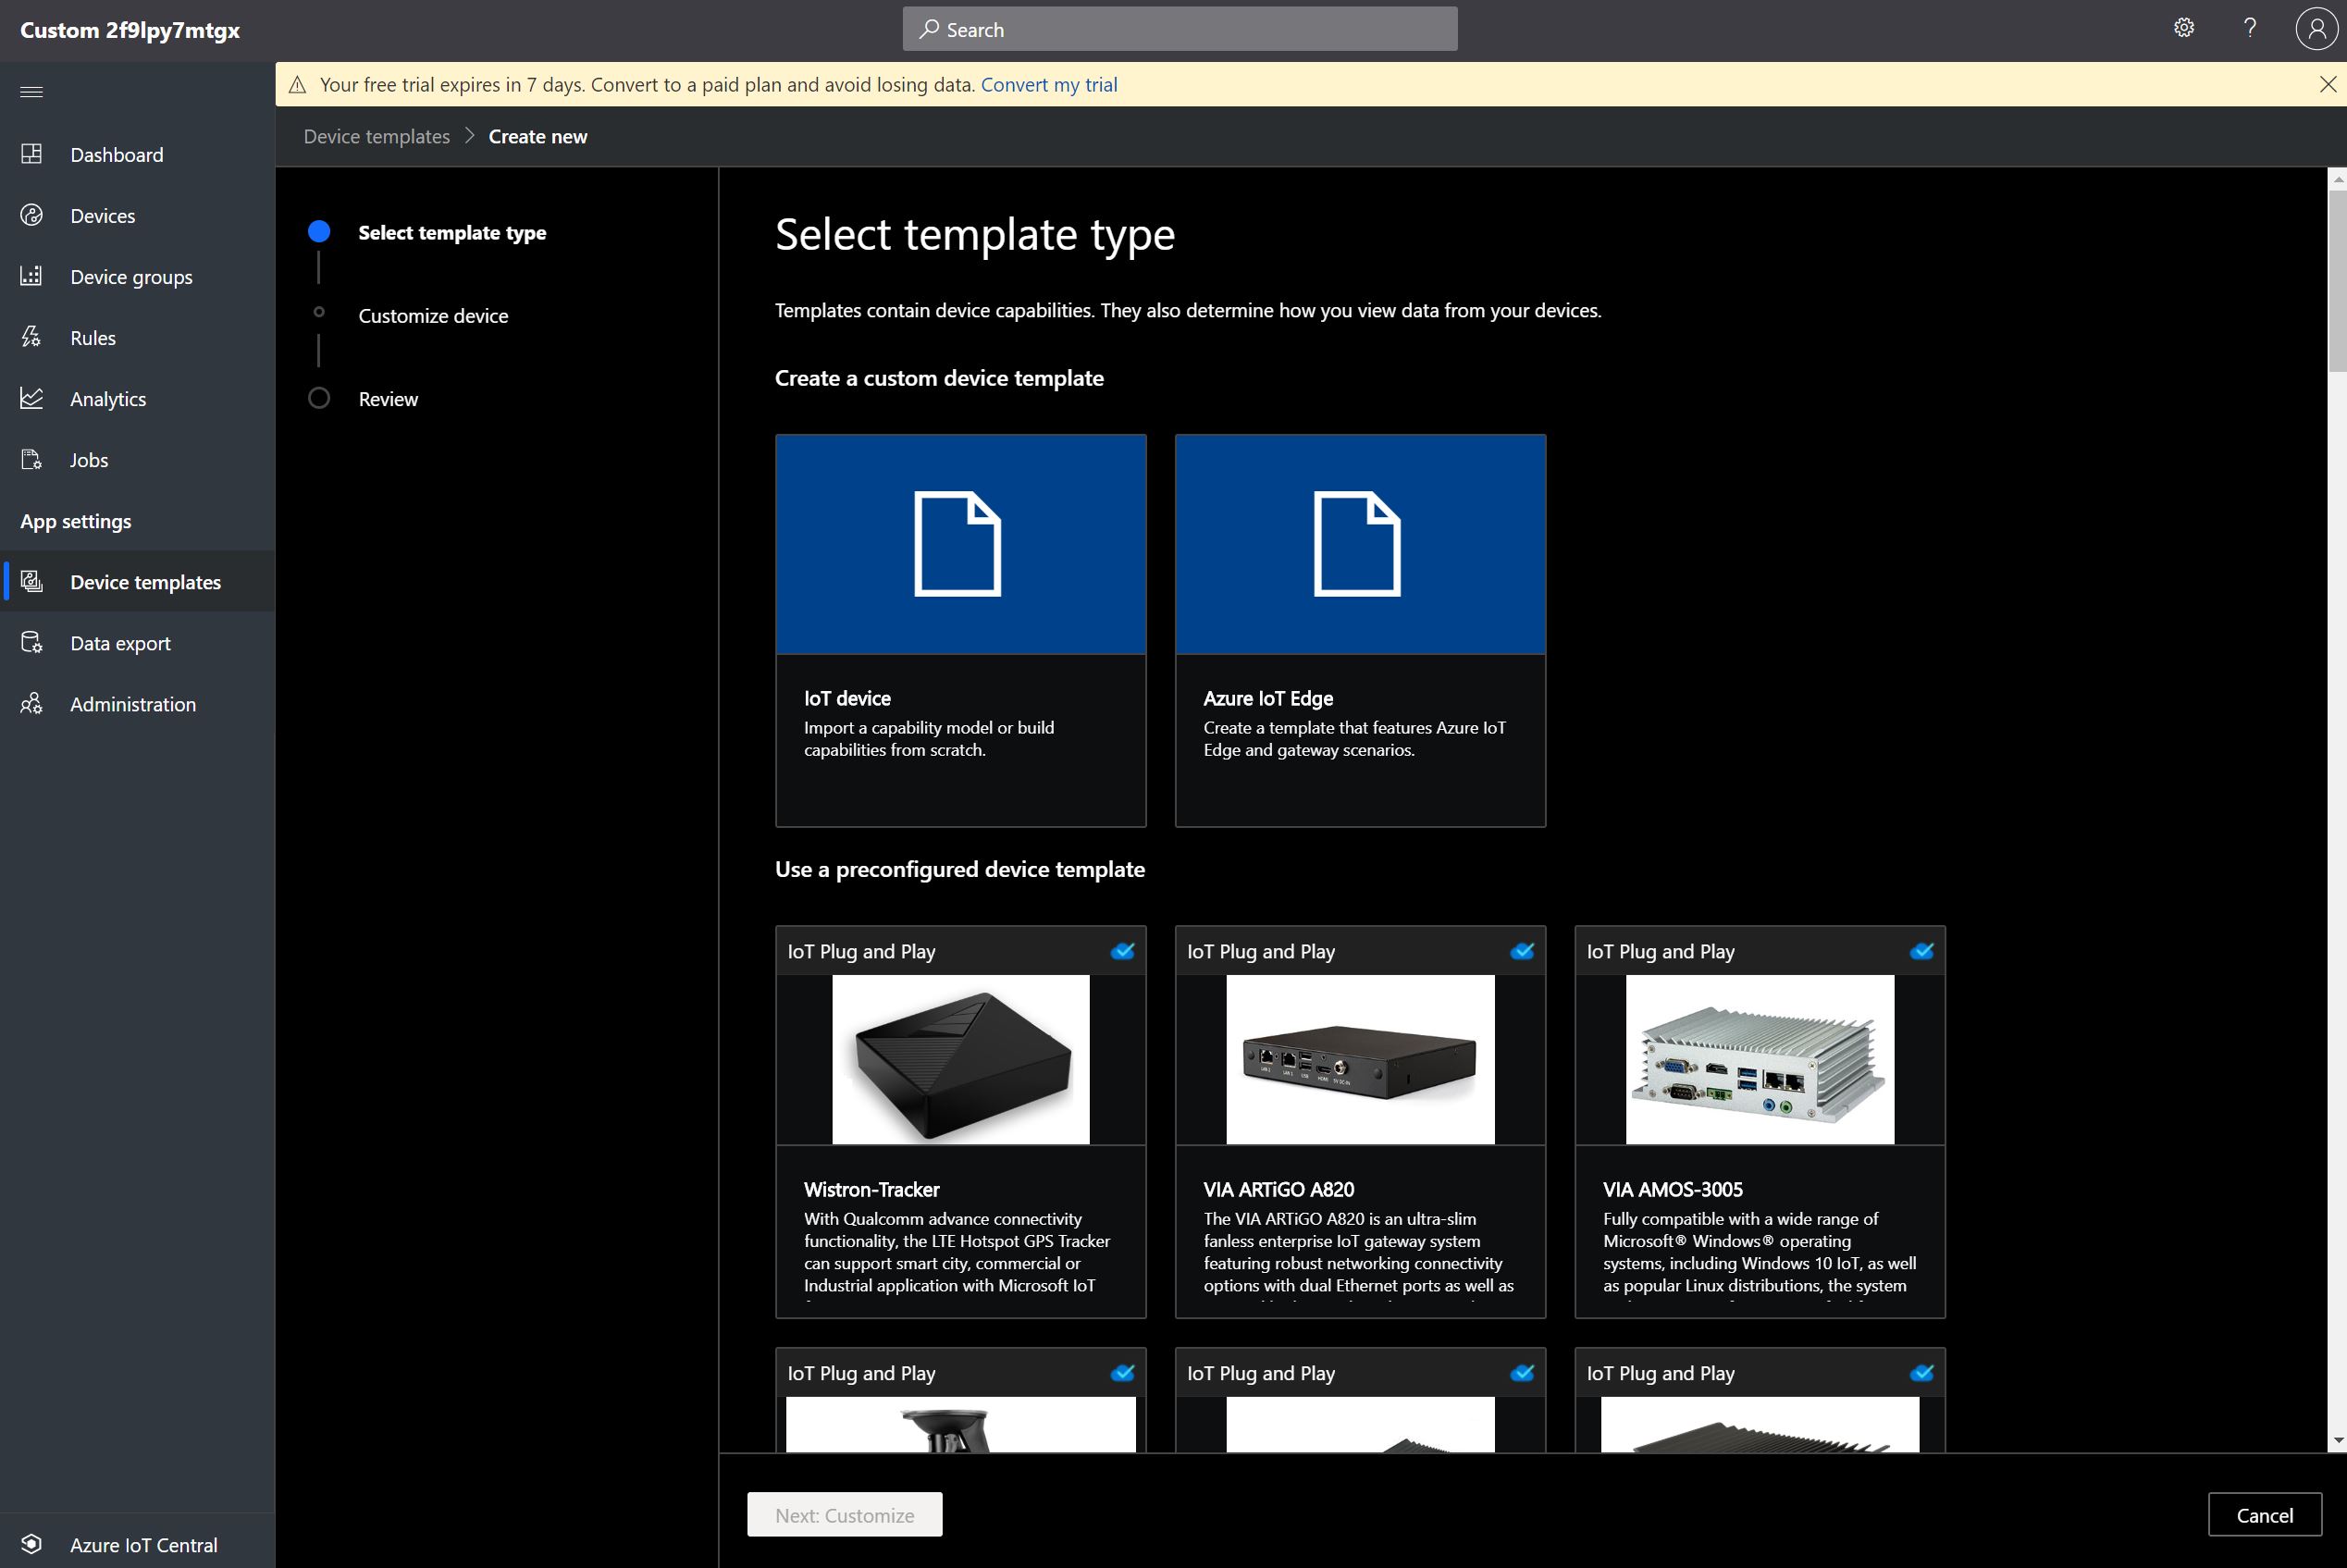
Figure 5: Device Templates
You have the ability to create a template for an IoT device, Azure IoT Edge device, or one of the pre-configured device templates listed. The list of certified devices (with IoT Plug and Play) are shown here and more are being added all the time.
Once you publish your device template, you can add devices based on that template. On the Devices tab you will notice a selection with the name of your device template that you can click on. This will display a list of the current devices that are based on this device template. Clicking the +New button will allow you to create a device based on this template.
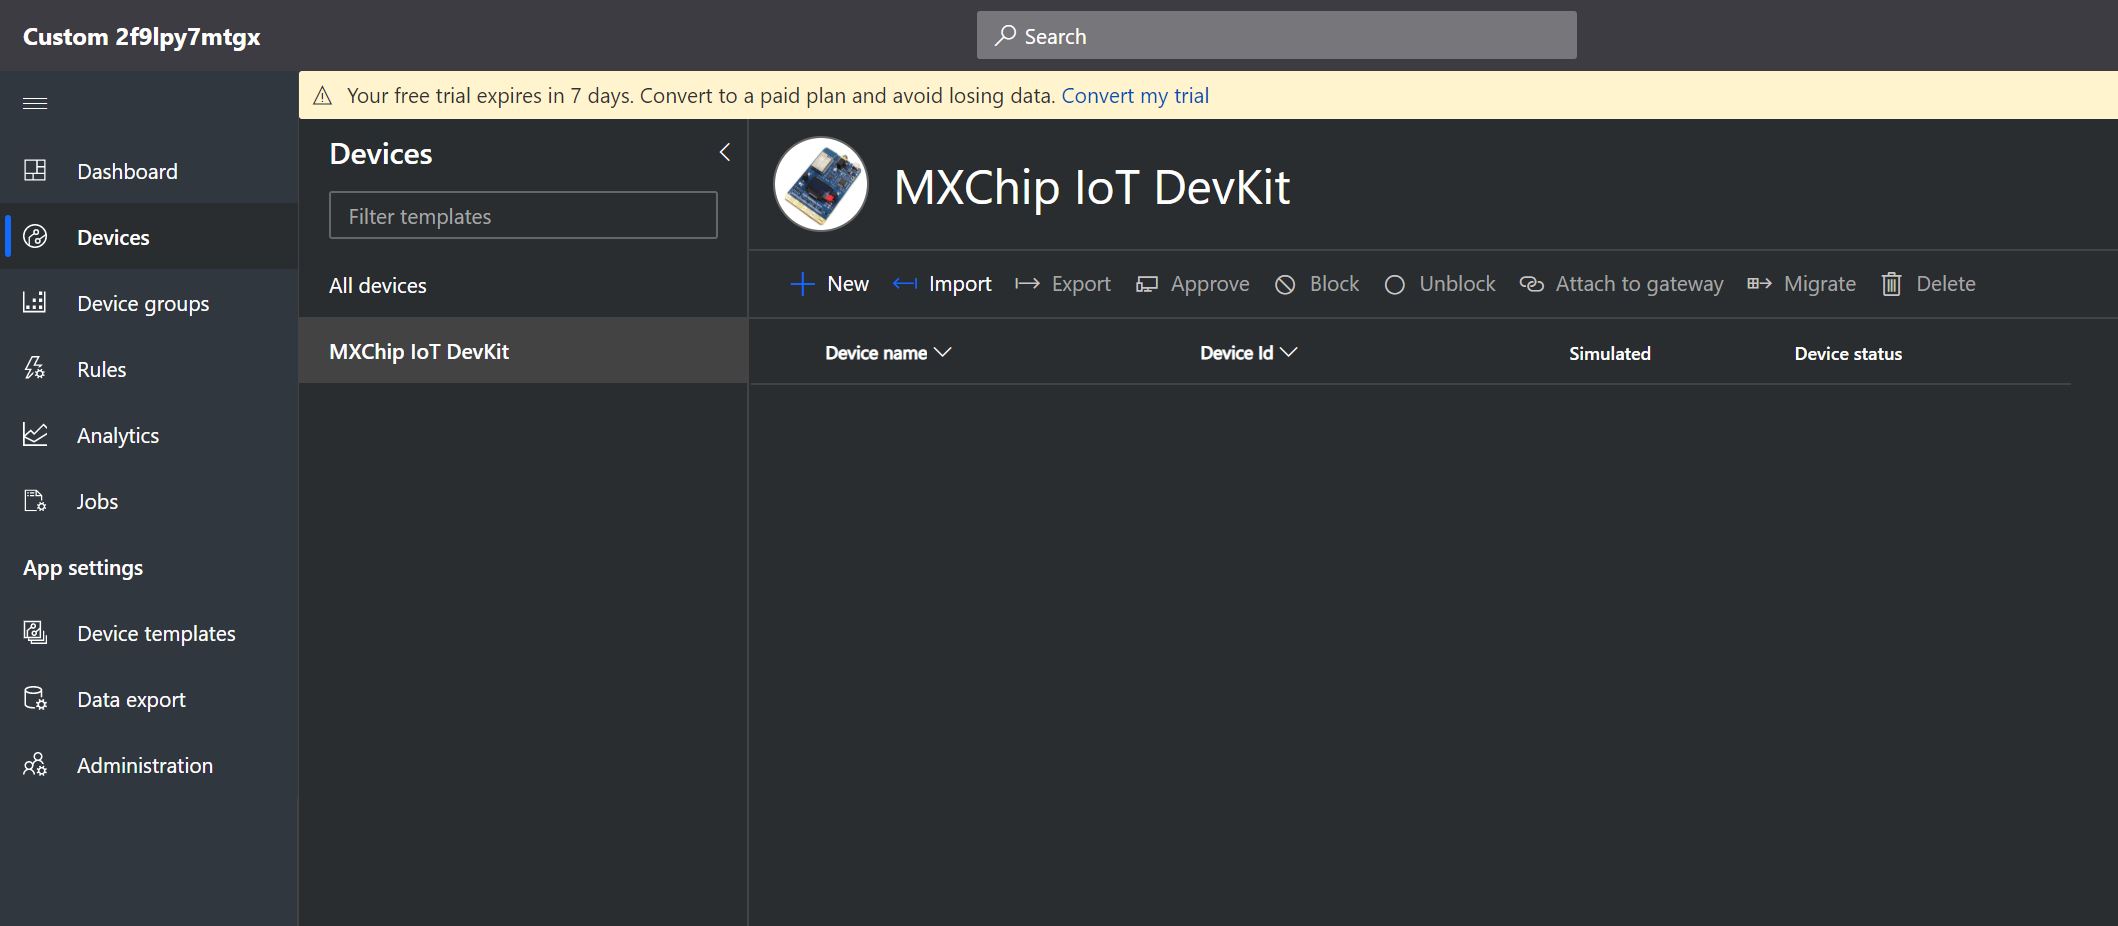
Figure 6: Creating a Device using Device Template
Device Groups
Device Groups are a logical grouping of devices in the system based on specific attributes. You can create one or more Device Groups to filter one or more devices in your system. This is useful if you have hundreds (or thousands) of devices and you need to look at specific devices quickly.
Navigate to the Device Groups tab and click on the +New button to create a new device group. You will see a page that allows you to enter information for your new device group such as the Name and Scope. Adding one or more filters in the Scope area will define the filters needed to only display the device(s) you want to see.
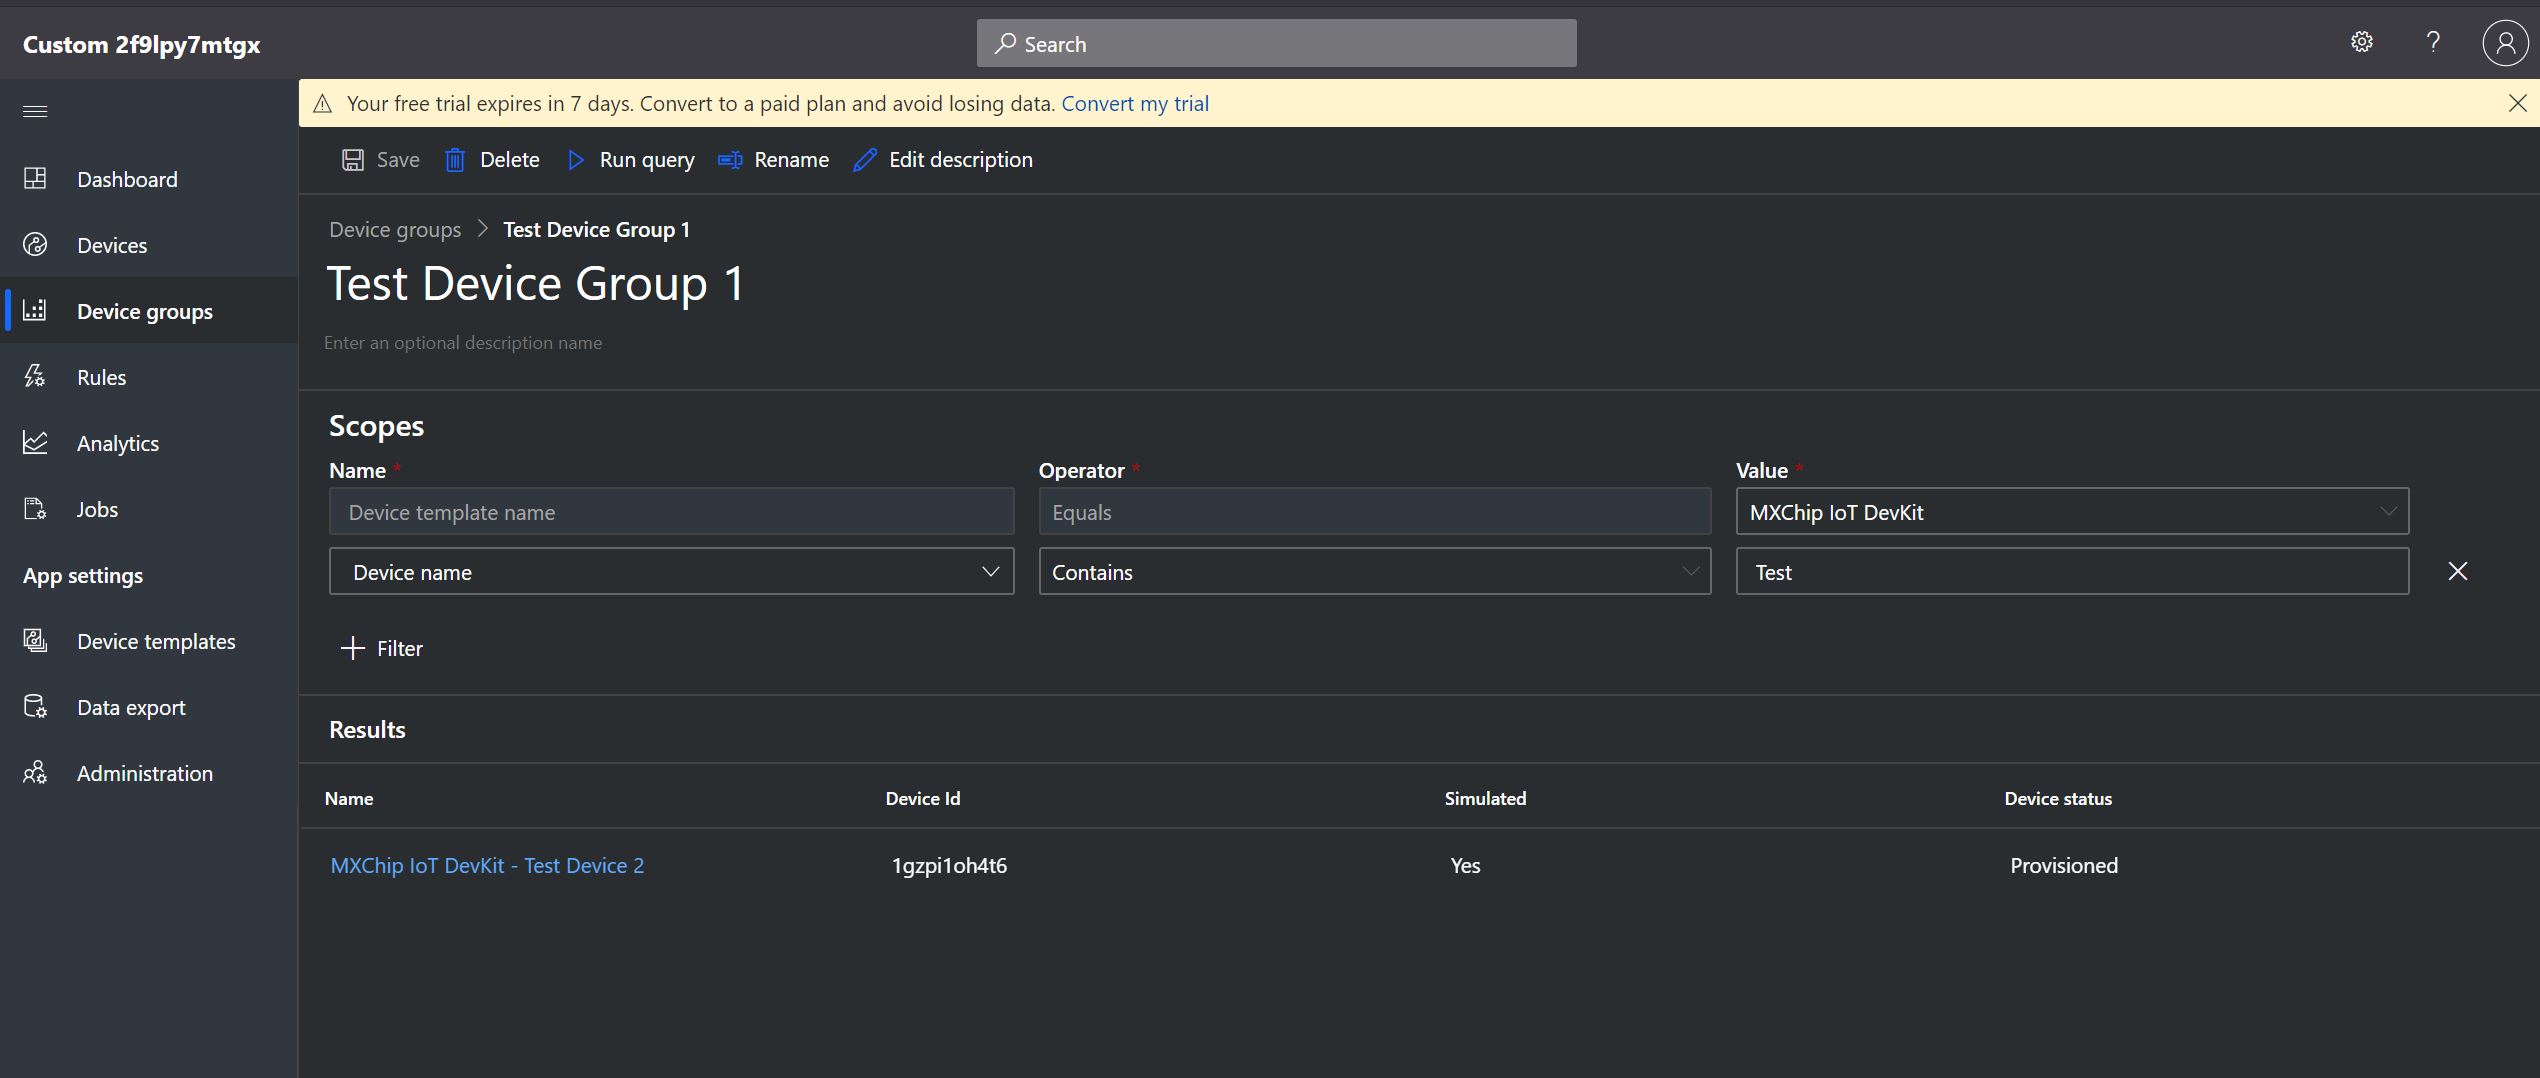
Figure 7: Device Groups
Rules
You can create telemetry-based rules in IoT Central. This is done under the Rules section in the application. Clicking on the Rules tab will display a list of the current rules in the system. Create a new rule by clicking on the +New button. This will display a page that allows you to create a new rule.
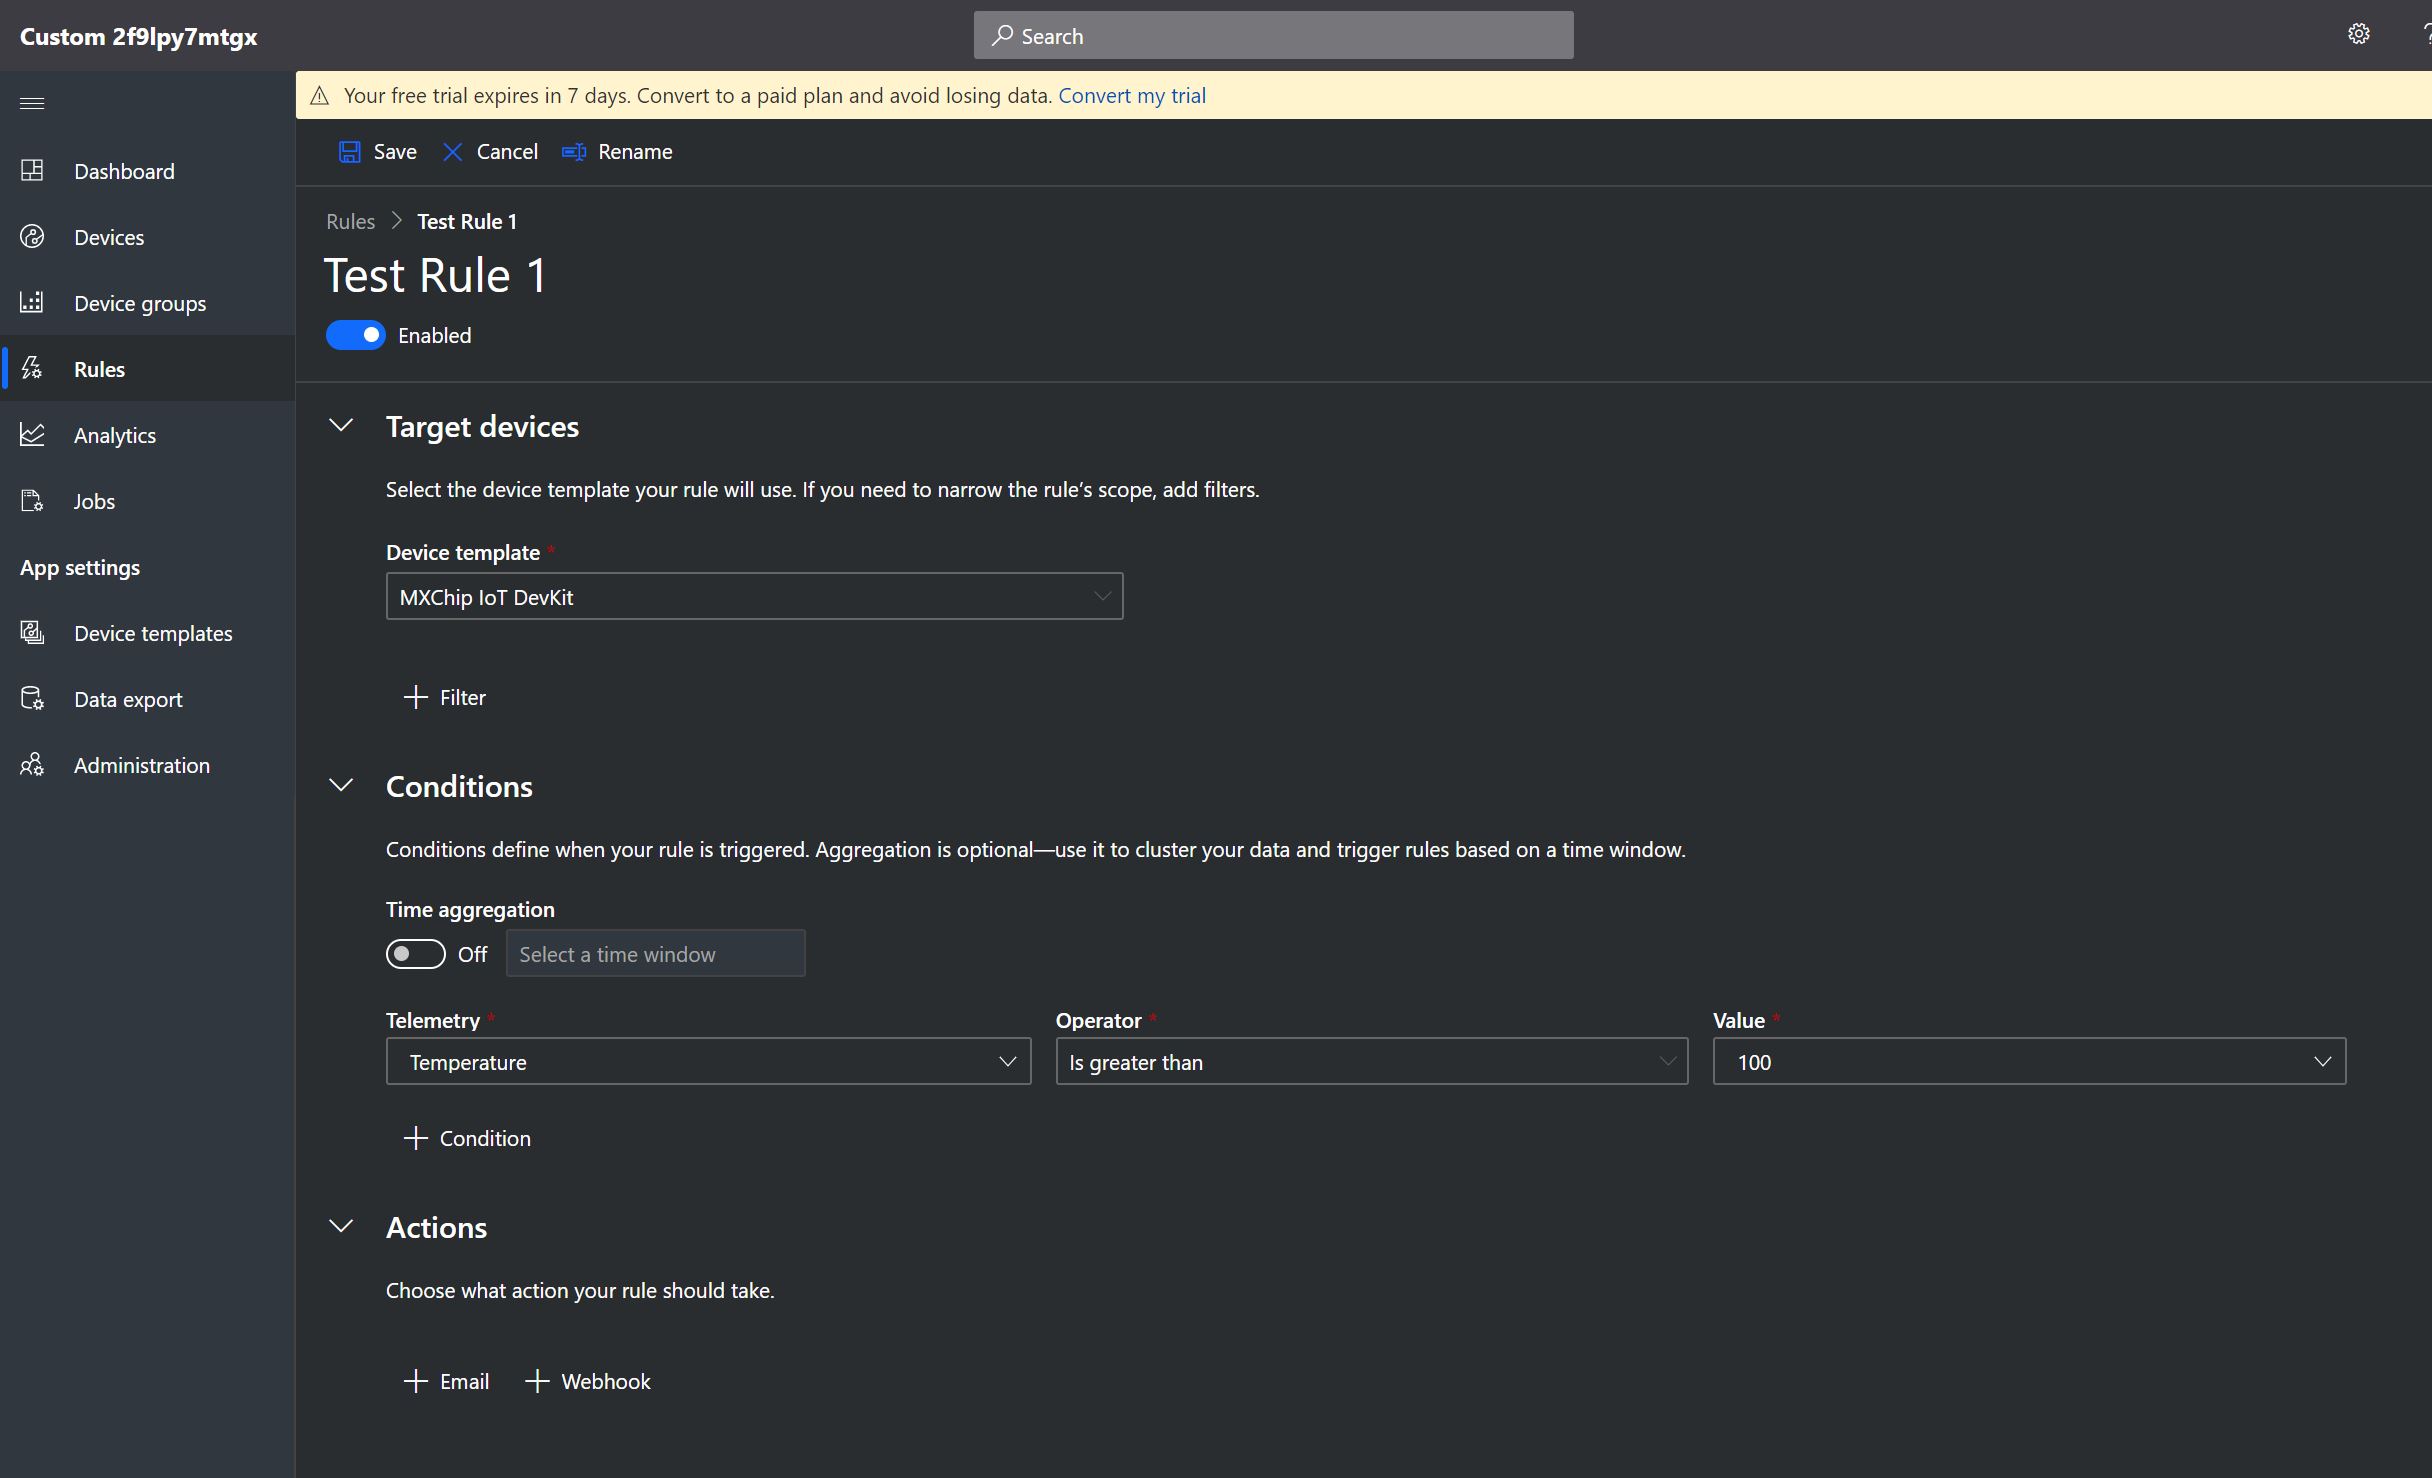
Figure 8: Rules
Give the rule a name and then specify a target device template, which will define the devices to which the rule applies. If you need to specify less than all the devices in the device template you select, create one or more filters to filter the list of devices further.
Conditions are created to specify when the rule is triggered. You can specify one or more conditions the rule must meet to be triggered.
There is also a section for Actions. These are the things that happen once the rule has been triggered. You notice you can either send an email or call a web hook when the rule is triggered. You can create one or more actions if you choose.
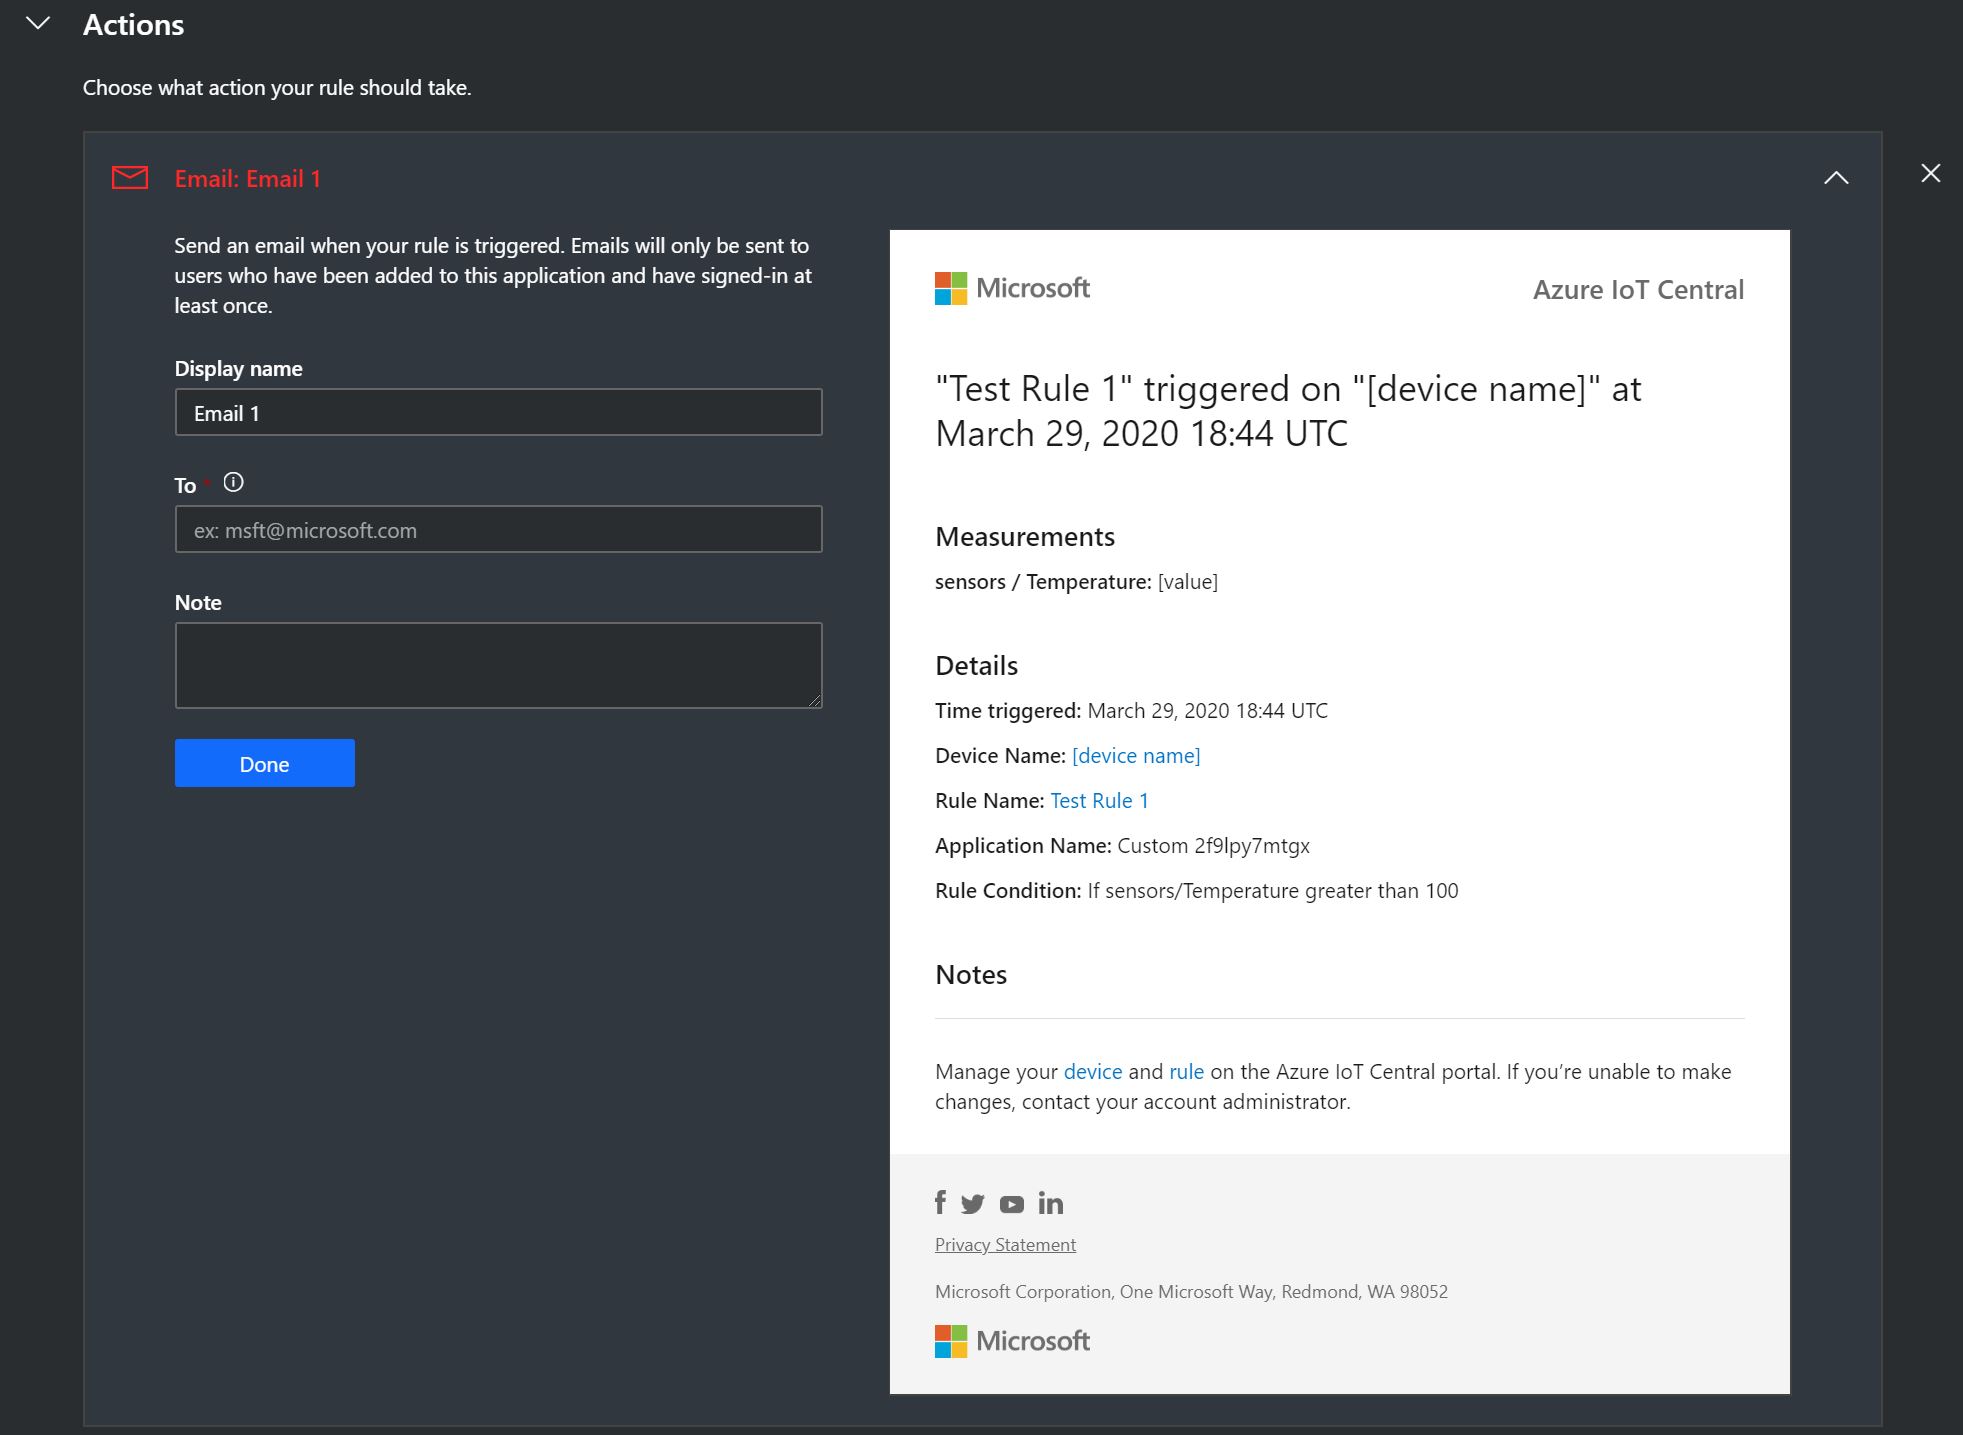
Figure 9: Email Action
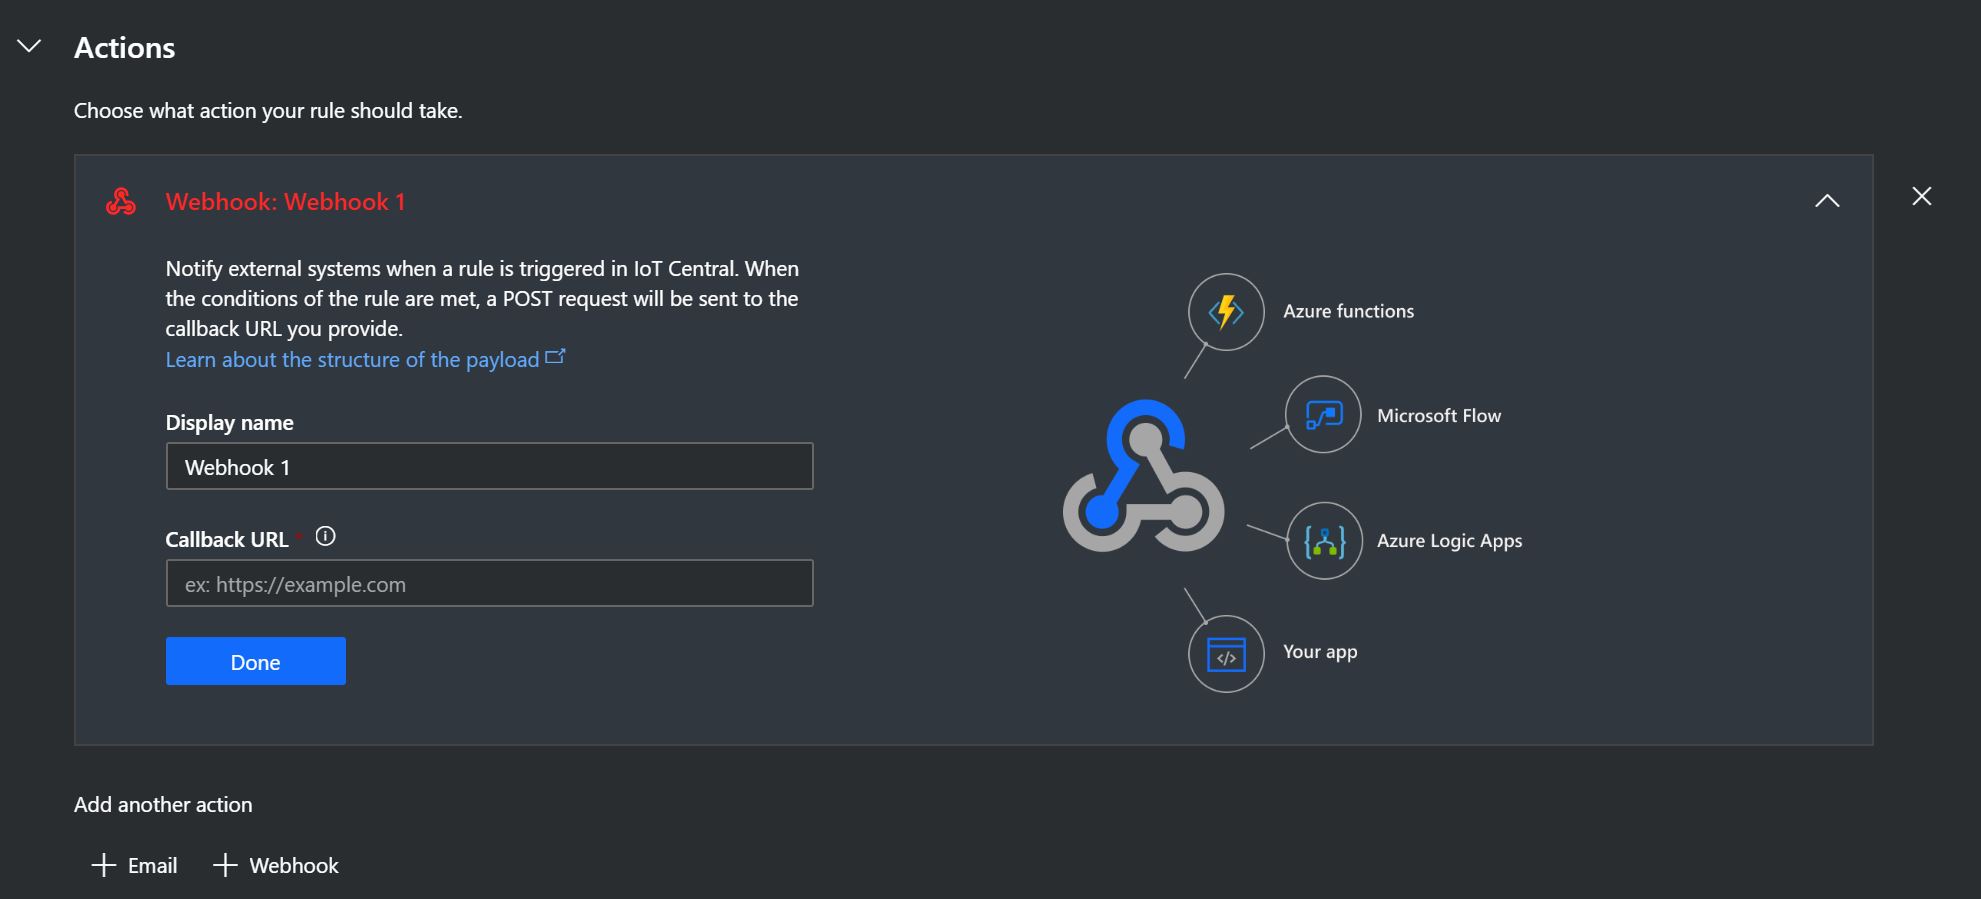
Figure 10: Webhook Action
Analytics
Azure IoT Central also has the capability to analyze device data including time series information. You can specify the telemetry values to display along with splitting the data collections by attributes (such as Device ID). Select the Device Group and Telemetry value(s) to analyze and click the Analyze button when you are finished.

Figure 11: Analytics
Jobs
You can use Azure IoT Central to manage your connected devices using jobs. Jobs are useful for performing bulk updates to your device properties or for running commands. Clicking on the Jobs tab will display a list of the existing jobs in the system, job status and when they were last run. Creating a new job will allow you to specify details of the job such as Name, what device group the job targets as well as the Job Type and detailed information.
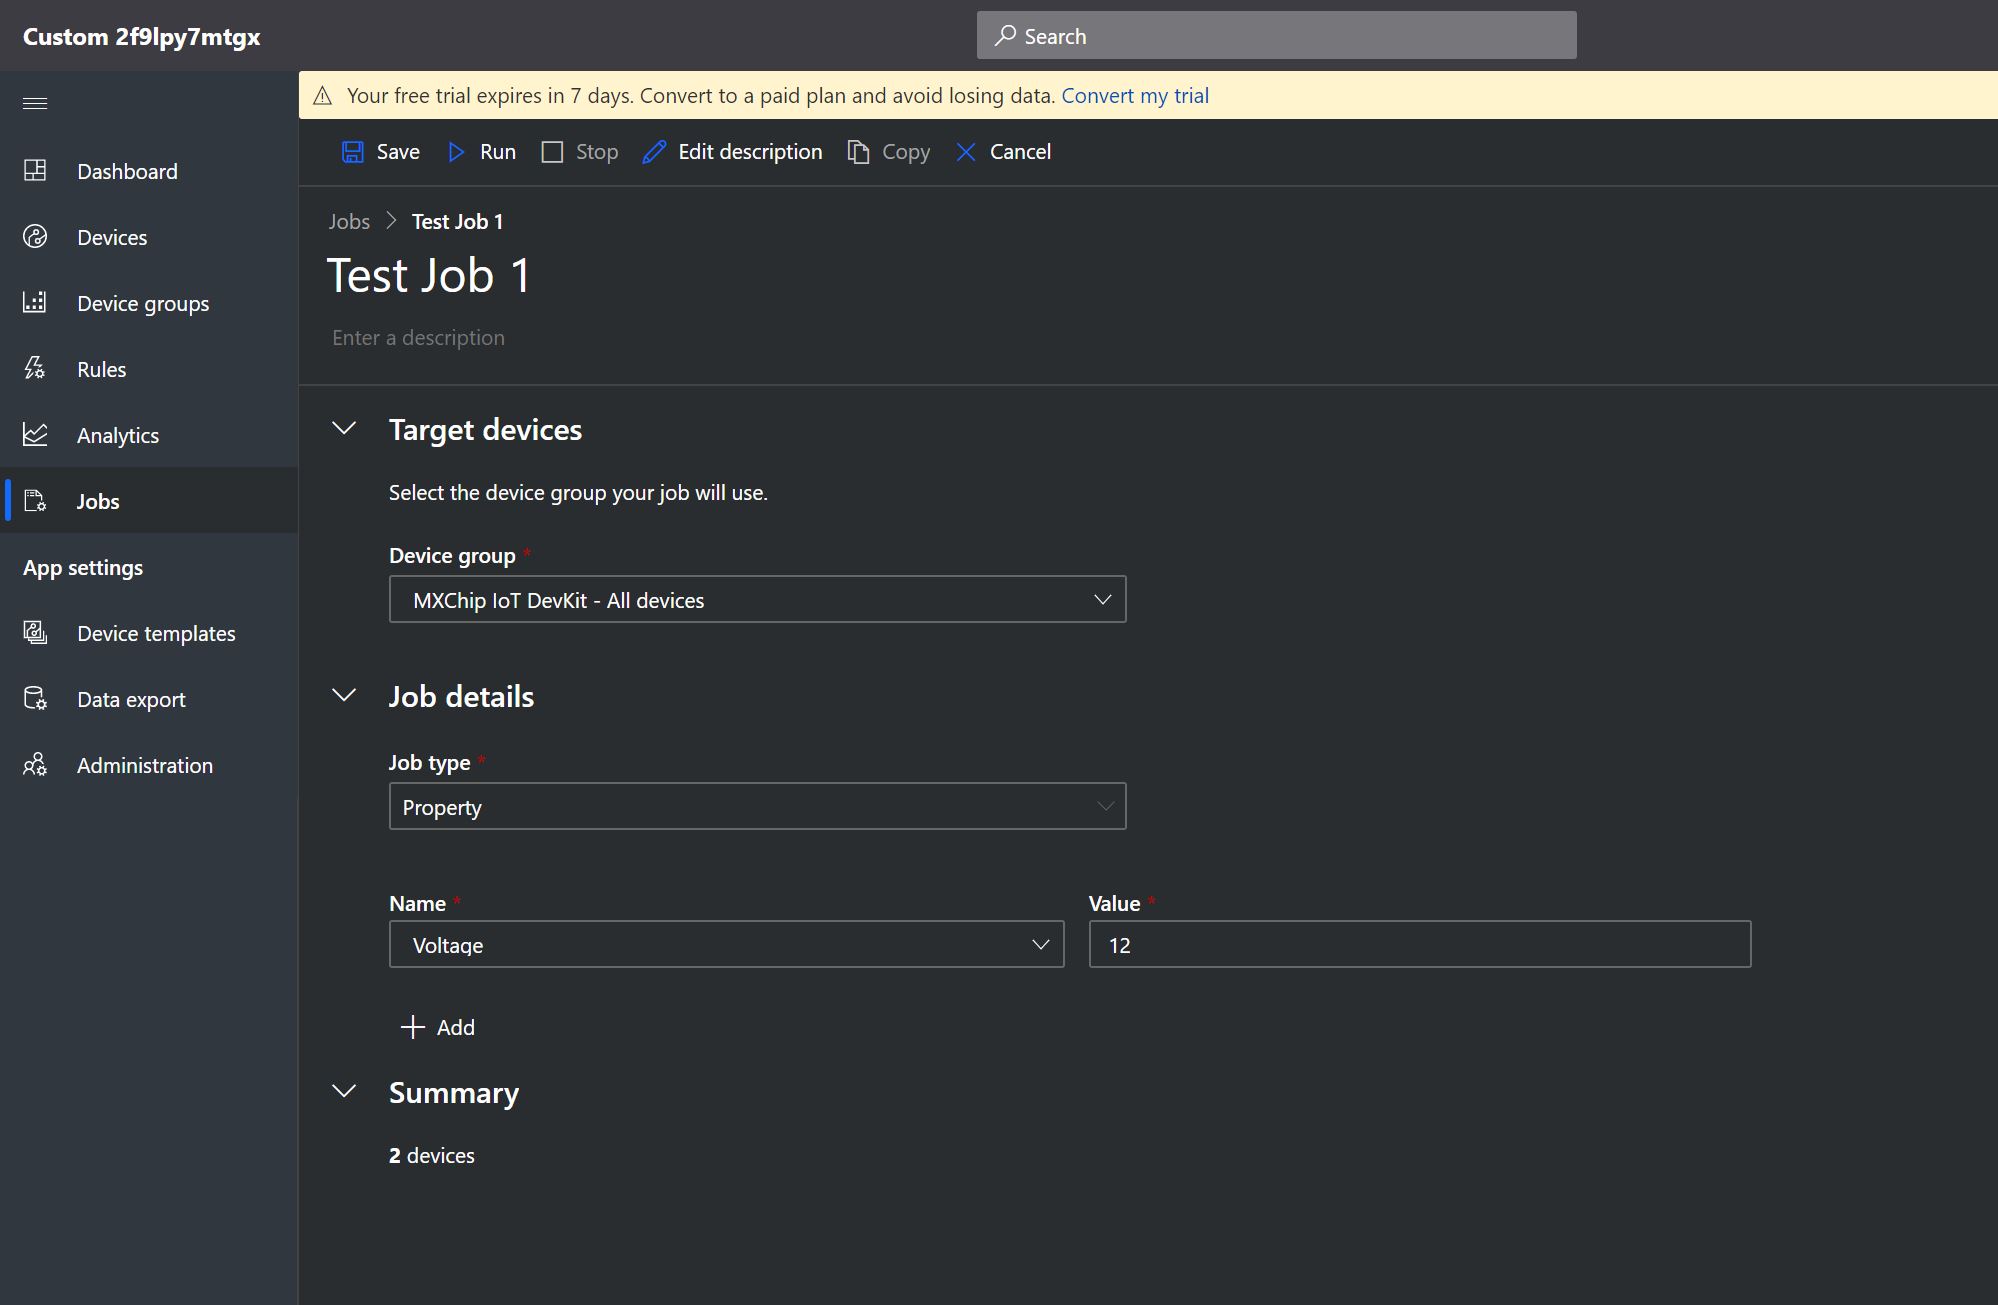
Figure 12: Creating a Job
Running a job is done by clicking on the Run button. This will execute the job and return results of the operation.
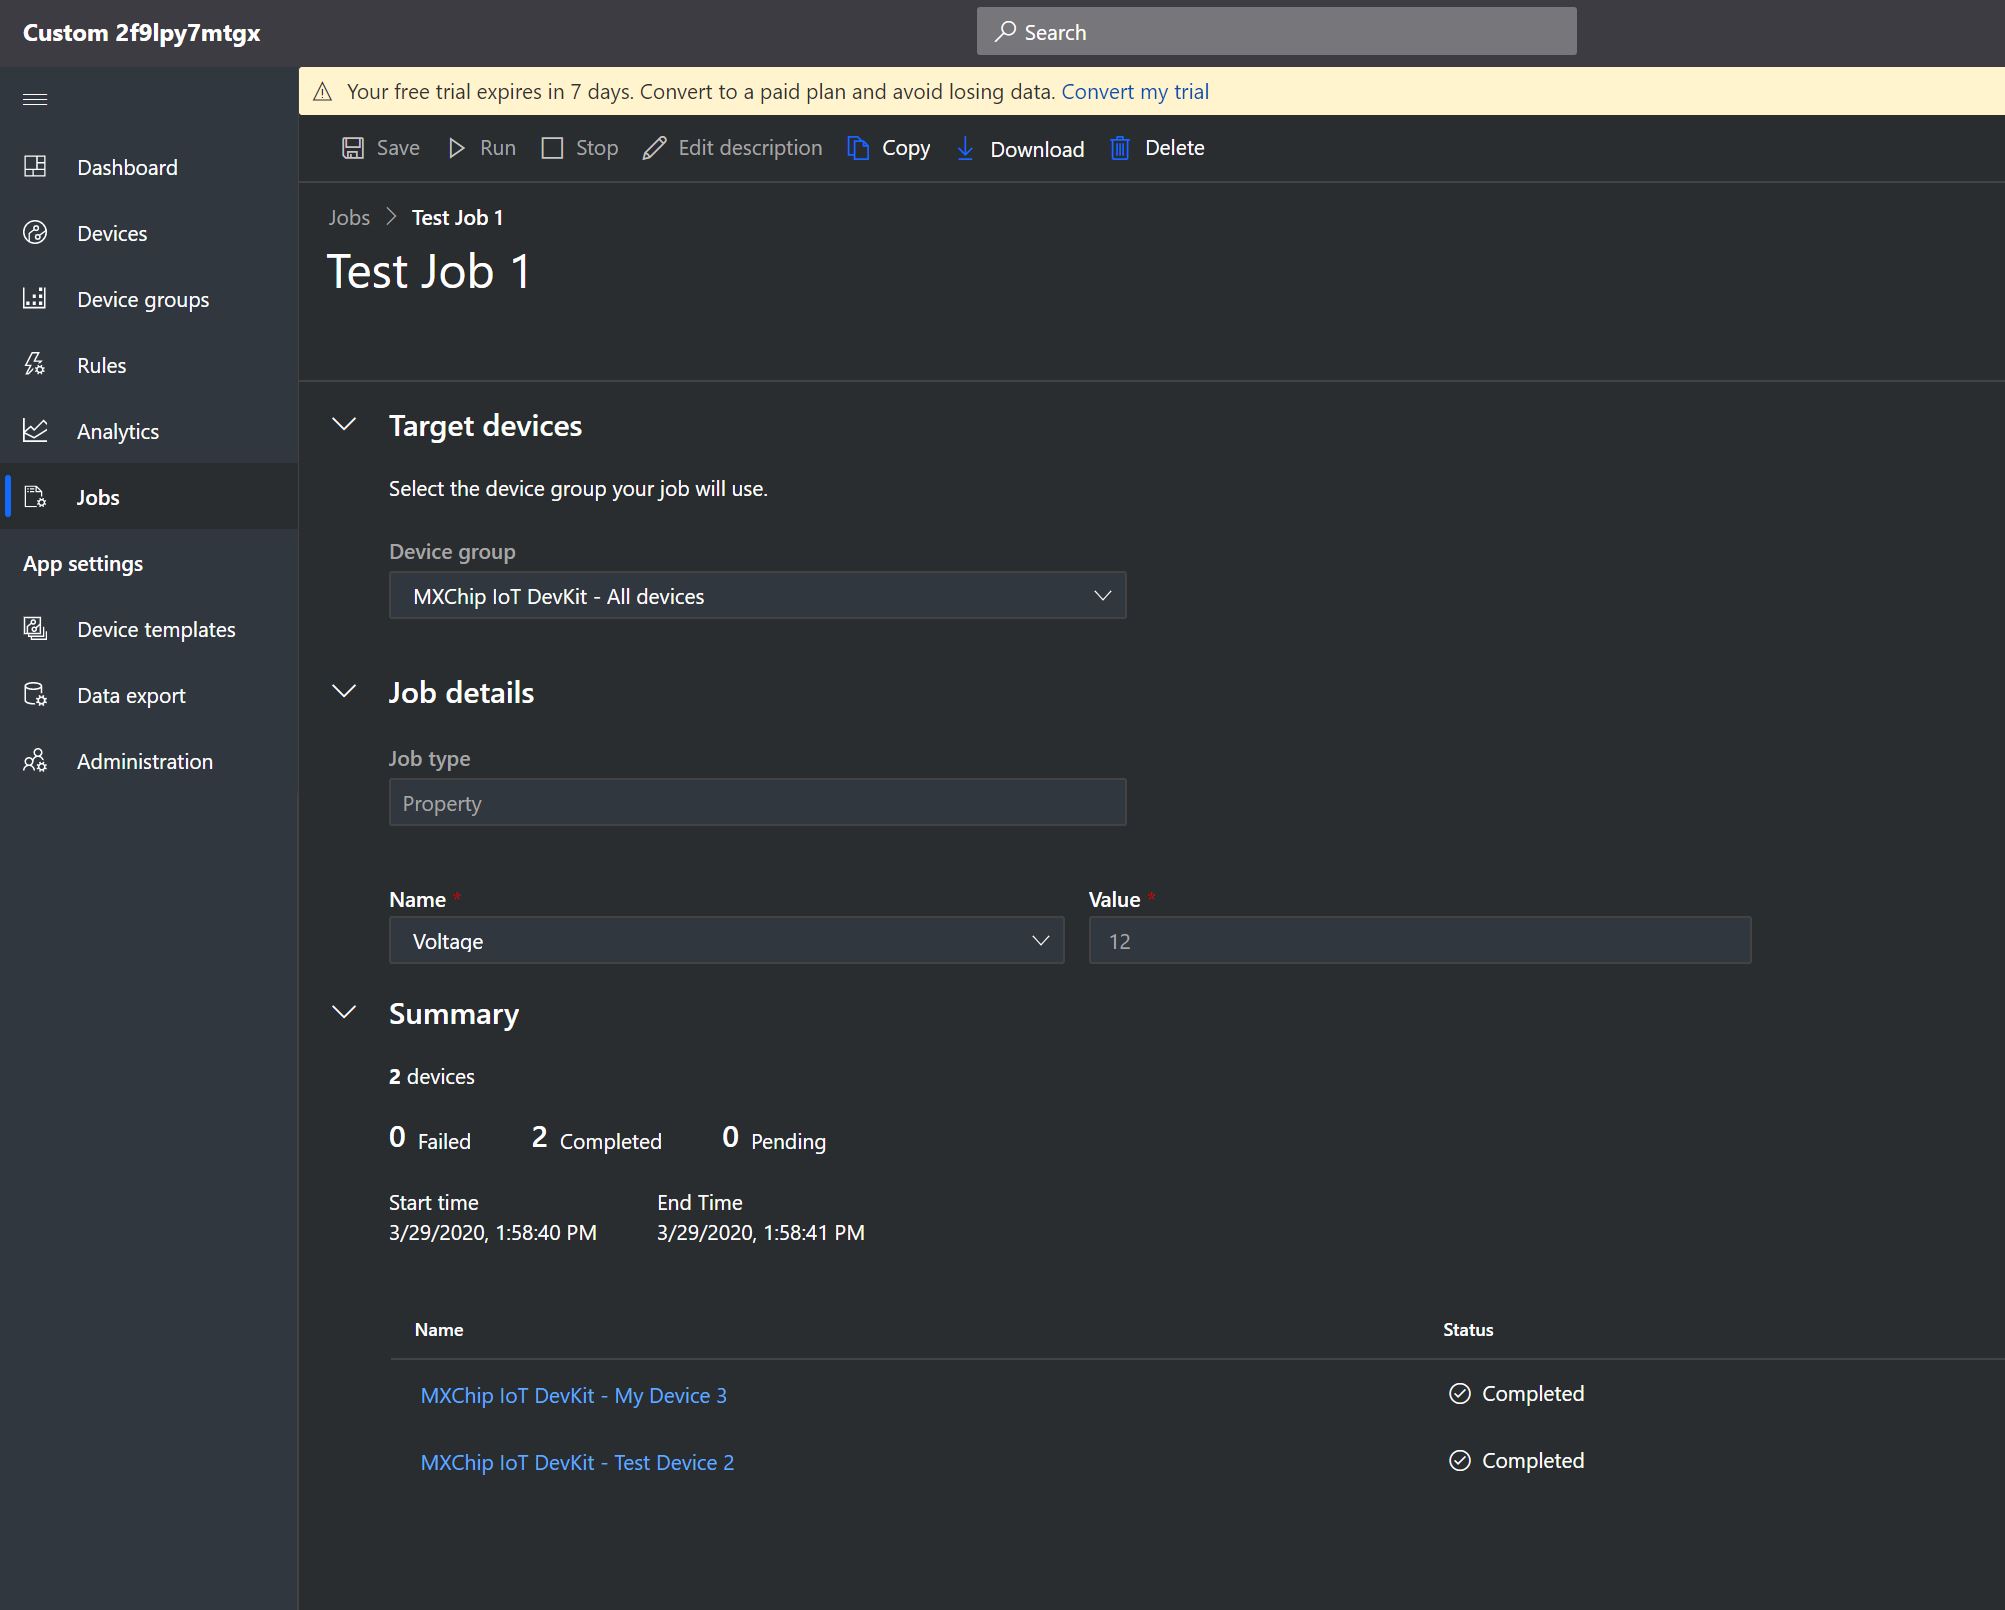
Figure 13: Running a Job
Administration
The IoT Central application also allows administration of the website, including Users in the system, Roles, Pricing and the Device Connections. You also have the ability to permanently delete the solution.
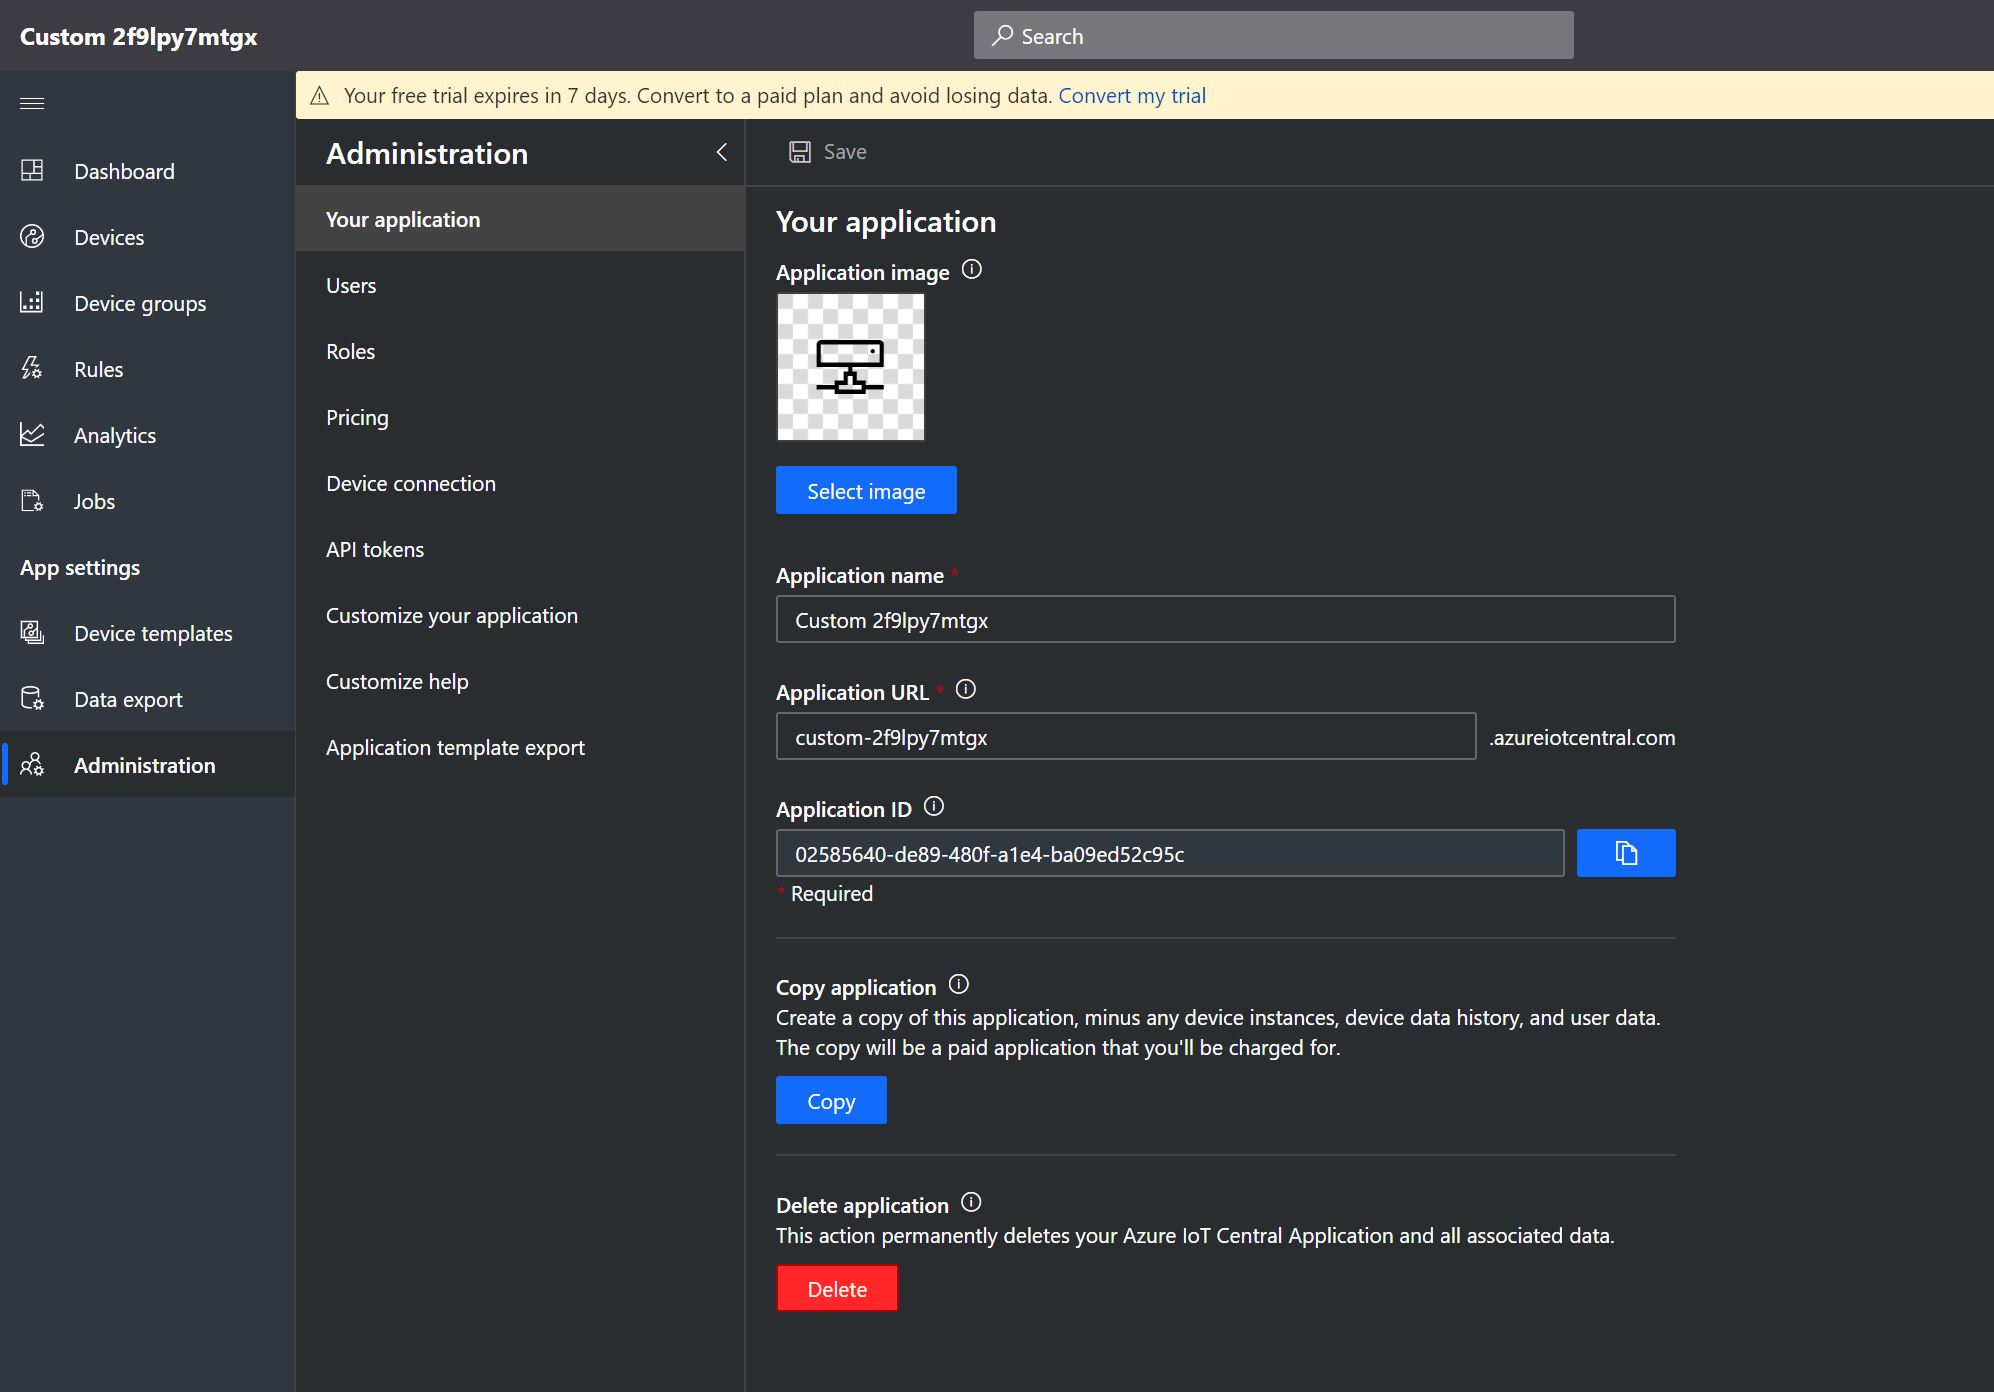
Figure 14: Administration
Underlying Infrastructure
Since IoT Central is a SaaS (software-as-a-solution) offering, you do not have access to the underlying architectural components in Azure. What this means is that Microsoft fully hosts and supports the IoT Central application but they also manage the resources themselves. You do not have the ability to configure/customize/remove any of the individual Azure resources used in your IoT Central application. If you need to customize the IoT Central application beyond what is provided to you through the SaaS offering, then you need to consider Azure IoT Solution Accelerators which do provide the ability to manage and modify the underlying Azure components.
In conclusion, Azure IoT Central is a nice offering from Microsoft if you want to get your IoT solutions up and running quickly! Device provisioning and customizations are part of this service, as well as Rules, Jobs, and analytics for the device data. I hope this brief tour of Azure IoT Central has been helpful to you.
Cheers!

One thought on “Azure IoT Central”