
The Azure IoT Hub service provides the ability for bi-directional communication with your devices. You can use Azure IoT Hub to send messages from your devices to your IoT cloud solutions, as well as send commands from your IoT cloud solutions to your devices. This article will describe the different types of communications possible with Azure IoT Hub and how you can use them.
Prerequisites
Before you can send/receive messages between Azure IoT Hub and your devices you need the following:
- An Azure account. Sign up for a free trial here
- Provision an instance of IoT Hub
- Create at least one device with your IoT Hub
Bi-directional communication means just that – in both directions. What that means for Azure and IoT is that you either send data from your devices to IoT Hub, or data or commands from IoT Hub to your devices. I will describe the different options to accomplish this, as seen below:
- Device-to-Cloud messages
- Cloud-to-Device messages
- Device Twins
- File Upload
- Direct Methods
Device-to-Cloud Messages
Sending information from your IoT devices to the cloud is supported by Azure IoT Hub with device-to-cloud (D2C) messages. Your devices can send telemetry time series and alert data to IoT Hub to be routed to other services for processing.
Azure IoT Hub comes with a built-in endpoint that back-end services can use to read telemetry data being sent from your devices. This endpoint is compatible with Event Hubs and you can also use standard IoT Hub SDKs to read from this endpoint.
When D2C messages are sent from your devices to IoT Hub, by default they are routed to this built-in service endpoint (messages/events). This endpoint is exposed to your devices with MQTT, AMQP and HTTPS protocols. You also have the ability to route these messages to custom endpoints that you create.
Messages can be routed to multiple endpoints, so if you create custom endpoints and setup the routing queries you can have a message be routed to more than one endpoint. IoT Hub currently supports the following custom endpoints:
- Azure Storage (Blob or Data Lake Gen2)
- Service Bus Queues
- Service Bus Topics
- Event Hubs
Here is an example route that filters out messages that have a temperature alert flag specified and routes the messages to the default events endpoint.

Please note that the built-in Event Hubs endpoint (messages/events) is the fallback route, so if incoming device messages do not satisfy query conditions for any custom endpoints they will be sent to this fallback route. You must enable the fallback route capability when you turn on message routing or your incoming messages will not be routed properly.
D2C messages received are stored temporarily by IoT Hub up to 7 days. They are lost if not processed by a configured back-end service. Messages can also have a maximum size of 256KB for each message. The throughput of what an IoT Hub can handle depends on the pricing tier. Details are here.
Additional details on D2C communications can be found here.
Cloud-to-Device Messages
Sending one-way communications from a cloud solution to one or more devices is possible with cloud-to-device (C2D) messages. Your cloud solutions can send notifications to devices, or commands that can alter the state of devices (device twins).
Azure IoT Hub will send messages to devices through a service-facing endpoint (messages/devicebound), and the device(s) then receive the messages through a device-specific endpoint (devices/{deviceid}/messages/devicebound).
Azure IoT Hub provides a guarantee that messages will be sent to devices at-least-once. In order to do this, IoT Hub persists C2D messages in per-device queues. These messages persist in the queues until the devices explicitly acknowledge completion (aka – they received the message successfully). Once acknowledged, IoT Hub removes the message from the appropriate per-device queue. This approach guarantees resiliency in the case of connectivity and/or device failures.
Additional details on C2D communications can be found here.
Device Twins
JSON documents that contain device state information are what is known as device twins. These documents store the metadata, configurations and conditions for a device. Azure IoT Hub maintains a device twin for each device you connect to IoT Hub. There are multiple uses that device twins provide:
- Store device-specific metadata in the cloud
- Report current state information about the device
- Synchronize the state of long-running workflows between the device and cloud solution
- Querying device metadata, configuration or state
The structure of a device twin is shown in Figure 2:

Tags are a section of the JSON document that the cloud solution can read/write to. Devices cannot see these tags or their values.
Desired Properties are a section of the JSON document used to synchronize device configurations or conditions. The cloud solution can set these properties and the device can read them. The device can also receive notifications that the desired properties have changed.
Reported Properties are a section of the JSON document also used to synchronize device configurations or conditions. Devices can set these properties and the cloud solution(s) can read them.
Root object properties define the device identity and also provide container objects for tags and the reported, desired properties sections.
Here is an example of a device twin:
{
    "deviceId": "testDevice1",
    "etag": "AAJWKSOAAAAAc=",
    "status": "enabled",
    "statusReason": "provisioned",
    "statusUpdateTime": "0001-01-01T00:00:00",
    "connectionState": "connected",
    "lastActivityTime": "2020-02-28T12:44:48.976Z",
    "cloudToDeviceMessageCount": 0,
    "authenticationType": "sas",
    "x509Thumbprint": {
        "primaryThumbprint": null,
        "secondaryThumbprint": null
    },
    "version": 1,
    "tags": {
        "$etag": "123",
        "deploymentLocation": {
            "building": "A",
            "floor": "1"
        }
    },
    "properties": {
        "desired": {
            "telemetryConfig": {
                "sendFrequency": "5m"
            },
            "$metadata" : {...},
            "$version": 1
        },
        "reported": {
            "telemetryConfig": {
                "sendFrequency": "5m",
                "status": "success"
            },
            "batteryLevel": 55,
            "$metadata" : {...},
            "$version": 4
        }
    }
}
The cloud solution backend can operate on the device twin using these operations (through HTTPS):
- Retrieve Device Twin: Returns the JSON document for the device twin
- Update Device Twin: Enables the partial update of the JSON document. Tags and Desired Properties can only be updated. Cloud solution can also add or remove properties in these sections. Setting a property to null removes it from the section. There is also the ability to completely overwrite the Tags and Existing Properties with new JSON.
- Receive Device Twin Notifications: Allows the cloud solution to be notified when a change is made to the device twin. A route in the IoT cloud solution called twinChangeEvents must be created and configured as a route for this operation to succeed.
The device can operate on its device twin using these operations:
- Retrieve Device Twin: Returns the JSON document for the device twin. Tags are not visible.
- Update Device Twin: Enables the partial update of the JSON document. Reported Properties can only be updated. This operation works in the same way as the cloud solution updates a device twin.
- Observe Desired Properties: The device can choose to be notified of updates to the Desired Properties when they occur.
There are size limitations on the different sections in the device twin, as seen here:
- Tags: 8KB max size on values
- Desired Properties: 32KB max size on each value
- Reported Properties: 32KB max size on each value
As an example, if the cloud solution wants to change the sendFrequency value for the device it modifies the device twin value for sendFrequency, as seen here:
"desired": {
   "telemetryConfig": {
   "sendFrequency": "5m"
},
…
The device(s) would be notified of this change immediately or when they become connected (if offline). The device would then report back to the cloud solution the updated configuration on the device:
"reported": {
   "telemetryConfig": {
   "sendFrequency": "5m",
   "status": "success"
},
…
File Upload
IoT devices can start file uploads through a device-facing endpoint in IoT Hub. You can have your devices request file uploads to an associated Azure storage account in the cloud, with IoT Hub acting as a dispatcher for the uploaded file (requested by a device) to the Azure storage account. File uploads can be used for large files such as media files or large telemetry batches.
In order for file uploads to work, you must first associate an Azure storage account to IoT Hub. This can be done via the Azure Portal or programmatically through the IoT Hub REST APIs.
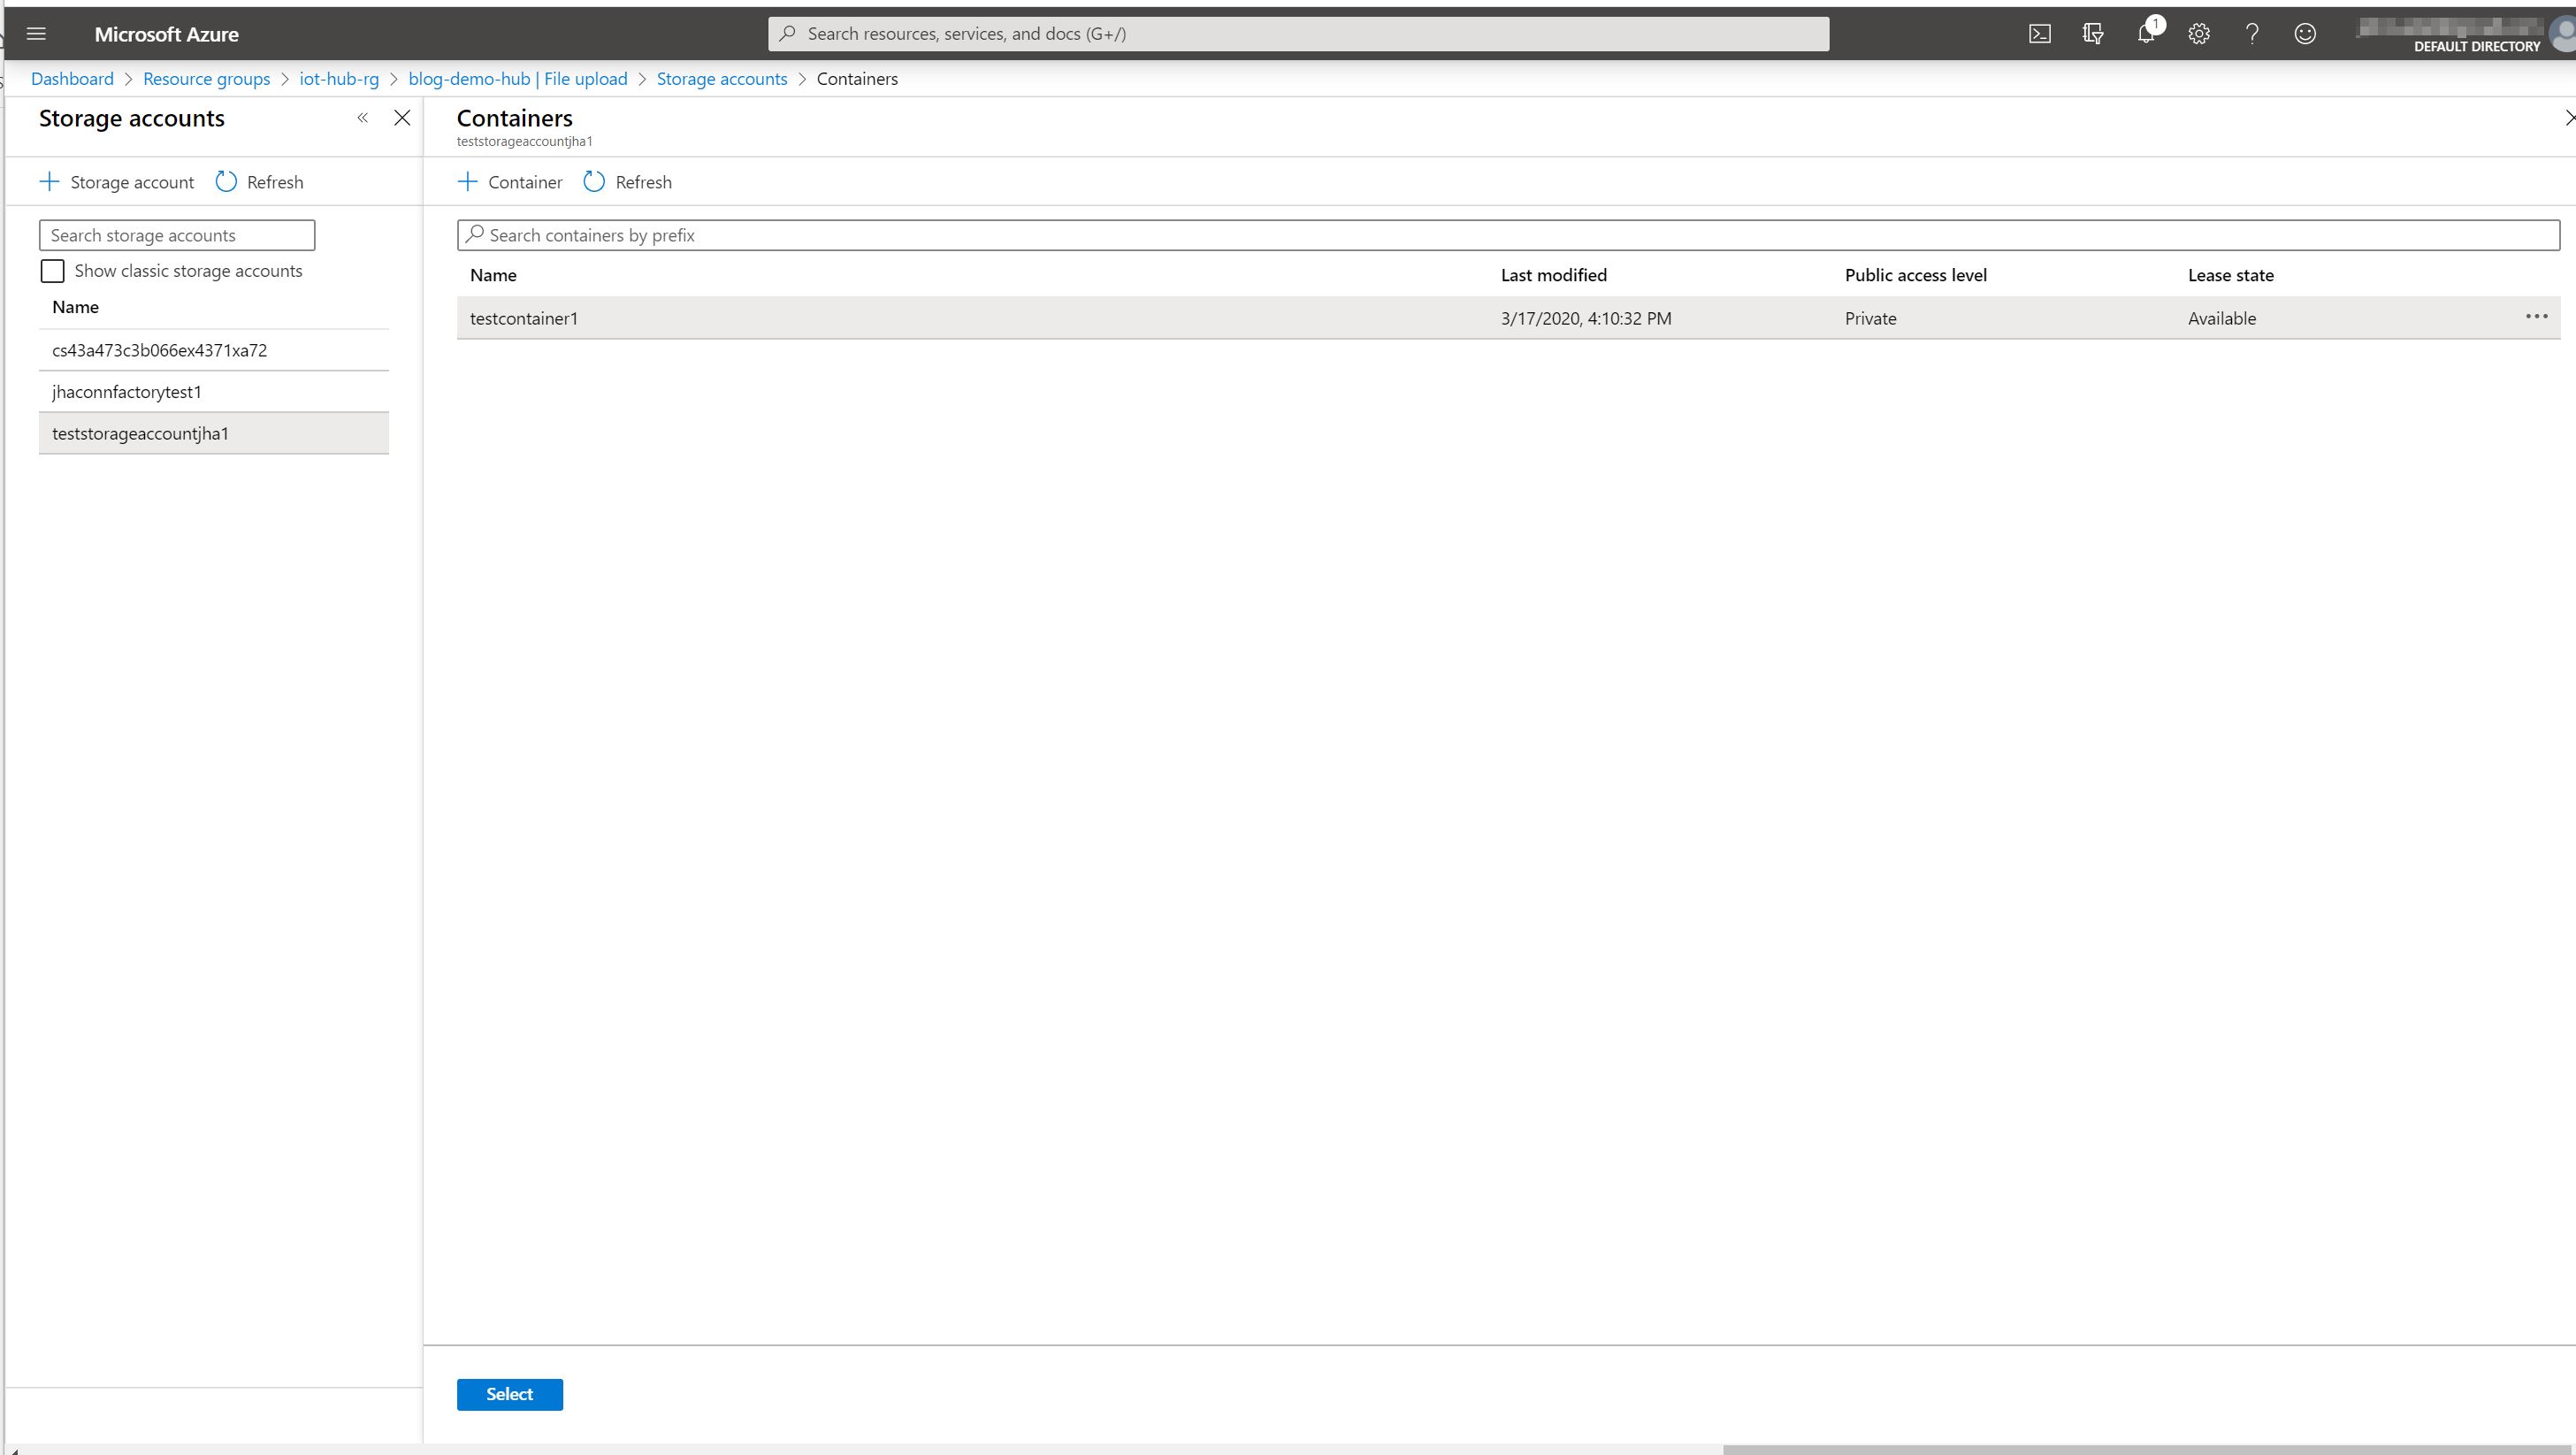
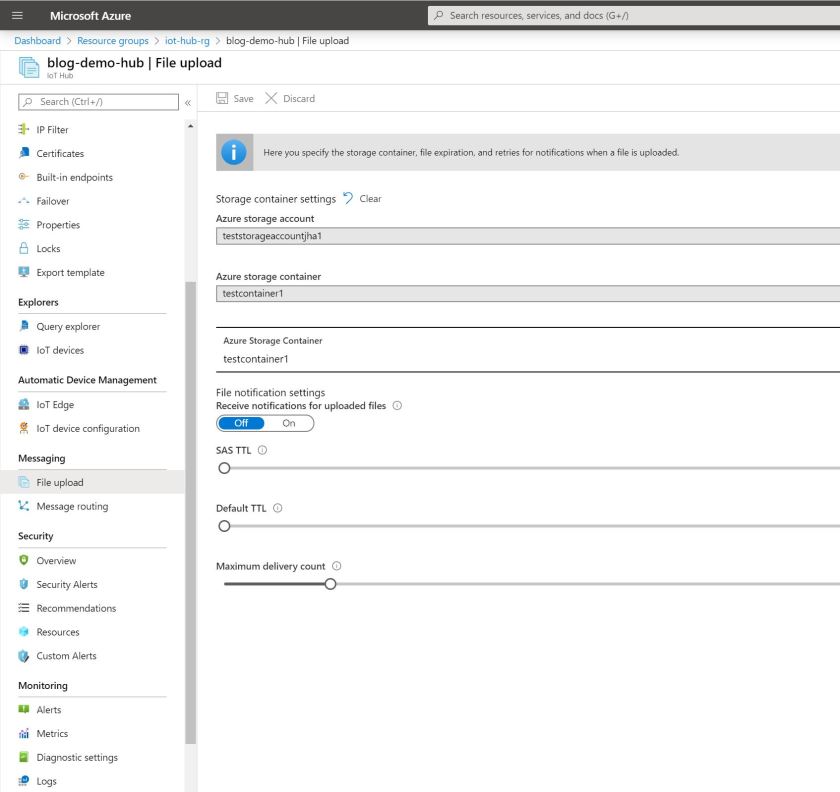
Once you have made this association you can write code in your device to upload files to the cloud. IoT Hub will handle the upload to its associated blob storage account and provide notifications that you can monitor. Here is a great tutorial that reviews the steps needed to perform a file upload from your device.
Direct Methods
Direct methods provide an alternative way of communication with devices that work independently of the other communication options. Direct methods allow us to call a method on the device as a local service, which means we can get immediate feedback from the results of that call.
Direct methods are implemented on the device and use a request-response pattern when communicating. You can invoke a direct method through a service-facing URI and are a synchronous call. The invocation will either succeed or fail (after the timeout period), returning a result with an optional payload. The benefits/drawbacks of direct methods are as follows:
Benefits
- Define multiple named direct methods
- Pass an optional payload
Returns a status code and optional payload - High throughput
Drawbacks
- Only supports AMQP or MQTT
- Doesn’t work if device is offline
As an example, here is how you would write code on your device to receive calls to a direct method:
await device.SetMethodHandlerAsync(“showMessage”, ShowMessage, null);
…


private static Task ShowMessage(MethodRequest methodRequest, object userContext)
{
…
}
Calling the SetMethodHandlerAsync class registers a named method handler with the device, which in this example the method name is ShowMessage. Parameters are the name of the message handler method as well as the reference to that handler method and an optional context object.
The definition of the ShowMessage handler method is also defined, which takes a MethodRequest object parameter and optional context object and returns a Task object.
Now that our devices are able to handle direct messages from the cloud, the only other thing to do is write code in our IoT cloud solution to call the direct method on our device. We can do this by defining a method to invoke the direct method call on our device, as seen in this console application example:
static async Task Main(string[] args)
{
   …
   var serviceClient = ServiceClient.CreateFromConnectionString(svcConnString);
   await CallDirectMethod(serviceClient, deviceId);
   …
}


private static async Task CallDirectMethod(ServiceClient sClient, string deviceId)
{
   var method = new CloudToDeviceMethod(“showMessage”);
   method.SetPayloadJson(“’This is a test direct method’”);

   var response = await sClient.InvokeDeviceMethodAsync(deviceId, method);

   Console.WriteLine($”Response status: {response.Status}, payload:{response.GetPayloadAsJson()}”);
}
As you can see, the Main method creates an instance to our IoT hub using the ServiceClient class. We then create a private method named CallDirectMethod(), which takes the instance of our ServiceClient class along with the Device ID value. This method instantiates the direct method via the CloudToDevice() class, which we specify the name of the direct message when instantiating (showMessage in our example). We can then set the payload JSON and asynchronously invoke the direct method on the device. A response is returned to let us know if the method ran successfully or not.
Conclusion
In conclusion, we described the different types of communications possible with Azure IoT Hub and how you can use them. I hope this article has helped you understand the different types of Azure IoT Hub messaging.
Cheers!
