
Azure and IoT Hub provide the ability to register and connect individual IoT devices so that their telemetry data can be sent and received in the cloud. This is great but what do you do if you have hundreds or even thousands of devices? Individually registering them is not feasible and would be a maintenance nightmare. We need a solution for these types of scenarios.
This article will describe what the Azure Device Provisioning Service is and how you can use it to maintain multiple IoT devices with Azure at scale.
What is Device Provisioning Service?
Azure Device Provisioning Service (DPS) is a cloud-based service that helps Azure IoT Hub provide automatic provisioning features with no human intervention. DPS provides the ability to provision up to millions of IoT devices in a secure and scalable effort. Support is also included for IoT devices with Trusted Platform Module (TPM), symmetric keys and X.509 certificate authentications.
A common scenario to use DPS would be when you need to provision multiple IoT devices without hardcoding the IoT Hub information (connection string, device ID). DPS provides zero-touch provisioning support so that you are freed from having to manually provision each device in your solution. Other scenarios where DPS is a good fit are when you need to load-balance devices across multiple IoT hubs, reprovisioning when a change is made on the device, and connecting devices to an IoT hub with the lowest latency.
Additional information and a listing of all the features of the Device Provisioning Service can be found here.
How to setup an instance of DPS
This section describes how to setup an initial instance of the Device Provisioning Service in Azure. It is assumed you have an active Azure subscription (free trial here). I will be showing you how to do this in the Azure Portal. Alternatively, you can follow these steps to do the setup with the Azure CLI or here with an ARM template.
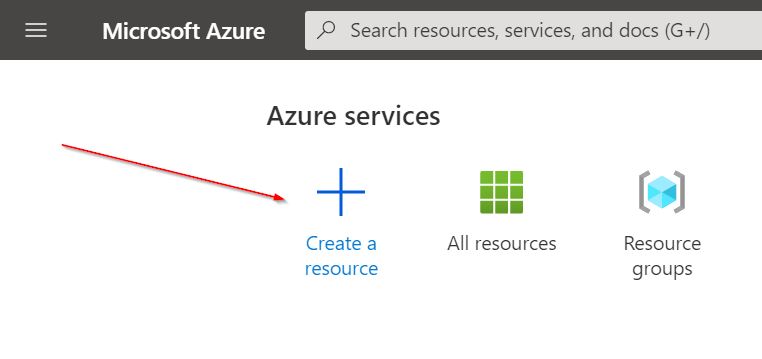
Sign into your Azure portal. From the homepage, click on the +Create a Resource button to get started.
Enter Device Provisioning Service in the search box and press Enter.

A list of matching resources will appear. Select IoT Hub Device Provisioning Service and click Create to begin the installation wizard.

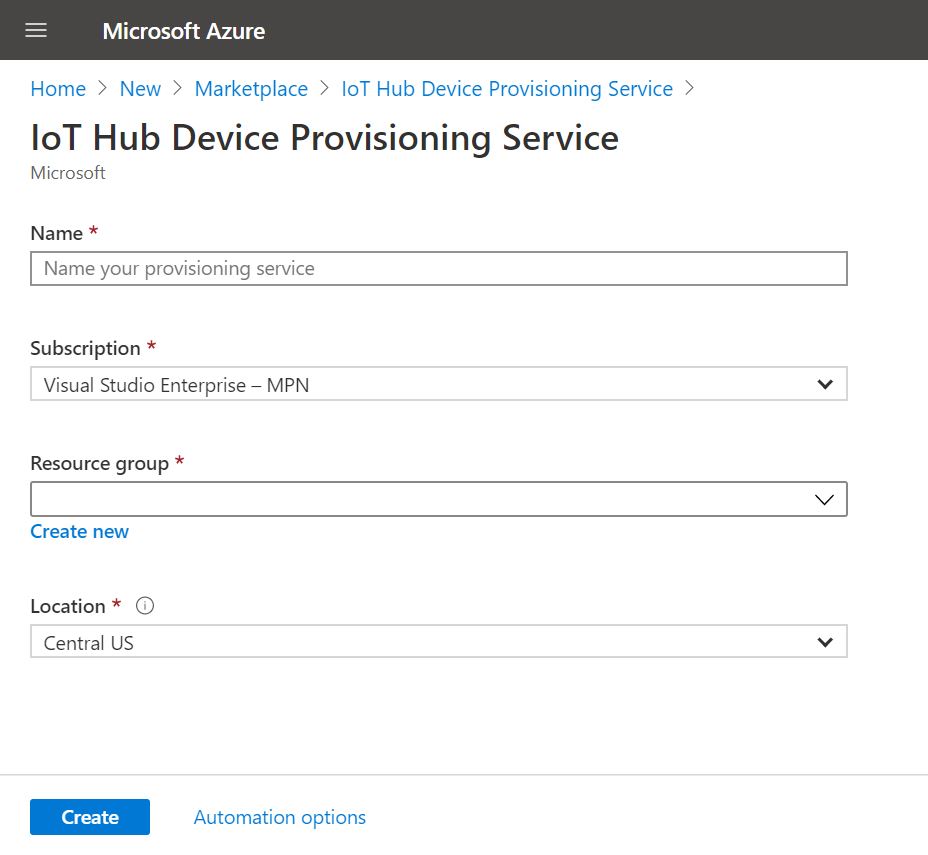
The displayed page allows you to enter the necessary information to create an instance of DPS. Please enter a globally-unique name for your DPS service, along with what Azure subscription you would like it created in. You can create a new resource group or select an existing one, and then finally choose the Location you want the service to be created in. Click Create to create the service.
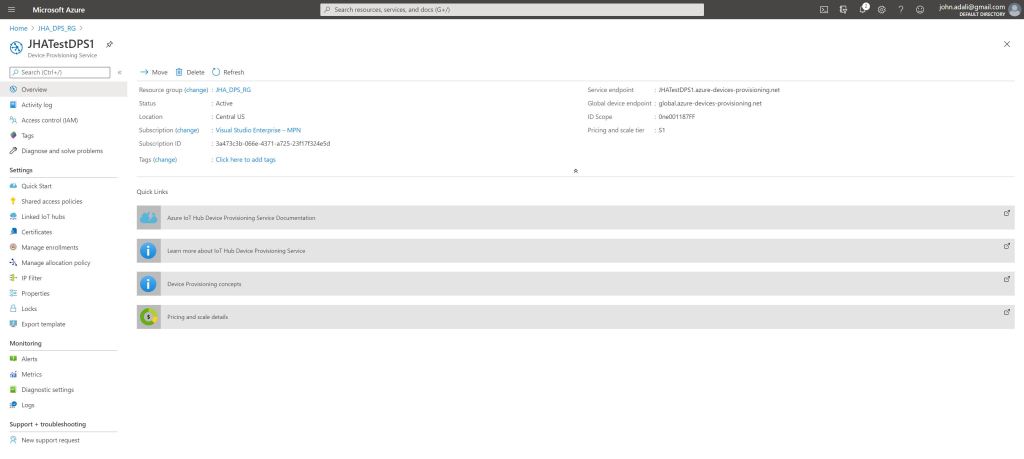
Once created, you can navigate to the resource and information about the service is displayed on the Overview page.
Linking an IoT Hub to DPS
The next step is to connect an IoT Hub instance to the Device Provisioning Service, so that DPS can provision IoT devices to an associated hub. You will need to have a previously created IoT Hub available in your Azure subscriptions.
In order to link an IoT Hub to the Device Provisioning Service, navigate to the Linked IoT Hubs page from the Device Provisioning Service’s menu.
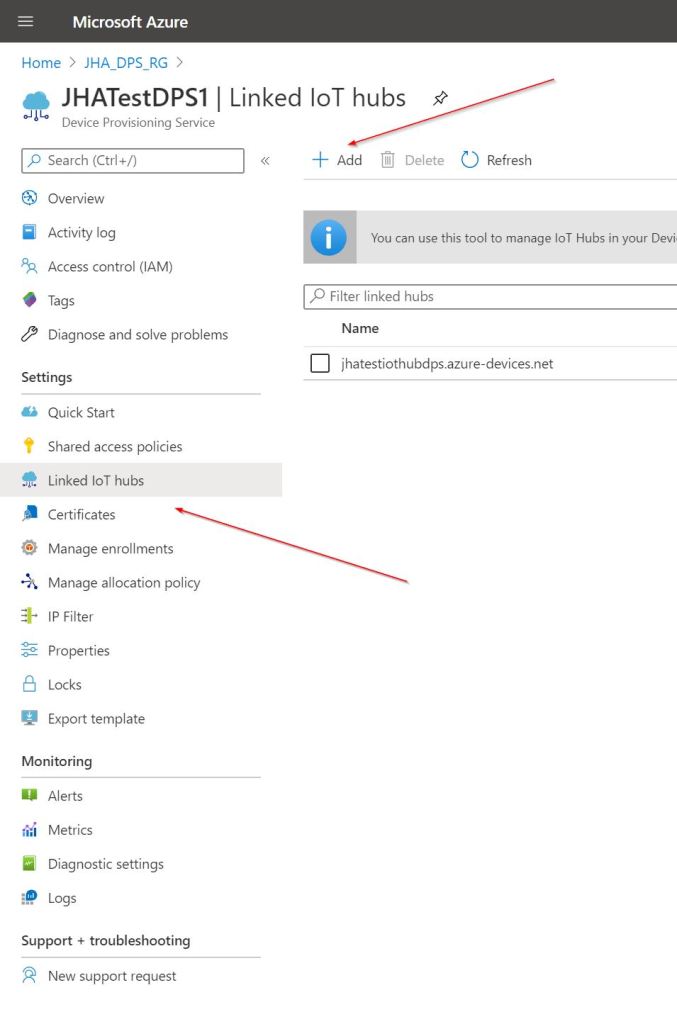
From here, click the +Add button to link an IoT Hub instance to DPS. A blade will appear asking you to enter information about the IoT Hub you want to link.

Selecting an entry in the IoT Hub dropdown will then display an Access Policy dropdown, to which you are required to make a selection here before you can click the Save button to add the IoT Hub as linked to DPS. Once complete, you will see an entry in the Linked IoT Hubs section.
Enrolling devices to DPS
Once you have one or more IoT Hubs linked to the Device Provisioning Service, you are now ready to begin enrolling devices to your service. There are two ways to enroll devices:
- Individual Enrollments
- Enrollment Groups
Individual enrollments represent an entry for a single device and are a good choice if your device has a unique initial configuration or can only use Shared Access Signature (SAS) tokens via TPM as the attestation mechanism. X.509 certificates are also supported with individual enrollments.
Enrollment Groups represent a group of devices that share an attestation mechanism. Groups are a good choice for a large number of devices that share an initial configuration or devices in the same tenant. Enrollment groups use either Symmetric Keys or X.509 certificates. Specifying X.509 certificates indicate that all devices share a signing certificate in the X.509 certificate chain.
Individual Enrollments
The process of enrolling a single IoT device with the Device Provisioning Service is pretty straightforward and you will only need a few pieces of information to complete the process. You can start the process by navigating to the Manage Enrollments section in your DPS instance and then clicking on +Add individual enrollment:
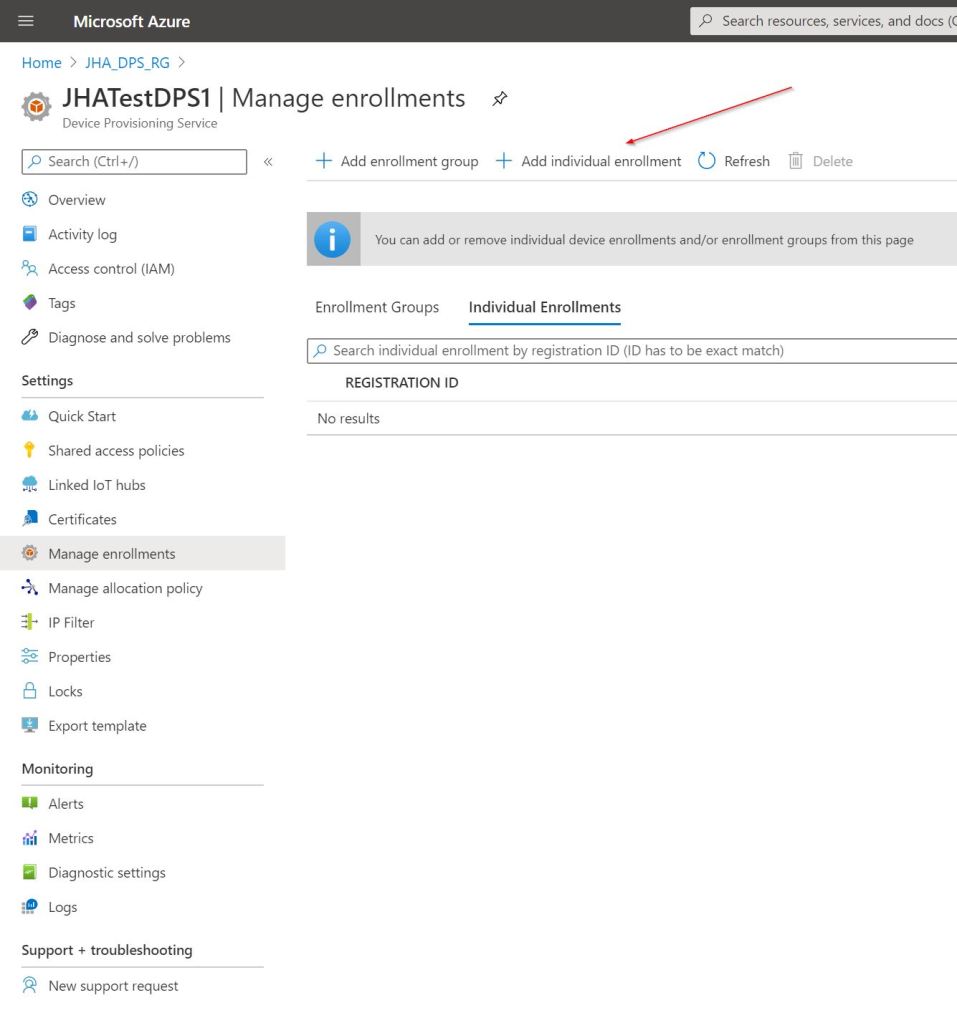
A page will be displayed that asks that you enter some information about the enrollment.

Select the Attestation Mechanism such as X.509, Symmetric Key or TPM. Your selection here will display different controls to enter information. For example, selecting Symmetric Key will display Primary/Secondary Key information, along with Registration ID for the device.

Selecting TPM will then ask for an Endorsement Key, while X.509 will ask for a primary and secondary certificate file.

The IoT Hub Device ID can be specified as the name of your device (as seen in IoT Hub). If you leave this blank the system uses the Registration ID value. You are also able to specify whether the device is an IoT Edge device.
There are a few other fields to look at here:
- Allocation Policy – Allows you to specify how the system assigns the device to a linked IoT Hub (lowest latency, evenly weighted, static or custom)
- IoT Hub(s) device is assigned to – allows selection of one or more linked IoT Hubs
- Re-provisioning Policy – allows either resetting to initial configuration or maintaining device configuration and migrating the data
- Enable Entry – Specifies whether the device is enabled or disabled when the enrollment is created
Finally, there is the definition of the Initial Device Twin for the device. You can add any Desired Properties or Tags that you need for your scenario.
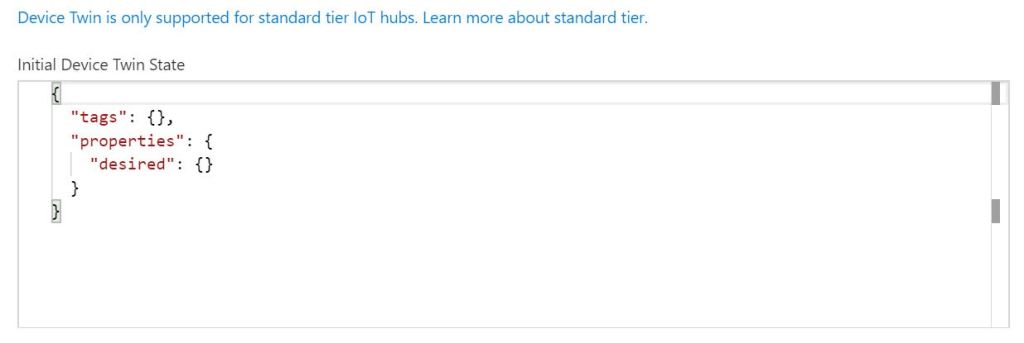
Once the enrollment is successful the next step would be to update the code on the IoT device and execute the device code.
Group Enrollments
The process for enrolling a group of devices is similar to individual enrollments but with some significant differences. You can start the process by navigating to the Manage Enrollments section in your DPS instance and then clicking on +Add enrollment group:
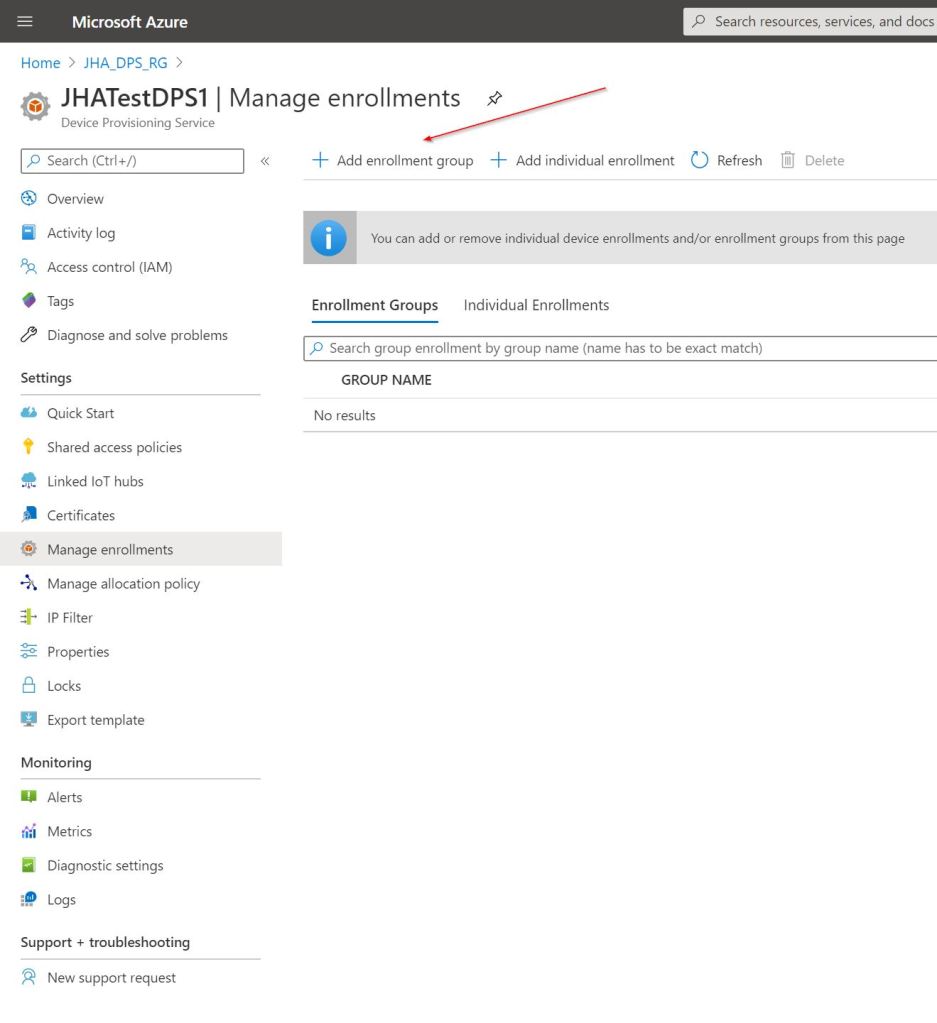
A page will be displayed that asks that you enter some information about the enrollment.
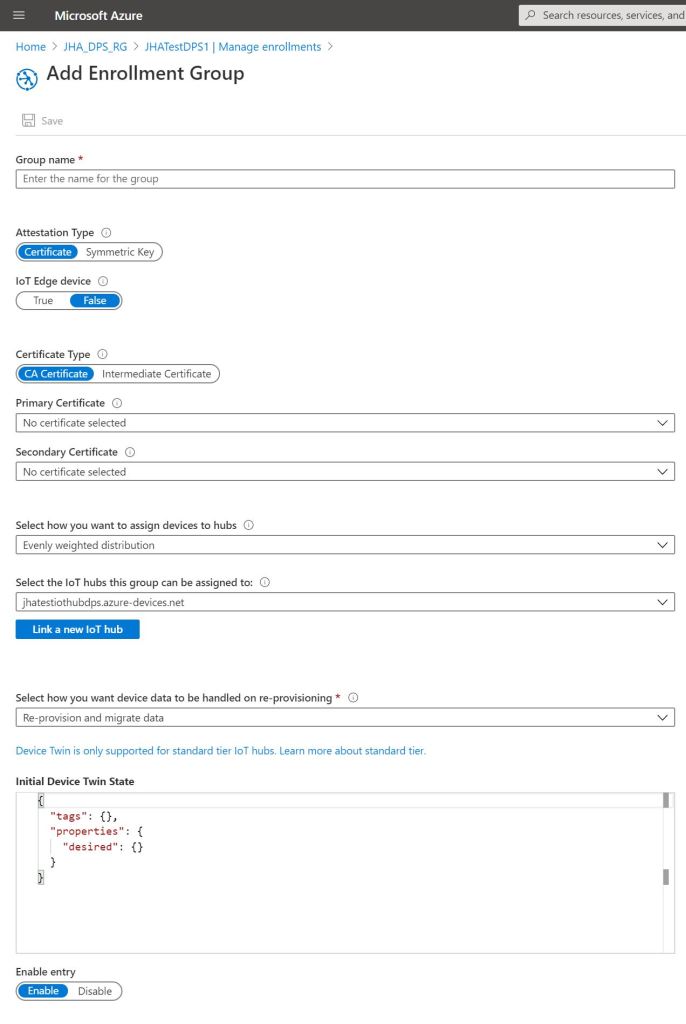
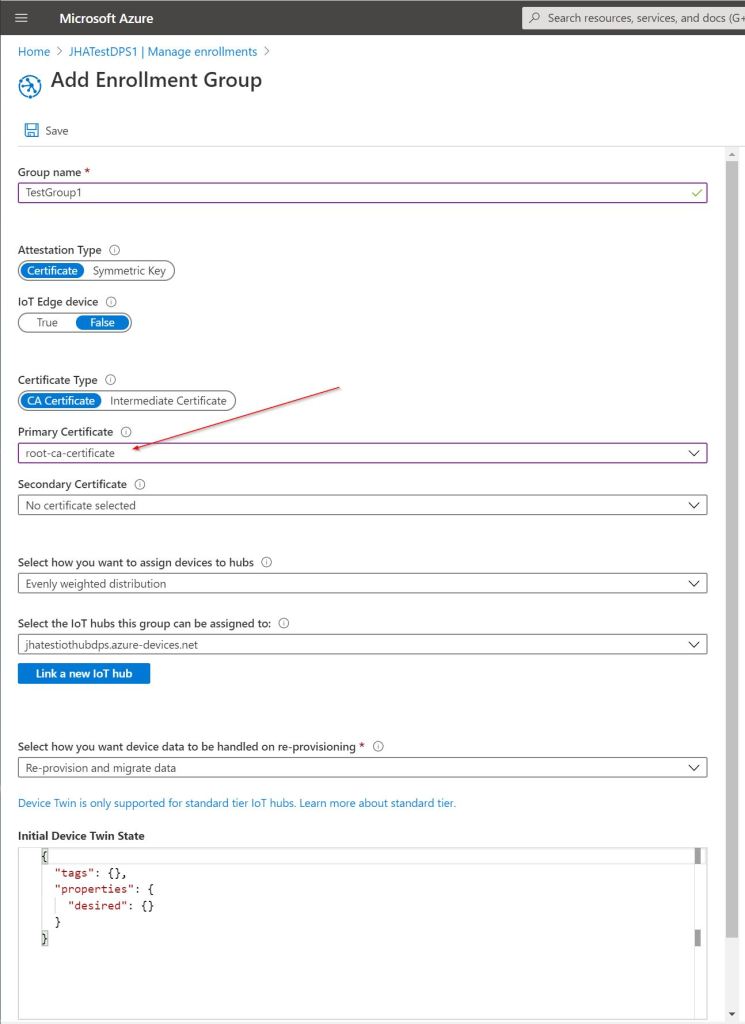
The Allocation Policy, IoT Hub(s) device assigned to, Re-provisioning Policy, Enable Entry and Initial Device Twin State fields are identical in functionality to individual enrollments. Please note that there are only two (2) attestation types for group enrollments: Certificate and Symmetric Key.

Selecting Symmetric Key will display the Primary/Secondary key entries, just like with Individual Enrollments. However, selecting Certificate will require that you select a Primary Certificate and optional Secondary Certificate from a CA (certificate authority). You will also notice that you can specify the Certificate Type as CA Certificate or Intermediate Certificate. This specifies whether the primary/secondary certificate you specify is either a root or intermediate certificate. Please see the Using Certificates section below for further details.
Using Certificates
Using X.509 certificates for either individual or group enrollments in DPS requires that you follow a specific process to properly sign your devices with these certificates.
For individual enrollments, specifying a X.509 certificate requires that your device has a specific certificate that is unique to that device only. That means when you create the certificate for a specific device it is validated against the code on the device. This is necessary to prevent any tampering of the code on the device (meaning it will fail device attestation). The Azure MXChip IoT DevKit example for DPS shows how to use individual enrollment with an MXChip device (https://learn.microsoft.com/en-us/samples/azure-samples/mxchip-iot-devkit-state/sample/).
Group enrollments require that you verify your root CA certificate with a verification certificate that you can create device certificates with (when deploying device code securely). This allows the device certificate to be validated up through the chain (to the root CA) when attestation occurs for a device.
The first step in this process is to create a root CA certificate that you will use in your group enrollment. You can use tools like OpenSSL to help you generate a root CA certificate.
Once you have your root certificate, return to the Azure Portal and navigate to the Certificates section under Settings in your DPS instance.
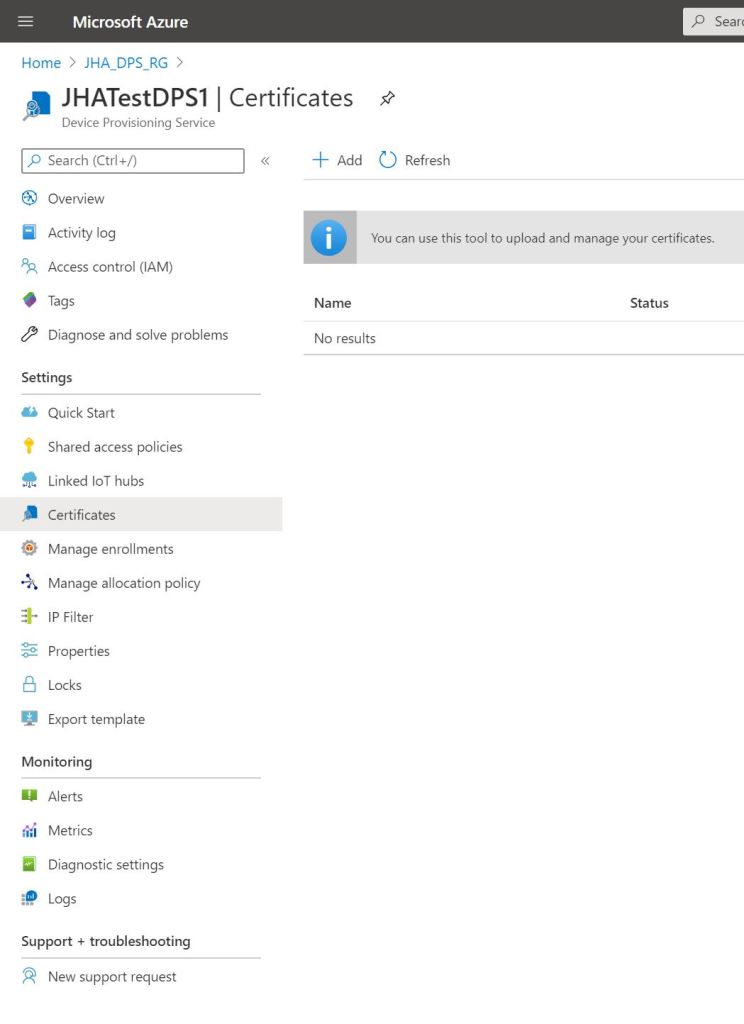
Click on +Add to create a new certificate associated with the Device Provisioning Service. Provide a descriptive name for your cert and add the certificate file (.pem or .cer) and click Save.

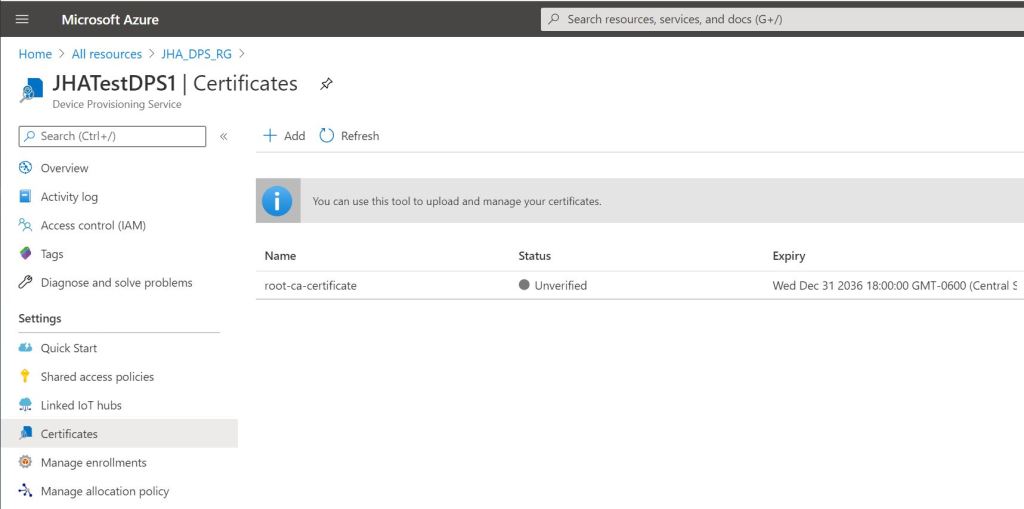
Once added, you will be returned to the Certificates page in DPS, which will now show you the certificate you just added. Note the Status will say Unverified.
You now need to verify the root certificate before you can use it in a group enrollment. This is done by creating a verification certificate using a verification code generated by DPS. Click on the certificate record you just created. A blade will open on the right side of the page with information about your certificate. Click the Generate Verification Code button towards the bottom and the system will generate a code for you. You will use this code to generate a verification certificate file. The Azure IoT SDK source files on GitHub has a certGen.sh tool that will allow you to create this verification certificate with the verification code that was generated.
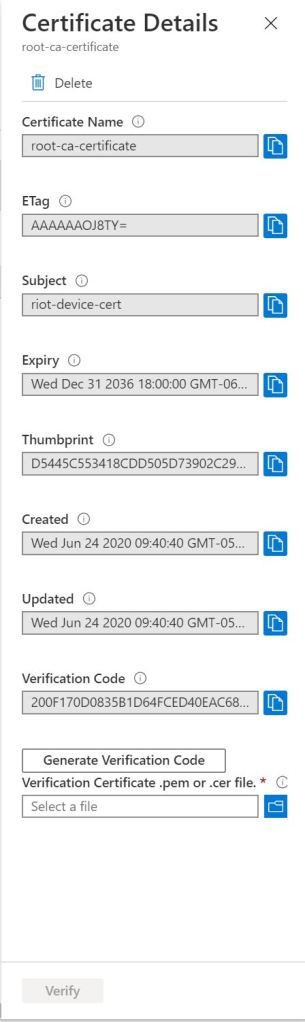
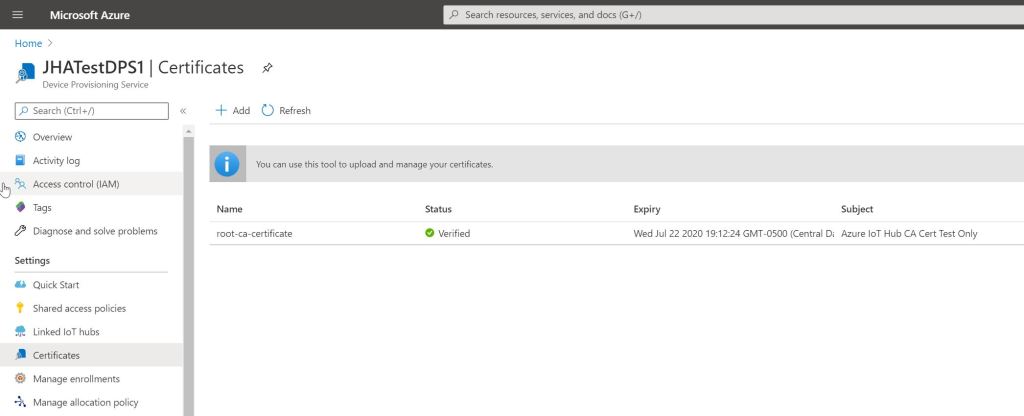
Once generated, return to the Certificate Details page in Azure Device Provisioning Service and add your verification certificate by clicking on Verification Certificate. Once uploaded, the Verify button should light up and you can click on that to have DPS verify the certificate. If successful, you will see that the certificate status will now show as Verified.
The next step is to create the group enrollment in DPS and select the Primary Certificate with the root CA certificate you just uploaded and verified in DPS. Navigate to the Manage Enrollments page in DPS and click on +Add enrollment group to create a group enrollment record. Give the group a name and make sure the Attestation Type is set to Certificate. When you open the dropdown for Primary Certificate you should see the certificate name you created earlier. Select this as your primary certificate and fill out the remaining information and then click Save.
The final step in this process is to create a device certificate for each device in your scenario, using the verified root CA certificate you created earlier. You can then use that device certificate in your device code to authenticate to IoT Hub.
Demos
Please see my video here for demos using Device Provisioning Service.
Conclusion
I hope this article was helpful in explaining what Azure Device Provisioning Service is and how you can use it to deploy your devices securely and at scale. For more information on Device Provisioning Service please visit https://docs.microsoft.com/en-us/azure/iot-dps/.
