
IoT solutions can be complex, especially if you have multiple devices that you need to send to more than one destination in your cloud solution. Azure IoT Hub provides the capability to send your device data to multiple destinations through message routing. This article will describe the available options with message routing and how they are used.
Prerequisites
Before you can use message routing with your devices you will need the following:
- An Azure account. Sign up for a free trial here
- Provision an instance of IoT Hub
- Create at least one device with your IoT Hub
Incoming Messages
The devices in your IoT solution will be sending telemetry data into Azure IoT Hub. Conceptually, you normally think of these messages all being sent to one place and being handled/processed by the hub. However, what if you want these messages sent to different cloud services that may be part of your solution? In the past you might have had custom code to handle these messages and route them appropriately. That made your solution overly complex when you were required to handle all the details about these incoming messages, such as handling transient faults, how to deal with lost messages, and maintaining high reliability.
Fortunately, Microsoft has made this easier for us by providing message routing as part of Azure IoT Hub. IoT Hub will now take care of all those complex details for routing messages so we can focus on our custom IoT solution code. IoT Hub provides scalability for incoming messages, handling transient faults, and how to handle lost messages. The details of message routing are abstracted from us, and we only need to know how to configure the routing to specify where we want our messages to go.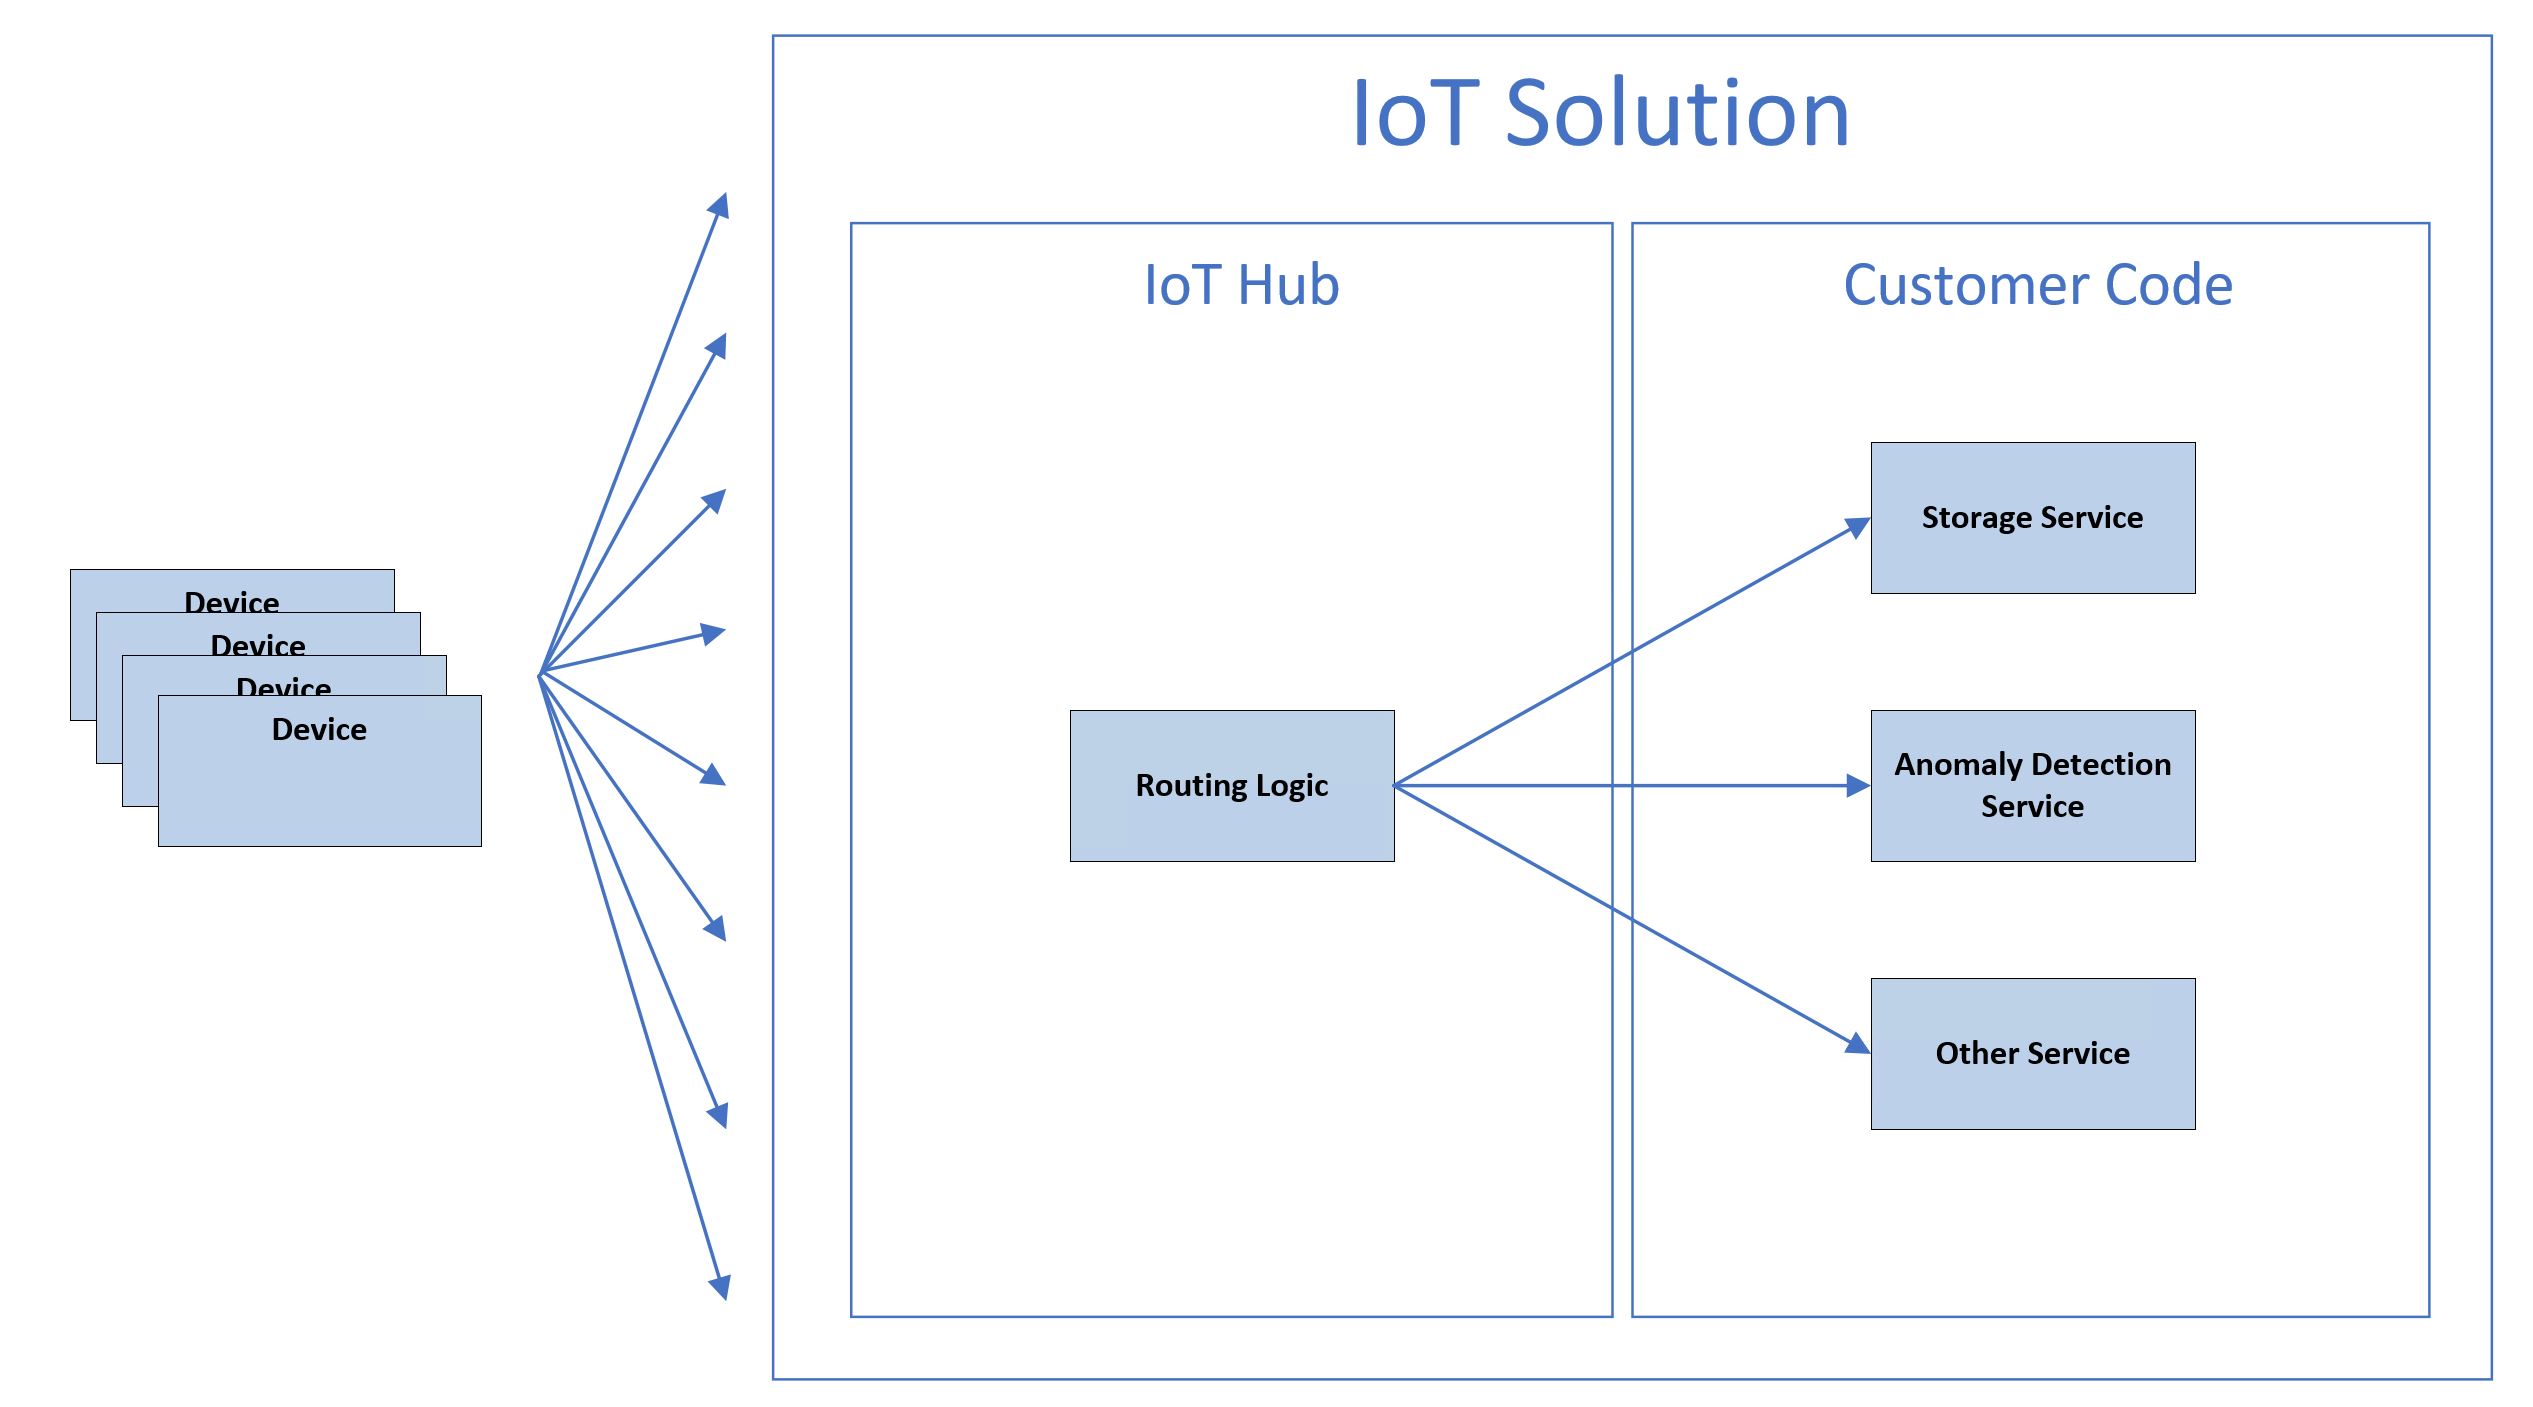
Figure 1: Message Routing
Endpoints
There are a number of places you can route your device messages to by configuring IoT Hub. These are the final destinations of your data, allowing backend processing services to execute actions against the data you route to it. The different types of endpoints are as follows:
- Event Hub
- Service Bus Queue
- Service Bus Topic
- Storage
Also note that paid SKU hubs can have up to 10 additional endpoints while free SKU hubs can only have 1 additional endpoint.
Event Hub
Creating an event hub allows you to route your device data to a specific event hub resource to allow further/dedicated processing. Note that IoT Hub comes with a built-in endpoint that is compatible with this type. Here is an example of adding a new event hub endpoint to IoT Hub:
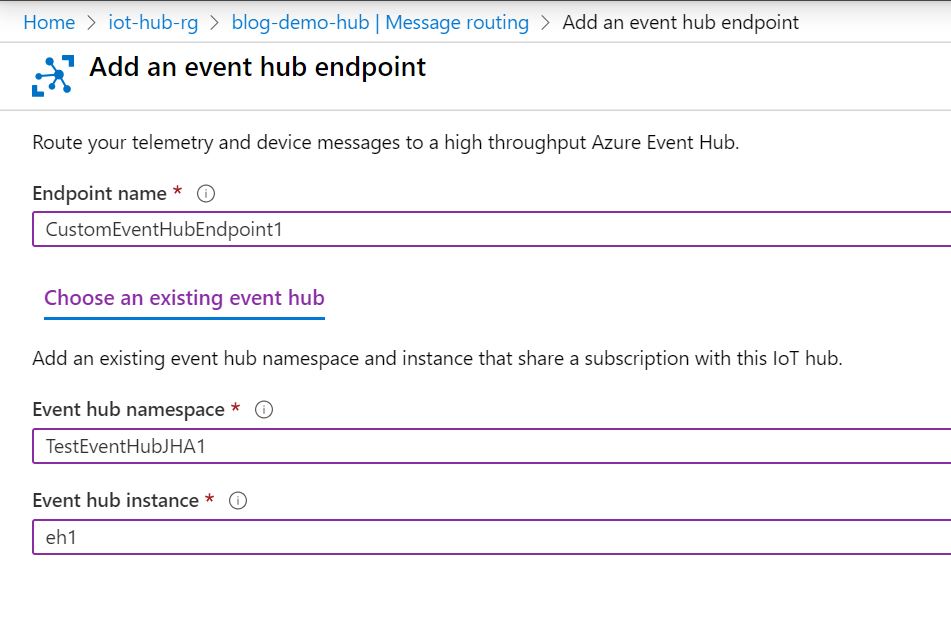
Figure 2: Event Hub Endpoint
Service Bus Queue/Topic
You can create a custom endpoint to a Service Bus Queue/Topic, which would then create a record that can be processed by an Azure function for example. Here is an example of adding a new Service Bus Queue endpoint to IoT Hub:
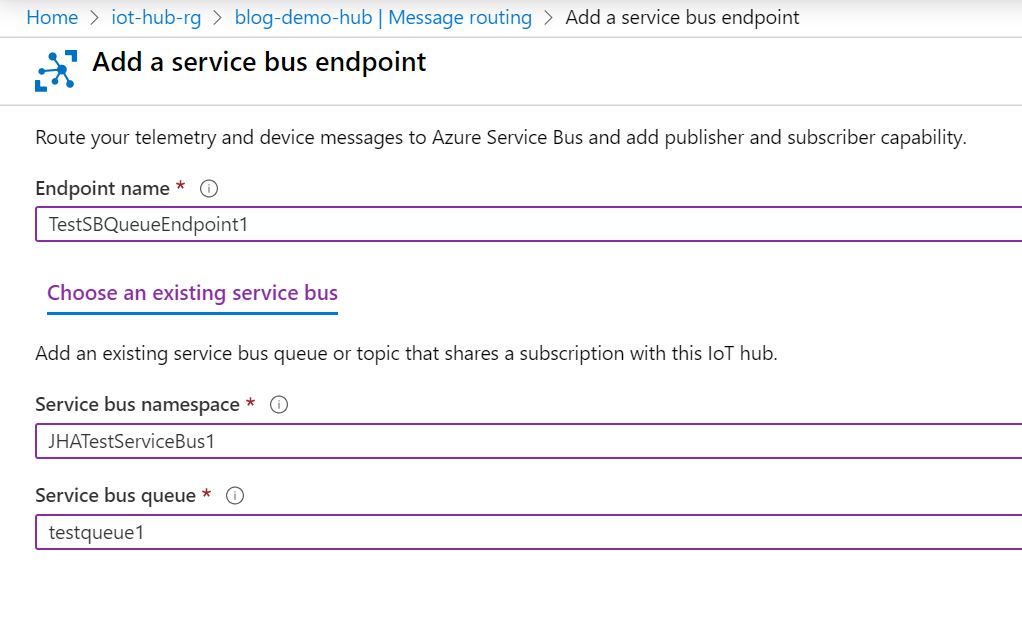
Figure 3: Service Bus Endpoint
Creating a custom endpoint to a Service Bus Topic works in the same way you would create one for a Service Bus Queue, but please note that your Service Bus Namespace must be the Standard (or higher) pricing tier for topics to be available. Also be aware that you cannot create a custom endpoint to a Service Bus Queue/Topic if they have sessions or duplicate detection enabled.
Storage
You can also create a custom endpoint that uses Azure blob storage, allowing the saving of incoming messages to an existing container (as blobs only). Here is an example of adding a new Azure Storage endpoint to IoT Hub:

Figure 4: Storage Endpoint
Batch Frequency specifies (in seconds) the maximum amount of time before the system will batch and write records to Azure Storage. The Chunk Size Window specifies the maximum size of blobs (in MB). Apache AVRO is the default encoding, although you can specify JSON.
Routes
Routes are created/configured to direct the appropriate data source to an endpoint for processing. When you create an endpoint you must specify the Name, Endpoint (built-in or custom), Data Source, and filter query.

Figure 5: Adding a Route
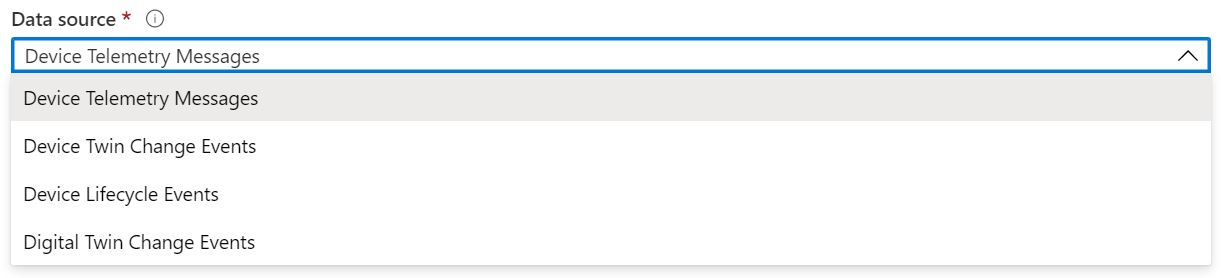
The Data Source field specifies where the data is coming from and must be one of the following selections:
You also have the ability to filter the incoming message data, which can be done using queries in the Routes. IoT Hub defines a common format for all device-to-cloud messaging, and filtering is done by writing a query against this common format. Here is an example:
{
  "message": {
    "systemProperties": {
      "contentType": "application/json",
      "contentEncoding": "UTF-8",
      "iothub-message-source": "deviceMessages",
      "iothub-enqueuedtime": "2017-05-08T18:55:31.8514657Z"
    },
    "appProperties": {
      "processingPath": "{cold | warm | hot}",
      "verbose": "{true, false}",
      "severity": 1-5,
      "testDevice": "{true | false}"
    },
    "body": "{\"Weather\":{\"Temperature\":50}}"
  }
}
Querying on message system properties should prefix a ‘$’ symbol on the query. Queries on application properties do not need this symbol prefixed. For example, querying on the system property ‘contentEncoding’ would look like this:
$contentEncoding = 'UTF-8'
Querying on an application property would look like this:
processingPath = 'hot'
Please note that device-to-cloud messaging is not case-sensitive, so using unique property names is recommended. Here is an example of a query that filters records that have the application property ‘temperatureAlert’ = true.

Figure 6: Message Routing Queries
A fallback route is present so that any messages that do not satisfy any specified query conditions will be sent to this route. The default fallback route is the ‘messages/events’ route that is used by the built-in endpoint (compatible with Event Hub). You can turn on message routing in IoT Hub, which will allow you to create custom routes. Once a custom route is created, data stops flowing to the built-in endpoint unless you specifically create a route to that endpoint. Please be aware that if you delete all custom routes and you disable the fallback route, data will not be sent to any destination.
In addition to telemetry data, routes can be created for other events such as Device Twin changes, Device Lifecycle events and Digital Twin changes (currently in public preview). If you create a route with the data source set to one of these other events, IoT Hub will send messages to the appropriate endpoint for that event (Device Twin, Digital Twin, Device Lifecycle).
Conclusion
In conclusion, using message routing with Azure IoT Hub increases the flexibility, reliability and scalability of your IoT solution. Routing also enables you to keep track of specific events in your solution, such as device twins and device lifecycle. I hope this article has helped you understand the different options for message routing with Azure IoT Hub.
Cheers!
