
Microsoft provides the Azure IoT Hub service to assist in implementing Internet of Things (IoT) solutions. This fully managed Azure service enables reliable and secure bidirectional communication between your IoT devices and a back-end solution hosted in Azure. I am going to review the steps to create an IoT hub in Azure, along with how to register a device and configure tier and scaling options.
Prerequisites
The only prerequisite you need to follow along is an Azure account. You can sign up for a free trial here.
Creating an IoT Hub Instance
Azure Portal
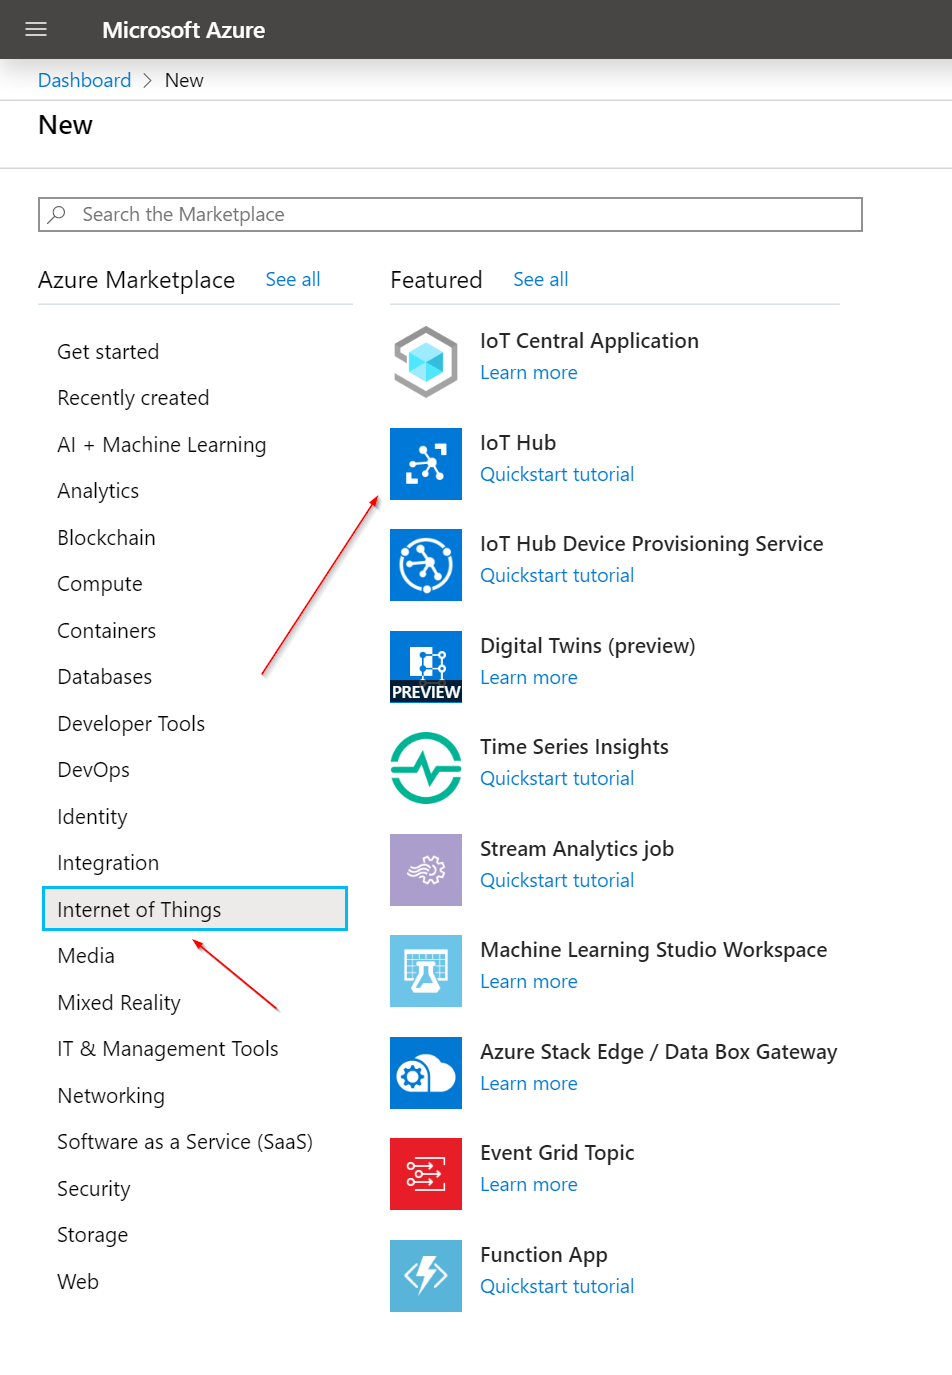
Probably the easiest way to create an instance of IoT Hub is to use the Azure portal. You do this by first logging into the Azure portal with your Azure credentials, and then clicking on Create a Resource in the upper left. This displays a new blade with a number of choices under Azure Marketplace. Click on Internet of Things and you should see the IoT Hub selection, as seen here:
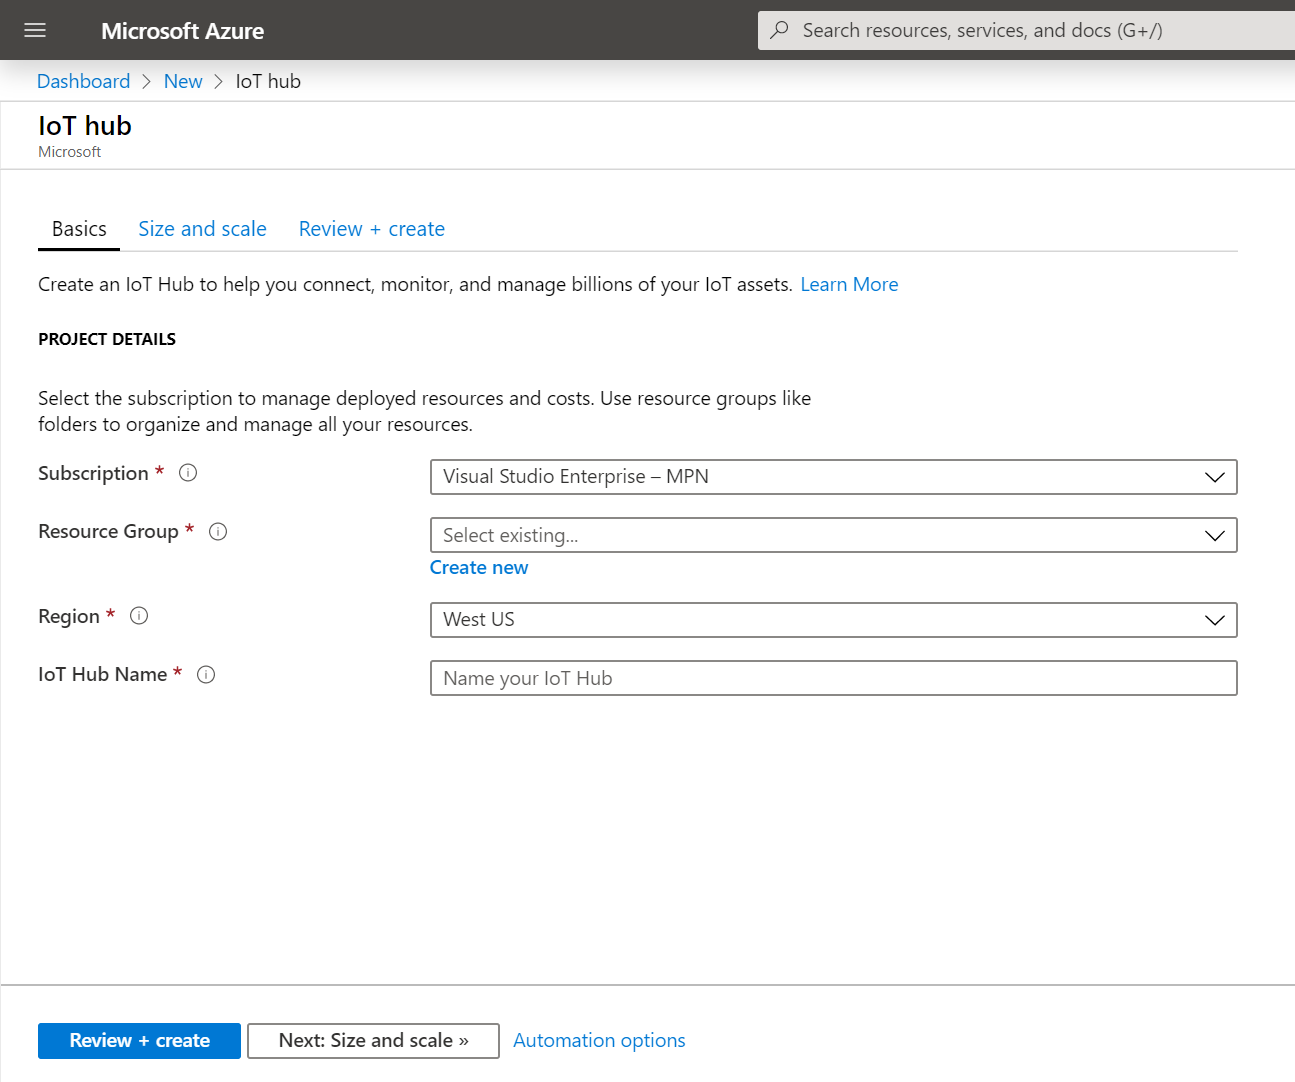
Clicking on IoT Hub will display a new blade that allows you to enter in details of your new IoT Hub, such as the Subscription, Resource Group, Region and IoT Hub name. The Subscription is auto filled with the subscription you are currently logged into. You can select a Resource Group to place the new IoT Hub in or create a new one. Region specifies the location that your IoT Hub will be created in, and the IoT Hub Name is a globally unique name you give to your IoT Hub.
Clicking Next: Size and Scale takes you to the next screen which allows you to select a pricing tier for your IoT Hub, along with the number of IoT Hub units allocated. The pricing tiers include a Free Tier as well as 3 levels of either Basic or Standard Tiers (B1-3, S1-3 respectively). The choice you make here determine a number of options relating mainly to data throughput and scaling. Details are here.
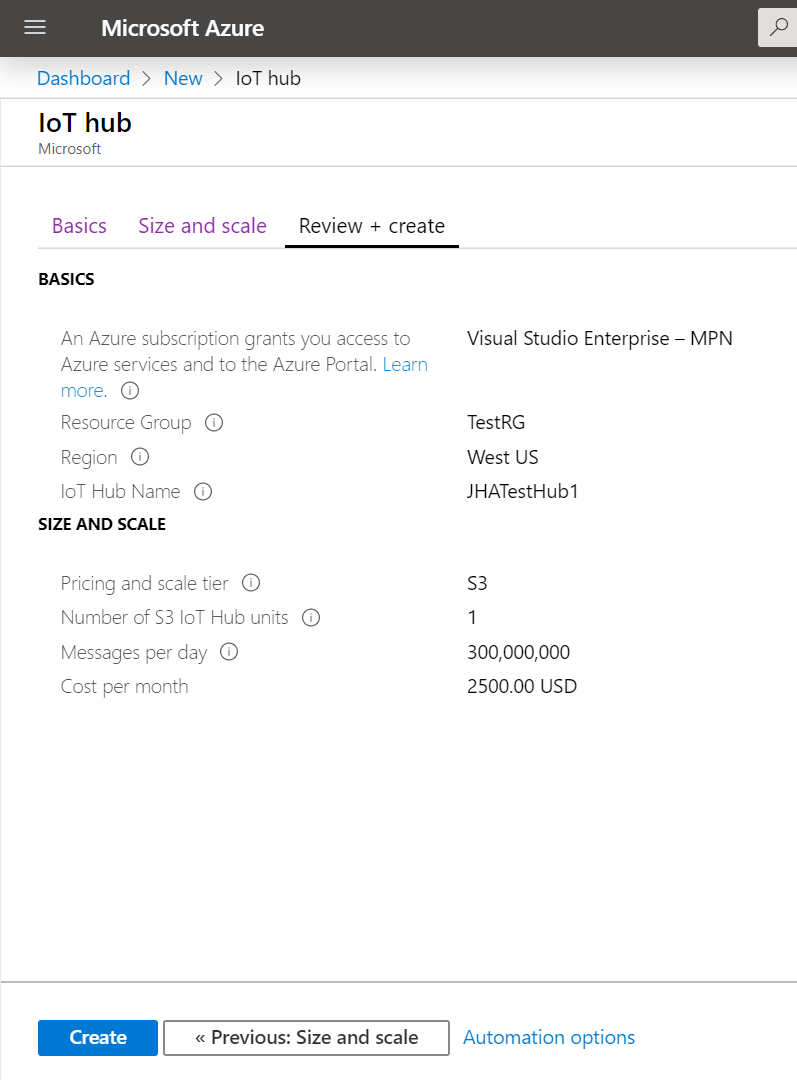
At the time of this writing, the highest pricing tier selection is S3: Standard Tier as shown below:

Clicking Review + create will take you to a summary page listing out the selection choices you made. Clicking Create here will instruct the Azure Portal to create the IoT Hub with the choices you selected.
Azure CLI
Another way to create an instance of IoT Hub is by using the command-line interface (CLI). Azure hosts an interactive shell environment called Azure Cloud Shell that you can use to execute CLI commands. You can launch Azure Cloud Shell by either going to https://shell.azure.com in your browser, or by clicking on the Cloud Shell button in the upper right in the Azure Portal.

Once you are in your Cloud Shell environment, you can execute the following command to create an instance of IoT Hub:
az iot hub create --name {your iot hub name} --resource-group {your resource group name} --sku S1
The only required parameters are the name of your IoT Hub along with the resource group it will be associated with. Insert a globally unique name for your IoT Hub along with the name of an existing resource group. The optional –sku parameter designates what pricing tier to create the IoT Hub with. Pricing details are located here.
There are additional optional parameters when creating an IoT Hub and are listed here.
Configuring IoT Hub Tiers
There are two tiers for Azure IoT Hub: Basic and Standard. You should consider what your IoT solution is designed to do before you select a tier. The difference between Basic and Standard tiers are the number of features they support. A Free tier is also provided, which has all the functionality of the Standard tier but has limited messaging allowances.
If your solution collects data and you are analyzing it centrally, then the Basic tier is probably the best choice. If you want to use advanced configurations to control your IoT devices remotely, or you want to distribute some of your workloads to the devices themselves, then the Standard tier is probably the best choice.
Each tier has three levels, listed in numerical order (1, 2, 3). The difference between these three levels is how much data they allow to be send from devices per day:
- B1, S1 tiers: 400,000 messages/day/unit
- B2, S2 tiers: 6 million messages/day/unit
- B3/S3 tiers: 300 million messages/day/unit
The following features are available in all IoT Hub tiers:
- Device-to-cloud telemetry
- Per-device identity
- Message routing, enrichments and Event Grid integration
- HTTP, AMQP, and MQTT protocols
- Device Provisioning Service
- Monitoring and diagnostics
The following features are only available in the Free/Standard IoT Hub tier:
- Cloud-to-device messaging
- Device twins, Module twins, and Device Management
- Device streams (preview at the time of this blog)
- Azure IoT Edge
- IoT Plug and Play (preview at the time of this blog)
Registering Devices
Once you have your IoT Hub instance created, you can register one or more devices identities that you intend to use with your IoT Hub.
Azure Portal
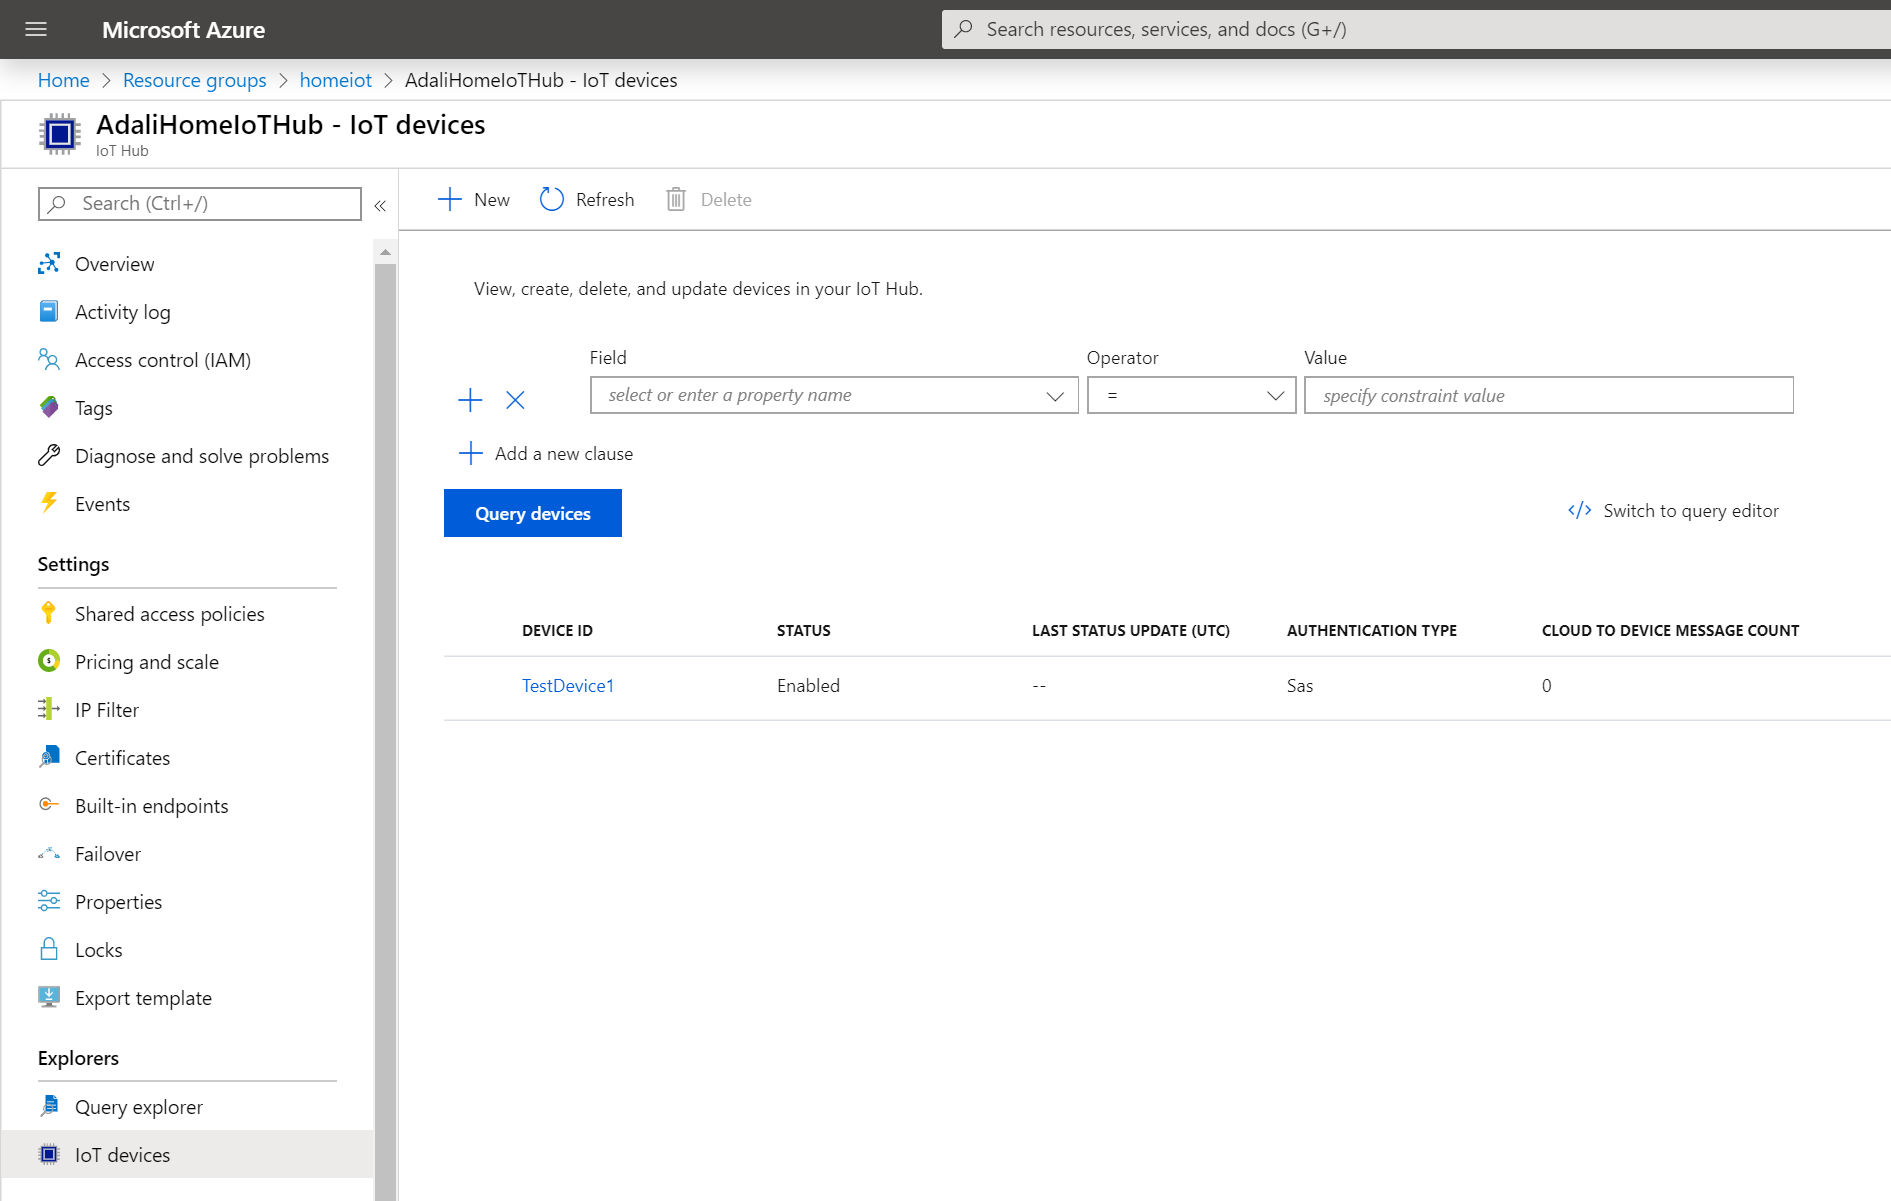
After you log in to the Azure Portal, navigate to your IoT Hub and click on the IoT Devices selection (under Explorers section):

This will display a list of the current devices created for the IoT Hub. You can click on the + New link towards the top of the page and a new blade will be displayed, allowing you to enter the following information about your device:
- Device ID – enter a name for the device. This is used for authentication and access control
- Authentication Type – select how the device will authenticate to IoT Hub. Symmetric Key is the default and allows entry of the primary/secondary keys (see below). X.509 Self-Signed and X.509 CA Signed allow you to select security certificates for the device (certificate created prior)
- Primary/Secondary Keys – allows you to set a unique value for accessing the device. Disabled if auto-generate keys is checked (valid for Symmetric Key authentication type only)
- Auto-generate keys – this will instruct Azure to generate unique values automatically for the primary/secondary keys (valid for Symmetric Key authentication type only)
- Connect this device to an IoT Hub – specifies if this device will interact with this IoT Hub
- Parent Device – specify if this device has a parent device. Used for IoT Edge

Clicking Save will instruct the Azure Portal to create the device with your selections. Once completed, you can access the device details by clicking on its name in the list of devices:

Azure CLI
You can also register device identities with your IoT Hub using Azure CLI. Execute the following command in your Cloud Shell instance, replacing {iothub_name} with your IoT Hub name and {device_id} with the name you wish to use for your device:
az iot hub device-identity create -n {iothub_name} -d {device_id}
The console will emit a JSON string upon success which give information about the device you just registered, such as primary/secondary key values, its connection state and whether it has IoT Edge capabilities:

You can verify in the Azure portal that the device is registered by navigating to the IoT Devices section in your IoT Hub. Your newly-registered device should be displayed in the list:
Additional parameters can be found here.
I hope this article has helped you understand what Azure IoT Hub is and how to create an instance and register your IoT devices to it, so you can begin sending data to Azure.
Cheers!
