
This is the second article on how you can configure Dynamics CRM without writing code. In Part 1, I described the configuration options with System and Custom entities, as well as explaining how to use Business Rules. In this article, I will describe how you can configure Dynamics CRM using Workflows and Dialog, Business Process Flows, and Dashboards/Reports.
Workflows and Dialogs
Dynamics CRM provides an engine that can run business processes automatically or interactively. This engine allows administrators to create and manage these automated business processes in order to provide customized functionality to the CRM environment.
Workflows are business processes that run automatically, with little or no interaction with the user. These processes can be configured to run in the background or in real-time, and can be triggered automatically (based on a specified condition). They can also be started manually by a user.
For example, I can create a workflow by opening a solution in CRM and navigating to the Processes area. Once there, I can click on the New button to create a new process (see Figure 1).

Figure 1: Creating a new Workflow
New workflows start in a Draft state, which means they are not activated in the system. This allows you to create the workflow and add your logic to it, before you activate it. Figure 2 shows an example of a workflow in Draft state.

Figure 2: Workflow in Draft state
There are a number of areas when configuring a workflow that define what it does and how it runs. First off, you give it a name so you can recognize your workflow. Under the Available to Run section, you see there are a few checkboxes that allow you to define how the workflow will run in the CRM system. Selecting the Run this workflow in the background option will specify that the workflow runs in the background asynchronously. Unchecking this box specifies that the workflow will run as a real-time workflow, which means it runs synchronously (immediately).
The checkbox under the Workflow Job Retention section allows you to save (or delete automatically) the completed workflow jobs after it runs each time. Checking this box clears these records immediately, so that you can save disk space in your system. Be careful though – I have found that it’s nice to have these records around for a period of time, as you can determine if the workflow is running successfully.
The Entity and Category fields tell you what entity in CRM you are running the workflow against, and that the Category is a Workflow.
Under the Options for Automatic Processes section, you can define the workflow scope. This tells the workflow to run for a specific set of records, as listed below:
- User – workflow only runs against the records owned by the current user
- Business Unit – workflow only runs against the records owned by the business unit the current user belongs to
- Parent: Child Business Units – workflow only runs against the records owned by business unit and the child business units the current user belongs to
- Organization – workflow runs against any record in the organization
There are also checkboxes that specify what triggers the workflow. You can select when a record is created, record status changes, record is assigned, or when a record is deleted. You can also select when specific fields on the entity record change.
Once you’ve configured how the workflow should run, the main part of the workflow is defining what it does when it runs. This is done by creating one or more steps. Figure 2 shows the area in the workflow that allows you to create steps. Here is where you can add steps and their conditions, along with actions on what each step does. For example, Figure 2 shows a step that indicates that if the Opportunity:Presales Resource field = Yes and the Opportunity:Presales Resource field contains data, then the workflow should then check to see of the Opportunity:Probability <= 20. If it is, the action of sending an email is performed.
Once you’ve added all your steps and have saved the workflow, you can publish it to activate it into the CRM system. At this point, you would activate your workflow in a development system to test its functionality (before deploying it to a production system). You also have the ability to see when your workflow has executed (in your solution that contains the workflow), as shown in Figure 3. This view allows you to see what instances of your workflow has run, along with the status of their execution. You can drill into each record to see the details of the workflow execution, such as what steps performed successfully, or where it failed.

Figure 3: Workflow Process Sessions
Dialogs are very similar to workflows, as they are also business processes. However, these processes are designed to run and interact with the user. You create a dialog in the same way as a workflow process (except you select Dialog instead of Workflow category), and you will notice in Figure 4 that there are less configuration options than in workflows.

Figure 4: Configuring Dialogs
You still create steps in a dialog with actions, but you will notice there is a Prompt and Response selection, under a Page step. This is where you create and configure the dialog prompts that the users will see when the dialog runs. Figure 5 shows an example of a dialog prompt. You also have the ability to define what the prompt will say and how the user will respond.

Figure 5: Dialog Response Prompt Configuration
Business Process Flows
Business Process Flows are another type of process in Dynamics CRM, but they differ in how they provide functionality to users. I like to think of Business Process Flows (BPFs) as a guide in Dynamics CRM that helps users follow a set of steps to complete a process. BPFs have a visual component as well as back-end functionality that perform tasks or actions when the user is interacting with the BPF. They differ from workflows in that they have a UI component that users interact with while using the system. They also differ from dialogs in that they are persist on specific record types, meaning they are part of the displayed form. They are not triggered by an action and therefore do not “popup” a window to request that users add information at that point.
Administrators have the ability to create custom BPFs in Dynamics CRM, or you can use one of the following standard BPFs that come with Dynamics CRM. Some examples of standard BPFs are:
- Lead to Opportunity Sales Process
- Opportunity Sales Process
- Phone to Case Process
The standard BPFs are good for general processes that you can have CRM users follow, but the real power of BPFs are displayed when you create a custom BPF that matches your business process. Figure 6 shows the Opportunity Sales Process that comes with Dynamics CRM.

Figure 6: Opportunity Sales Process BPF
Creating a Custom Business Process Flow
Creating a BPF doesn’t require specific coding skills, as CRM has provided an editor that allows administrators to create these processes without having to write code. You can navigate to the Settings area in CRM and click on Processes. This will navigate you to the My Processes view, which will show you a listing of processes owned by you:
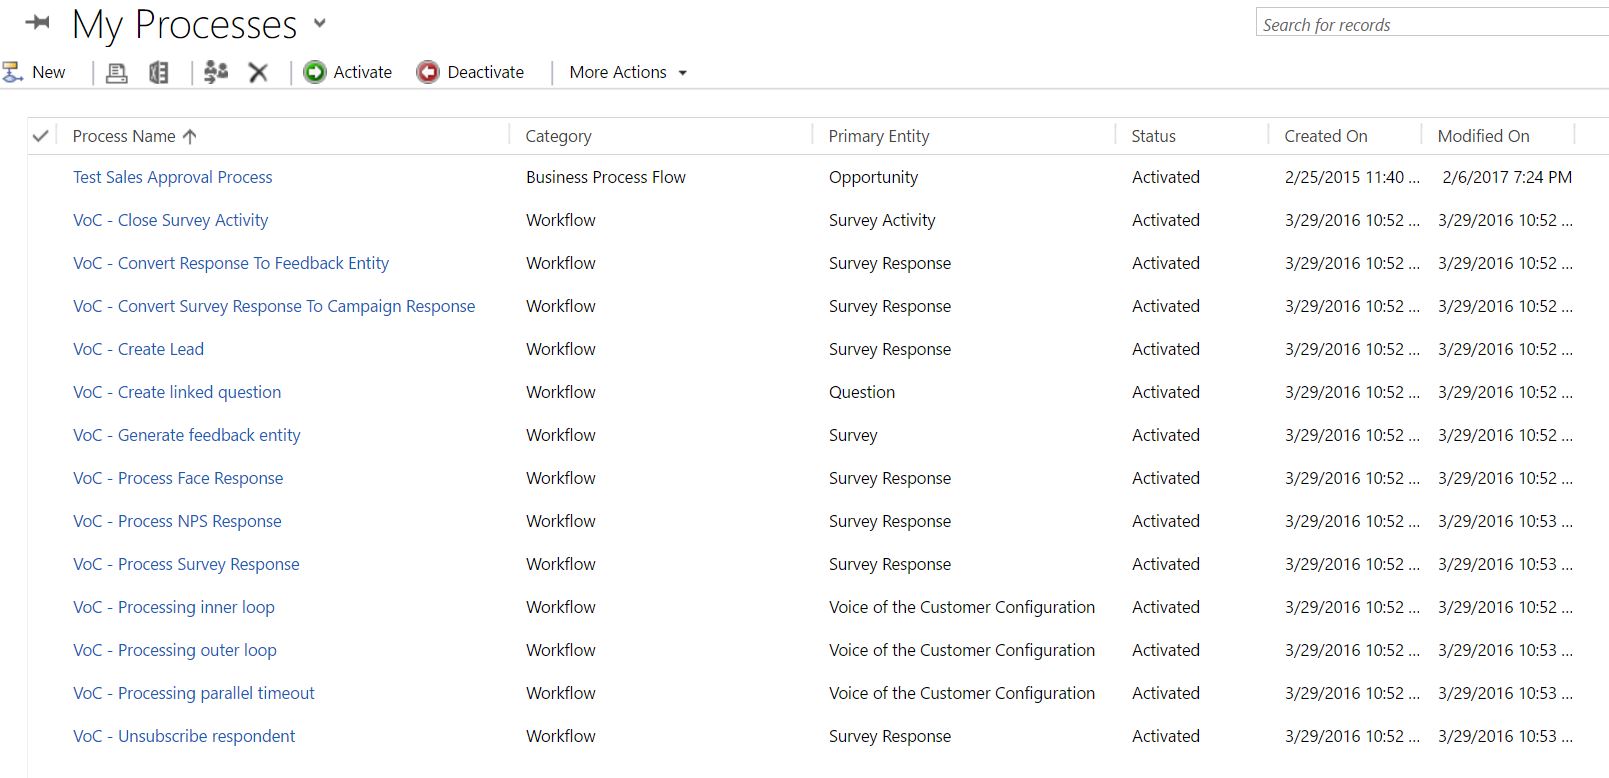
Figure 7: My Processes View
From here, you can see which processes are in the system that are owned by you. This includes both workflows and BPFs. You can create a new BPF by clicking on the New button in the upper right. Once you click this, a designer is displayed that allows you to create a custom Business Process Flow (see Figure 8).
Business Process Flows consist of stages and steps. Stages are the different parts of the BPF that users can navigate back and forth from. Stages also contain one or more steps. Each step represents a piece of data that can be entered for the entity record the BPF is associated with. Figure 8 shows an example of a custom BPF with stages and steps:
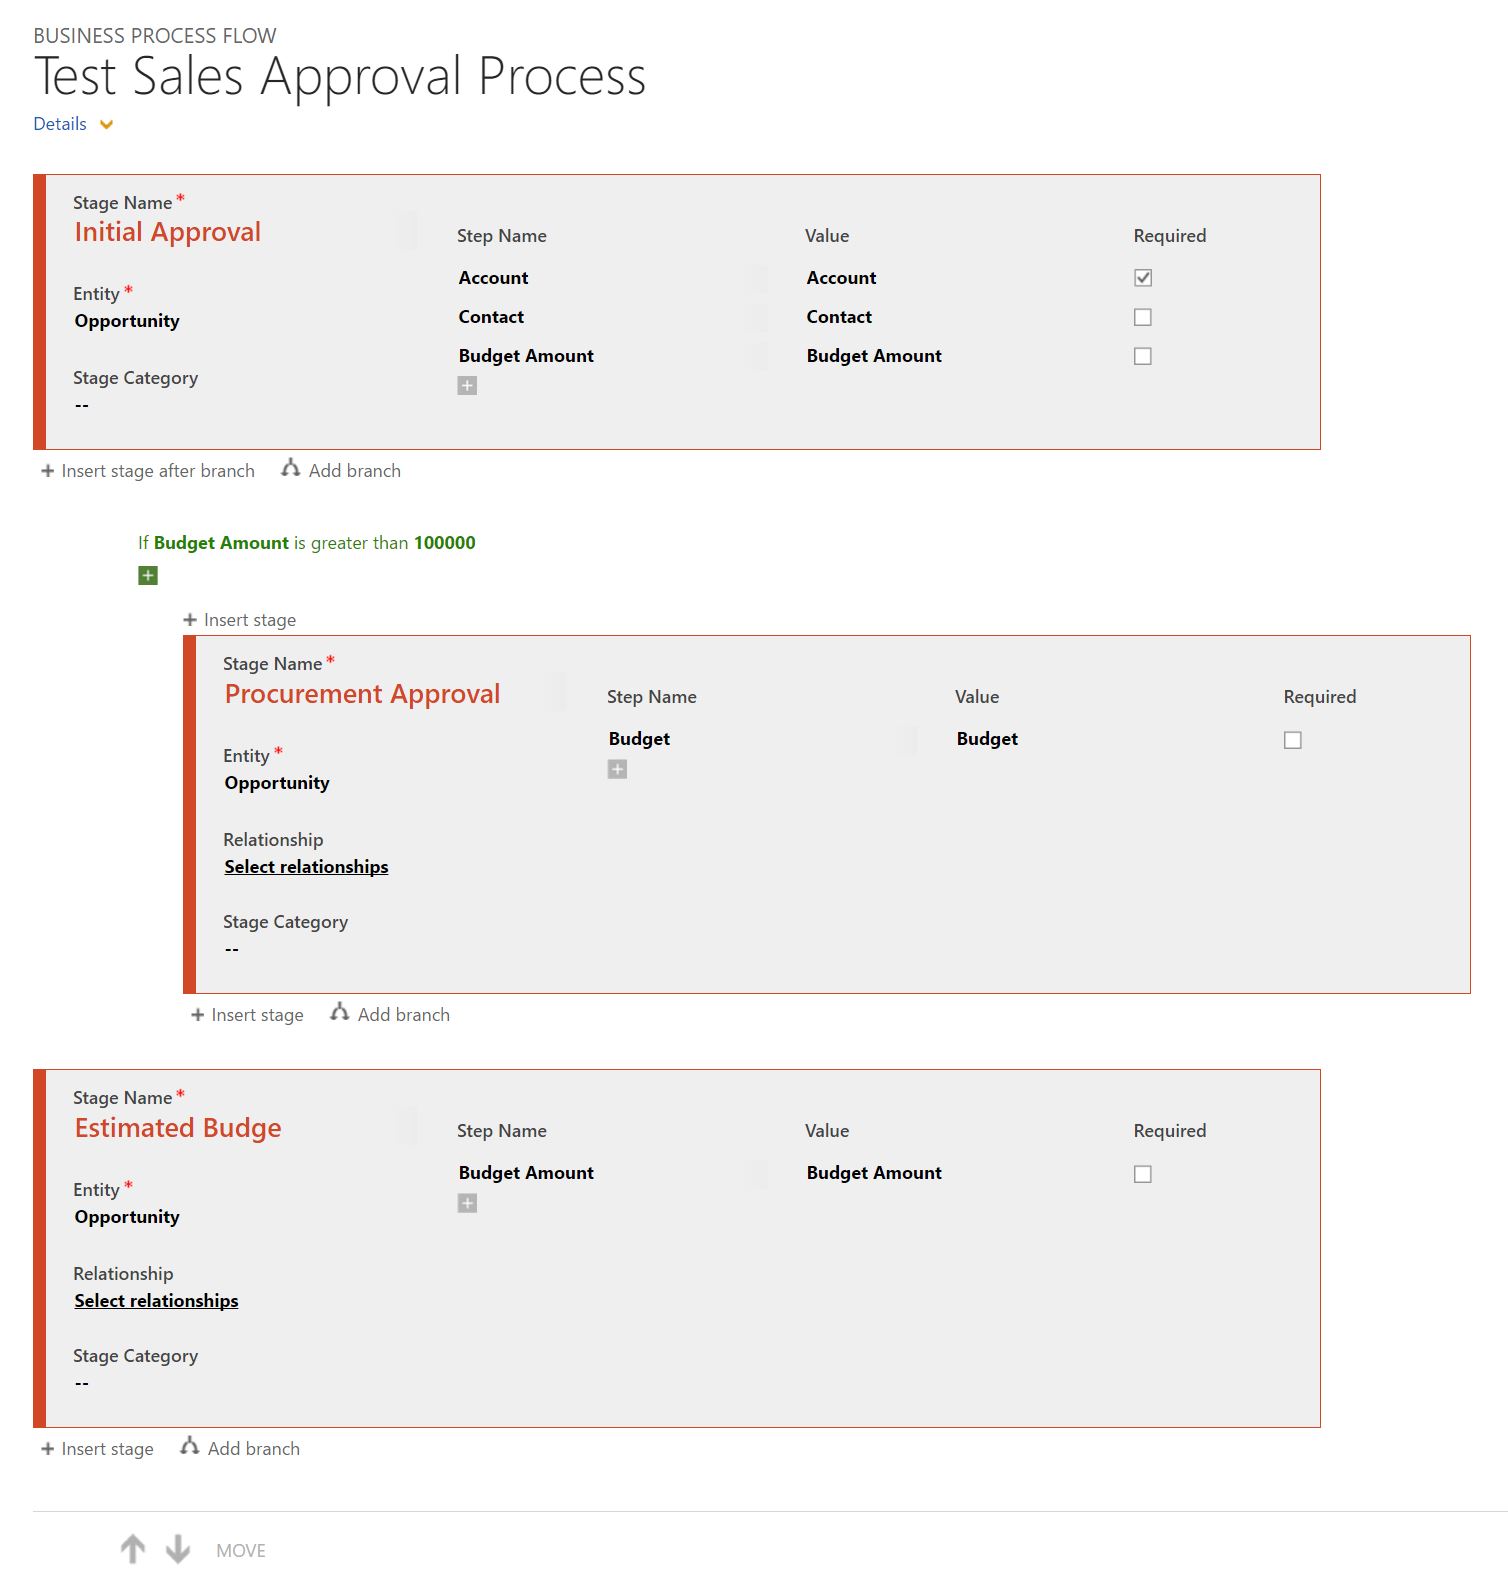
Figure 8: Custom BPF with Stages and Steps
Note that when you create steps for a stage, you specify a field on the entity record the BPF is associated with. You can also designate whether the step is required. This means that the user cannot advance to the next stage until a value is entered for each of the required step fields in the stage (commonly known as stage-gating).
You will also notice from Figure 8 that there is a branched stage in the BPF. Branching BPFs gives the ability for a stage to only be displayed (and active) if a certain condition is met. In our example, the Procurement Approval stage is only displayed if the Budget Amount value (Step in Stage 1) is greater than $100,000. Figures 9 and 10 show what this branching looks like when the Budget Amount is above or below the $100,000 threshold.

Figure 9: Custom BPF with Branch Hidden

Figure 10: Custom BPF with Branch Displayed
Once you’ve created your custom BPF, you must activate it for it to be used in the system. All new BPFs you create start in a Draft state. You can have more than one BPF active in the system for an entity, and if you do there is an order to which BPF will be attached to the entity record (based on the first BPF the user has access to, via security roles). Figure 11 shows the Process Order Flow dialog for a custom BPF:

Figure 11: Process Flow Order Dialog
Dashboards and Reports
There are two different ways Dynamics CRM displays data in the system: Dashboards or Reports. This section will describe each and how they are used.
Dashboards
Dashboards display data from CRM as an overview of business data. Users can see data that they can perform actions against, and this data is usually displayed across the organization. If you wish to see CRM data at a glance, creating a dashboard will help you do that.
There are two types of dashboards in CRM: System Dashboards and User Dashboards. System Dashboards are created by a System Administrator or Customizer and these dashboards are visible to the entire organization. User Dashboards are created by CRM users and are only visible to the CRM user who created it. User Dashboards can be shared by the CRM user to other users, so that others can view the dashboard.
For either type of dashboard, CRM users have the ability to set the default dashboard they wish. System dashboards can be marked as the default dashboard for a specific area (Sales, Marketing, etc.) but if a user marks a different dashboard as their default (System or Custom) it will override the System dashboard that is marked as the default. Figure 12 shows an example of a default System dashboard.
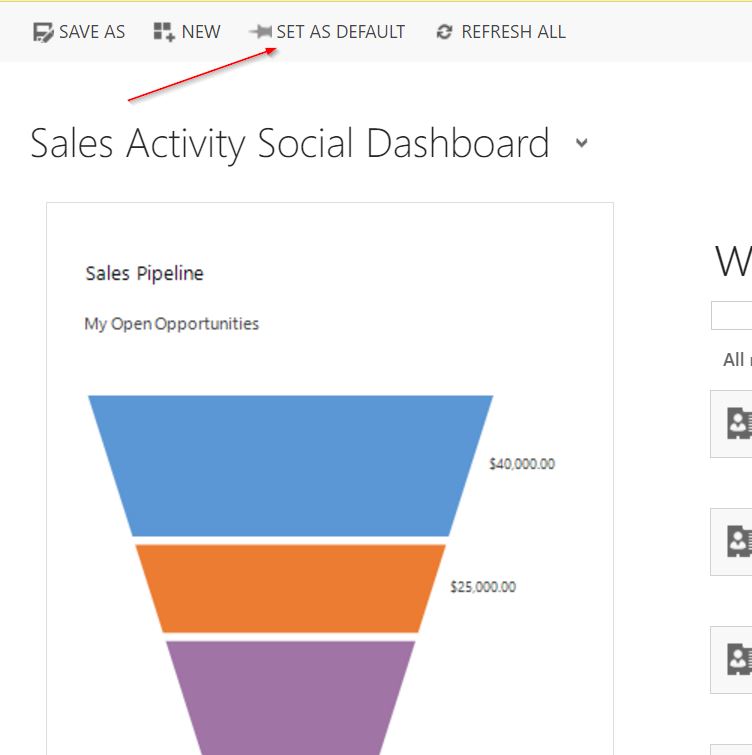
Figure 12: Dashboards in Dynamics CRM
Dashboards can also be created to display either tabular data (like a view) or graphical data (like charts). Other types that can be included in a dashboard are Web Resources or IFrames. Users also have the ability to drill down into a dashboard chart to see the tabular data it represents. This gives the user the added functionality of being able to examine specific sets of data in a dashboard in more detail. Figure 13 shows a System dashboard with both tabular data and a chart:
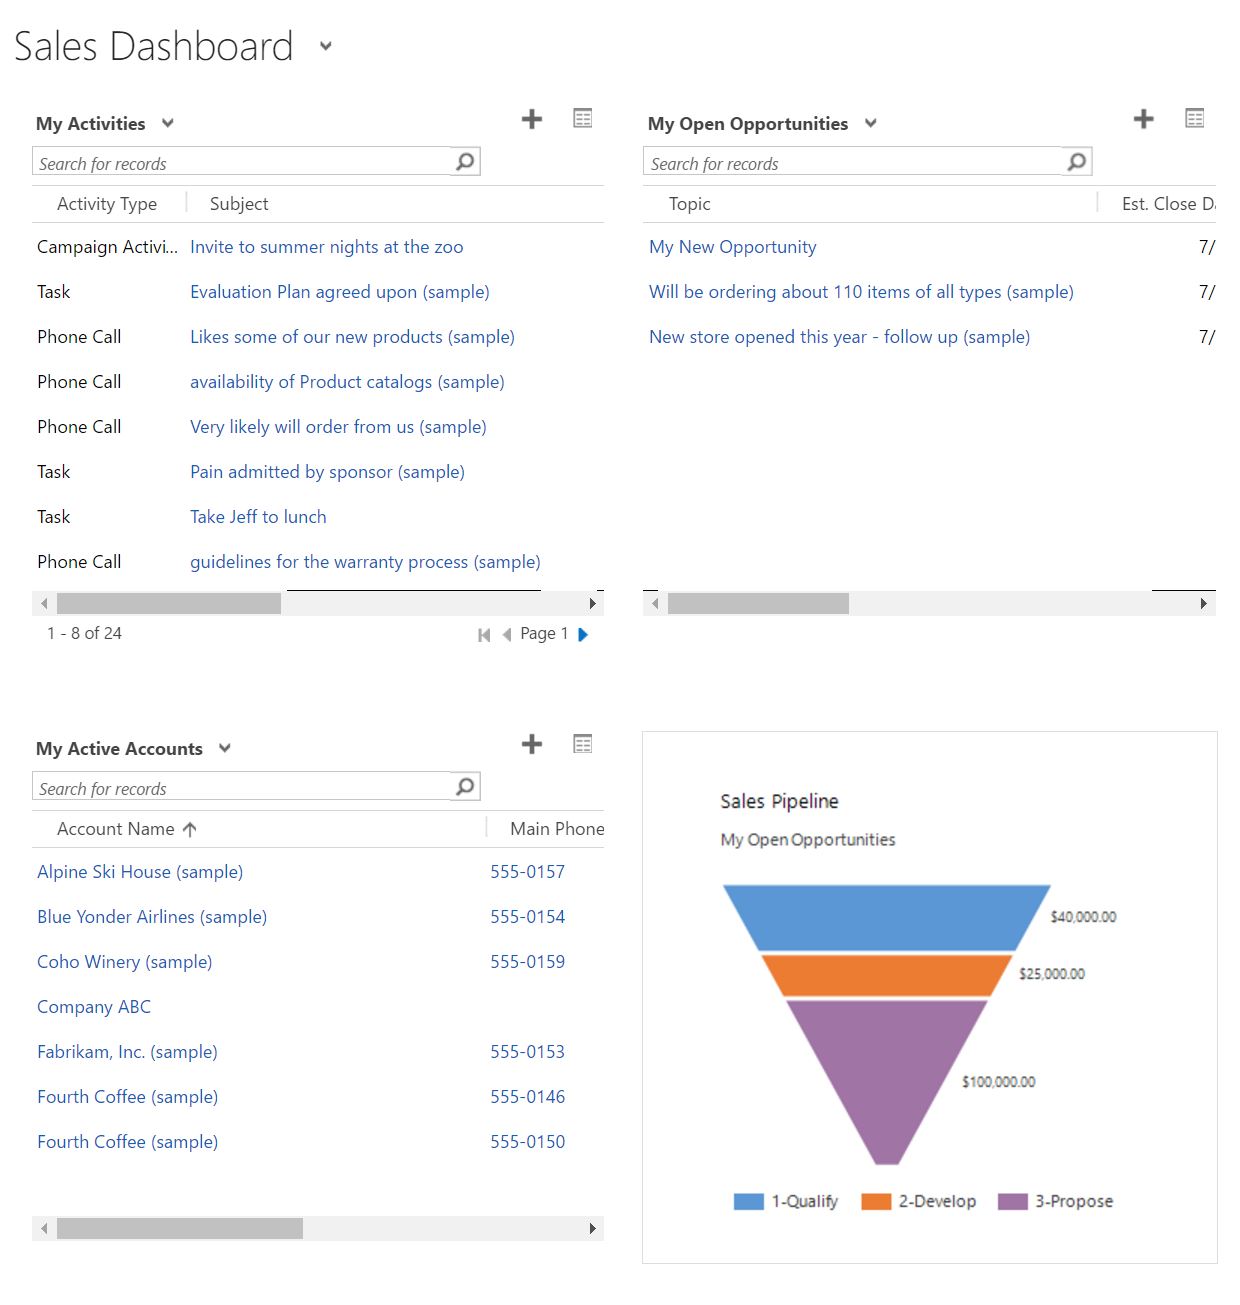
Figure 13: Charts and Tabular Data in Dashboards in Dynamics CRM
One thing to remember when viewing dashboards: The data it displays must be accessible by the user viewing the dashboard. What this means is that if a user doesn’t have the security role to view a particular set of data, the dashboard itself will still be accessible but the data it displays will not be. Usually an error is displayed in the specific dashboard window that states the user doesn’t have the proper permissions to view the displayed data.
Reports
Dynamics CRM also has the ability for users to create and run reports. These differ from dashboards as they are a snapshot of data at the time the report is run. They are also typically used to print out (or export) data from the CRM system. Creating reports in CRM is a large topic, so I will focus on how users can run reports.
Users have the ability to run a report that is in the system. This is done by navigating to the Reports section (i.e. Sales -> Reports) which will display a view of the Available Reports the user can see:

Figure 14: Available Reports View in Dynamics CRM
Clicking on one of these reports displays a dialog that allows the user to modify the (pre-defined) criteria for the report, and then run the report (by clicking the Run Report button in the lower right):

Figure 15: Running a Report in Dynamics CRM
Once the Run Report button is clicked, CRM processes the request and will display the report results. At this point, the user has the ability to perform a number of actions on the report, such as modifying the filtering criteria (depends on the report), saving the report results to a file (Excel, PDF, etc.), or refreshing the data. Figure 16 shows an example of a displayed report:

Figure 16: Report Results in Dynamics CRM
The above description for running a report in CRM is for reports that run on all sets of data in the system. There is another type of report in Dynamics CRM that allows users to run a report against a single record in the system. These types of reports are useful for displaying a snapshot of detailed information about a specific record. This is done by opening a specific record in CRM (such as an Account record, for example). If you click on the command bar on the top of the page, you will see a section titled Run Report (see Figure 17). Clicking on this will expand a sub-menu, which will then display a listing of all the reports you can run against this record. Note that sometimes there may not be anything listed here if these types of reports have not been created in the system. Clicking on a selection here will display the report results. The user then has the ability to perform specific actions against the report results, as described earlier.
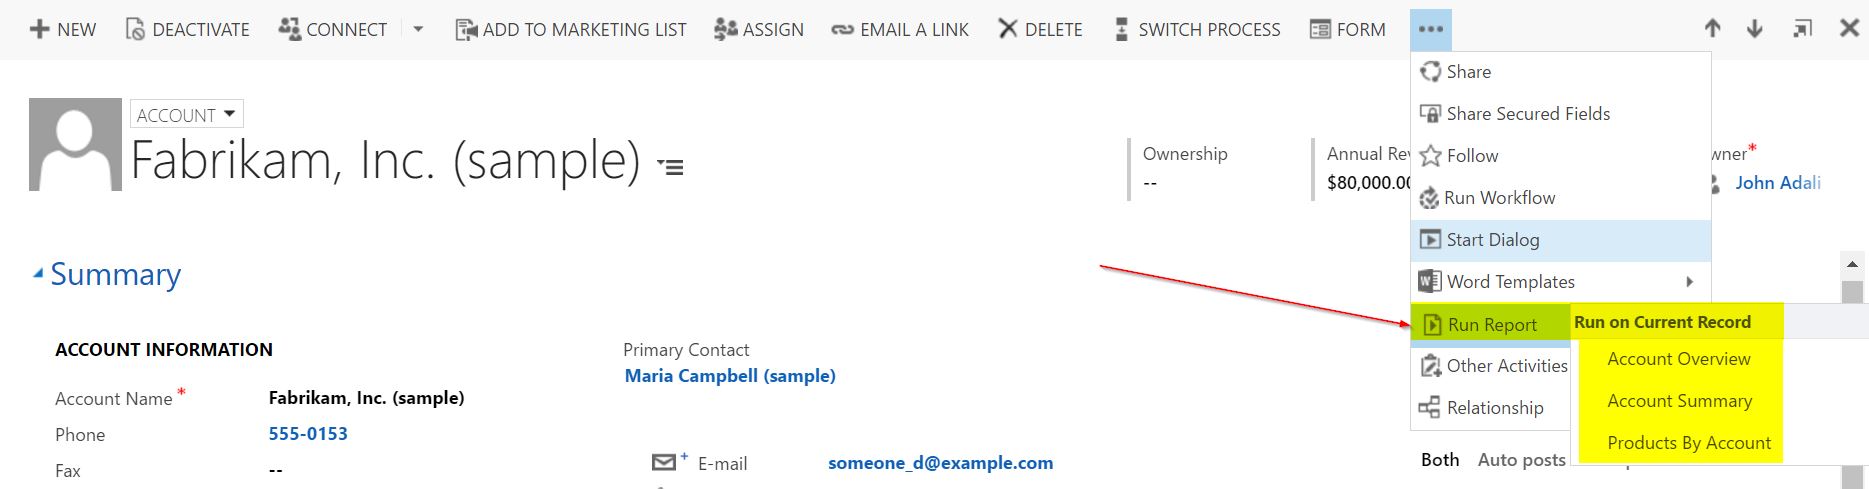
Figure 17: Selecting a Current Record Report in Dynamics CRM
Conclusion
As you can see, there are a multitude of different ways users and administrators of Dynamics CRM can configure the system without having to write a single line of code. These no-code configurations make Dynamics CRM a very powerful platform for tailoring the system to a business’s needs, and can take you very far into the realm of a custom CRM system for your organization.
